
There are two basic raster image formats used on the Web: GIF (Graphis Intergrange Format) and JPEG (Joint Photographic Experts Group). In addition, a more recent format was created to replace the GIF format -- PNG (Portable Network Graphics). These two formats are properly used for different kind of images. GIFs (and PNGs) are better suited to represent drawings, or images of up to 256 colors (8-bits per pixel). JPEGs are to be used whenever we have photos, or images with more than 256 colors(16, 24, and 32-bits per pixel). Tipically scanners and digital cameras save images in JPEG to capture the depth of colors found in nature.
This tutorial was created with the business student in mind, not a graphical artist. He or she should be able to create basic images either by using a business graphics package, such as PowerPoint (see a review of using Powerpoint here and cliparts for it here), Corel Presentations, Microsoft Paint (included in all Windows versions), or by taking pictures using digital cameras, or traditional cameras and scanning the pictures.
Lets use PowerPoint as an example of how to create a very simple graphic with three rectangles and add text inside of these rectangles:
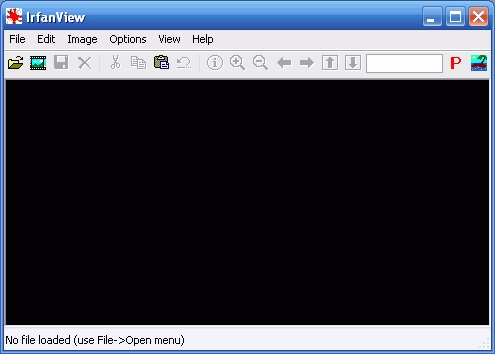
The focus of this tutorial in on the Windows platform, and on
a specic Windows tool capable of doing most of the functions needed in
editing graphical files:  .
.

The File pull-down menu let you load, and later convert (save as) from/to many file formats, particularly jpeg, gif, tiff, png, pdf, bmp, emf, wmf commonly used in Windows and the Web. XnView and Lview can convert from/to many more formats than IrfanView, but either lack other features needed for Web use, or are not free.
The Edit pull-down menu allows you to crop (remove unwanted parts of an image), copy, paste, insert text in a selected area of an image.
The Image pull-down menu allows you to resize your graphical image. Resizing will depend on the resolution of your image. In most cases you can only increase or decrease the size by a small percentage before the image is blurred,jagged, or the like. The best way to resize an image is in the original graphical package the image was created, not always available, but most raster graphics can be converted to vector graphics by business graphics software (e.g. PowerPoint) and then resized.
The Image pull-down menu is also used to flip the image, manipulate color, enhance contrast and a variety of other effects.
The Options pull-down menu let you select what to do with animated gifs (see this topic later in this tutorial), properties for a variety of ways to save and see the images, do screen capture, set an image as wallpaper, etc.
Please note that many of these functions are also available in the graphical toolbar, just below the pull-down menu.
You can obtain this effect by using GIF89a images, which have the ability to mark a single color in the colormap as transparent, forcing the browser to use its background color for those pixels in the image. See this example with an image with a gif with a transparent color and different backgrounds.
IrfanView (free) and LView (low cost) in Windows and the GIMP for Windows and Linux (free) can do the job. Only gif files can be transparent, jpegs will not work, but modern png files can also be made transparent. Lets see through an example how we can make an image transparent.
create your business graphic presentation, or image, as usual in one of these packages. Of course you can use a clip-art available in your package.
Save your slide (page) as a gif, as shown here in PowerPoint. Please note that PowerPoint will ask if you want to save the presentation or just the slide -- to save only the slide select no. When you save the slide it will save your image (in our example the rectangles with text) and all white space around it. You will have a very large file. You need to get rid of the white space and keep only the image you created.
open IrfanView and load the chart you just saved as a gif. Please notice that you have saved not only the clip-art but also the background (a huge area in white).
crop the image to get rid of the unwanted white, empty area. To do so, click on an imaginary corner of a much smaller rectangle or square closer to the clip-art, as shown in this example.
select edit and crop as shown above, to get rid of the white area as shown in this image. Please note that IrfanView, resized itself for the new size of the image. You can repeat this procedure, untill you get rid of as much white background as you care to do. (Note: You can do exactly the same up to this point using XnView, but not the next steps.)
this is the point where you can make the background transparent and save the image. To make it transparent select Save as, select make it transparent in the right side dialog .
Finally, click on Save and you will see a final dialog asking you to click in the color you want to make transparent as shown in the example we have been using.
The background of our example is white it did not make a difference in this page, but see it in this other page.

Look back at the Save as dialog we have seen for creating transparent gifs and you will see an option to save the image as an interlaced gif.
It is simple as that, but with high speed connections interlacing became less than a factor, see another example here, but I cannot see the difference in loading time or view with a fast connection and PC.
Take a look at my old Index page and you will see a spining triangle, if you are using a modern browser. How was that accomplished? Java? Java Script? No, that is only a gif89A format image comprised of four gif images of the triangle in different positions running in a loop.
The easiest way to accomplish this effect is to use the GIF Construction Set. A reference on how to process of creating animations using gif89A is at Royal Frazier page and an interesting example of what you can do is seen below.

This page is maintained by Al Bento who can be reached at abento@ubalt.edu. This page was last updated on January 16, 2010. Although we will attempt to keep this information accurate, we can not guarantee the accuracy of the information provided.