This FAQ is copyright © 1998 John Savill (SavillTech Ltd) and should not be reproduced, distributed or altered without my permission, however feel free to save it locally and/or print it. http://www.savilltech.com
Download a single file version of the FAQ from http://www.savilltech.com/download/faqcomp.zip. This download version is free of charge and is updated simultaneously with this site.
You can join the NT FAQ mailing list by sending a mail to nt-faq@ed-com.com with subscribe in the body of the message. You will receive an updated version of the FAQ at least once a week.
Q. What are the differences between NT Workstation and NT Server?
A. See table Below
| Workstation | Server | |
| Connection to other clients | 10 | Unlimited |
| Connection to other networks | Unlimited | Unlimited |
| Multiprocessing | 2 CPUs | 4 CPUs |
| RAS | 1 connection | 255 connections |
| Directory Replication | Import | Import and Export |
| Macintosh Services | No | Yes |
| Logon Validation | No | Yes |
| Disk Fault Tolerance | No | Yes |
| Network | Peer-to-peer | Server |
A. New Technology. Its also interesting to
note the heritage
RSX -> VMS -> ELN -> NT all major designs of David
Cutler
Also VMS +1 letter = WNT (Windows NT) :-) (aka HAL and IBM in
2001)
Q. What is the NT Boot Process?
A. Firstly the files required for NT to boot are
The common Boot sequence files are
The boot sequence is as follows
Q. When I boot up NT, it pauses for about 30 seconds on the blue screen.
A. Each dot represents one NT device driver, and sometimes if something is wrong with that driver the startup will be delayed. However there is a known problem with NT if your computer has one or more IDE disks and one or more SCSI disks which results in a pause of around 30 seconds. The problem is due to the detection code used by NT and is currently being investigated by Microsoft.
A. Virtual Memory makes up for the lack of RAM in computers by using space on the hard disk as memory, Virtual Memory. When the actual RAM fills up (actually its before the RAM fills) then virtual memory is created on the hard disk. When physical memory runs out, the Virtual Memory Manager chooses sections of memory that have not been recently used and are of low priority and writes them to the swap file. This process is hidden from applications, and applications views both virtual and actual memory as the same.
Each application that runs under Windows NT is given its own virtual address space of 4GB (2GB for the application, 2GB for the operating system).
The problem with Virtual Memory is that as it writes and reads to the hard disk, this is much slower than actual RAM. This is why if an NT system does not have enough memory it will run very slowly.
A. In the late 1980's the Windows environment was created to run on the Microsoft DOS operating system. Microsoft and IBM joined forces to create a DOS replacement that would run on the Intel platform that led to the creation of OS/2, and at the same time Microsoft was working on a more powerful operating system that would run on other processor platforms. The idea was that the new OS would be written in a high level language (such as C) so it would be more portable.
Microsoft hired Dave Cutler (who also designed Digital's VMS) to head the team for the New Technology Operating System (NT :-) ). Originally the new OS was to be called OS/2 NT.
In the early 1990's Microsoft released version 3.0 of its windows OS which gained a large user base, and it was at this point that Microsoft and IBM's split started as the two companies disagreed on the future of their OS's. IBM viewed Windows as a stepping stone to the superior OS/2, where as Microsoft wanted to expand Windows to compete with OS/2, so they split, IBM kept OS/2 and Microsoft change OS/2 NT to Windows NT.
The first version of Windows NT (3.1) was released in 1993 and had the same GUI as the normal Windows Operating System, however it was a pure 32 bit OS, but provided the ability to also run older DOS and Windows apps, as well as character mode OS/2 1.3 programs.
For a detailed history have a look at http://windowsnt.miningco.com
Q. How do I install the SYMBOL files?
A. Symbol files are produced by the linker when a program is built, and are used to resolve global variables and function names in an executable.
For more information see Microsoft Knowledge Base article Q148659
A. Windows NT (both the Workstation and Server) is a 32-bit Operating System. It is a preemptive, multi-tasking Operating System, which means that the Operating System controls allocation of CPU time, not the applications, stopping one application from hanging the OS. NT supports multiple CPU's giving true Multi-tasking, using symmetrical multiprocessing, meaning the processors share all tasks, as opposed to asymmetrical multiprocessing, where the OS uses one CPU and the applications another. NT is also a Fault Tolerant Operating System, with each 32bit application operating in its own Virtual Memory address space (4 GigaBytes) which means one application cannot interfere with another's memory space.
Unlike earlier version of Windows (such as Windows for Workgroups and Windows 95), NT is a complete Operating System, and not an addition to DOS.
NT supports different CPU's: Intel x86, IBM PowerPC (Not to be supported for NT5.0) and DEC Alpha.
NT's other main plus is its Security with a special NT file system (NTFS) that allows permissions to be set on a file and directory basis.
A. Originally there were .ini files in Windows, however the problem with .ini files are many, e.g. size limitations, no standard layout, slow access, no network support etc. Windows 3.1 (yes Windows not Windows NT) had a registry which was stored in reg.dat and could be viewed using regedit.exe and was used for DDE, OLE and File Manager integration. In Windows NT the Registry is at the heart of NT and is where nearly all information is stored, and is split into a number of subtrees, each starting with HKEY_ to indicate that it is a handle that can be used by a program.
| HKEY_LOCAL_MACHINE | This contains information about the hardware configuration and installed software. |
| HKEY_CLASSES_ROOT | This is just a link to HKEY_LOCAL_MACHINE\SOFTWARE\Classes and contains links between applications and file types as well as information about OLE. |
| HKEY_CURRENT_CONFIG | Again this is a link to HKEY_LOCAL_MACHINE\SYSTEM\CurrentControlSet\Hardware Profiles\Current and contains information about the current configuration. |
| HKEY_CURRENT_USER | This is a link to HKEY_USERS\<SID of User> and contains information about the currently logged on users such as environment, network connections, printers etc. |
| HKEY_USERS | Contains information about actively loaded user profiles, including .default which is the default user profile. |
Each of the subtrees has a number of keys, which in turn have a number of subkeys. Each key/subkey can have a number of values which has 3 parts
To edit the registry there are two tools available, regedt32.exe and regedit.exe.Regedit.exe has better search facilities, but does not support all of the Windows NT registry value types. If you want to just have a look around the Registry:
Q. What files make up the registry, and where are they?
A. The files that make up the registry are stored in %systemroot%/system32/config directory and consist of
There are also other files with different extensions for some of them
Q. How do I restrict access to the registry editor?
A. Using the registry editor (regedt32.exe)
Q. What is the maximum registry size?
A. The maximum size is 102MB, however it is slightly more complicated than this.
The registry entry that controls the maximum size of the registry is HKEY_LOCAL_MACHINE\SYSTEM\CurrentControlSet\Control\RegistrySizeLimit. By default this entry will not exist so it will need to be created:
The minimum size is 4MB, and if anything less than this is entered in the registry then it will be forced up to 4MB. The maximum is 80% of the paged pool (which has a maximum size of 128MB, hence 102MB which is 80% of 128MB). If no entry is entered then the maximum size is 25% of the paged pool. The paged pool is an area of physical memory used for system data that can be written to disk when not in use.
An important point to note is that the RegistrySizeLimit is a maximum, not an allocation, and so setting a high value will not reserve the space, and it does not guarantee the space will be available.
This can also be configured using the System Control Panel applet, click on the Performance tab and the maximum registry size can be set there. You would then need to reboot.
For more information see Knowledge Base Article Q124594
Q. Should I use REGEDIT.EXE or REGEDT32.EXE?
A. You can use either for NT. REGEDIT does have a few limitations, the largest is that it does not support the full regedit data types such as REG_MULTI_SZ, so if you edit this type of data with REGEDIT it will change its type.
REGEDIT.EXE is based on the Windows95 version and has features that REGEDT32.EXE lacks (such as search). In general REGEDIT.EXE is nicer to work with. REGEDIT.EXE also shows your current position in the registry at the bottom of the window.
Q, How do I restrict access to a remote registry?
A. Access to a remote registry is controlled by the ACL on the key winreg.
It is possible to set up certain keys to be accessible even if the user does not have access by editing the value HKEY_LOCAL_MACHINE\SYSTEM\CurrentControlSet\Control\SecurePipeServers\winreg\AllowedPaths\Machine (use regedt32). You can add paths to this list.
See knowledge base article Q153183 at http://www.microsoft.com/kb/articles/q153/1/83.htm
Q. How can I tell what changes are made to the registry?
A. Using the regedit.exe program it is possible to export portions of the registry. This feature can be used as follows:
Q. How can I delete a registry value/key from the command line?
A. Using the Windows NT Resource Kit Supplement 2 utility REG.EXE you can delete a registry value from the command line or batch file, e.g.
reg delete HKLM\Software\test
Would delete the HKEY_LOCAL_MACHINE\Software\test value. When you enter the command you will be prompted if you really want to delete, enter Y. To avoid the confirmation add /f to the command, e.g.
reg delete HKLM\Software\test /f
A full list of the codes to be used with REG DELETE are as follows:
| HKCR | HKEY_CLASSES_ROOT |
| HKCU | HKEY_CURRENT_USER |
| HKLM | HKEY_LOCAL_MACHINE |
| HKU | HKEY_USERS |
| HKCC | HKEY_CURRENT_CONFIG |
To delete a entry on a remote machine add the name of the machine, \\<machine name>, e.g.
reg delete HKLM\Software\test \\johnpc
Q. How can I audit changes to the registry?
A. Using the regedt32.exe utility it is possible to set auditing on certain parts of the registry. I should note that any type of auditing is very sensitive lately and you may want to add some sort of warning letting people know that their changes are being audited.
You will need to make sure that Auditing for File and Object access is enabled (use User Manager - Polices - Audit).
To view the information use Event Viewer and look at the Security information.
Q. What service packs and fixes are available?
A. See table below. All directories are off of ftp.microsoft.com/bussys/winnt/winnt-public/fixes/usa/nt40. Just click on the file name for a direct FTP link For people in Europe ftp.sunet.se/pub3/vendor/microsoft/bussys/winnt/winnt-public/fixes may provide faster access.
There are also Microsoft BBS numbers where Service Packs can be downloaded from, e.g. for the UK it is 44 1734 270065, however the fixes tend to be a few days later than on the FTP site.
| File Name | Directory | Description (Microsoft Article No.) |
| Sp1_400i.exe | /ussp1/i386 | Service Pack 1 |
| Sp2_400i.exe | /ussp2/i386 | Service Pack 2 (around 14Mb!) |
| Nt4sp3_i.exe | /ussp3/i386 | Service Pack 3 (around 18Mb!) |
Service Pack 1 Hotfixes /hotfixes-postsp1/
| KRNL40I.EXE | /32proc-fix | Q140065 |
| AFD40I.EXE | /afd-fix | Q140059 |
| CDFS40I.EXE | /cdfs-fix | Q142687 |
| NDIS40I.EXE | /mcanet-fix | Q156324 |
| NDIS40I.EXE | /ndis-fix | Q142903 |
| NTBCKUPI.EXE | /NTBackup-fix | Q142671 |
| NTVDM40I.EXE | /ntvdm-fix | Q134126 |
| PCM40_I.EXE | /pcmcia-fix | Q108261 |
| SCSIFIXI.EXE | /scsi-fix | Q171295 |
| SPX40I.EXE | /spx-fix | Q153665 |
| SYN40I.EXE | /syn-attack | Q142641 |
| NTFS40I.EXE | /toshiba-fix | Q150815 |
| STONE97I.EXE | /winstone97 | Q141375 |
Service Pack 2 Hotfixes /hotfixes-postsp2/
| ALPHA40.EXE | /Alpha-fix | Q156410 |
| DNS40I.EXE | /dns-fix | Q142047, Q162927 |
| IISFIX.EXE | /iis-fix | Q163485, Q164059 |
| KRNL40I.EXE | /krnl-fix | GET THIS. IT WILL FIX THE NT
CRASH WHEN USING A VIRUS KILLER! Q135707, **Q141239** |
| TCP40I.EXE | /oob-fix | Q143478 |
| RAS40I.EXE | /ras-fix | Q161368 |
| RPC40I.EXE | /RPC-fix | Q159176, Q162567 |
| SECFIX_I.EXE | /sec-fix | Q143474 |
| SERIALI.EXE | /serial-fix | Q163333 |
| SETUPDDI.EXE | /setupdd-fix | Q143473 |
| SFMSRVI.EXE | /sfmsrv-fix | Q161644 |
| WTCP40I.EXE | /TCPIP-fix | Q163213 |
Service Pack 3 Hotfixes /hotfixes-postsp3/
| 2GCRASHI.EXE | /2gcrash | Q173277 |
| ASPFIX.EXE | /asp-fix | Q165335 |
| IDEFIX-I.EXE | /ide-fix | Q153296 |
| DNSFIX_I.EXE | /dns-fix | Q142047 |
| ADMNFIXI.EXE | /getadmin-fix | Q146965 |
| ICMPFIXI.EXE | /icmp-fix | Q154174 |
| IIS-FIXI.EXE | /iis-fix | Q143484 |
| IIS4FIXI.EXE | /iis4-fix | Q169274 |
| JAVAFIXI.EXE | archive/java-fix | Q168748 |
| JOY-FIXI.EXE | /joystick-fix | Q177668 |
| LANDFIXI.EXE | /land-fix | Q165005 & Q177539 |
| DISBLLMI.EXE | /lm-fix | Q147706 |
| LSA-FIXI.EXE | /lsa-fix | Q154087 |
| NDISFIXI.EXE | /ndis-fix | Q156655 |
| OOBFIX_I.EXE | archive/oob-fix | Q143478 |
| PCMFIX-I.EXE | /pcm-fix | Q180532 |
| PENTFIX.EXE | /pent-fix | Q163852 |
| W32KFIXI.EXE | /archive/dblclick-fix | Q170510 |
| DCOMFIXI.EXE | /SAG-fix | |
| SCSIFIXI.EXE | /scsi-fix | Q171295 |
| CHARGENI.EXE | /simptcp-fix | Q154460 |
| SRVFIX-I.EXE | /srv-fix | Q180963 |
| TAPI21FI.EXE | /tapi21-fix | Q179187 |
| TEARFIXI.EXE | /teardrop2-fix | Q179129 |
| WANFIX-I.EXE | /wan-fix | Q163251 |
| WINSFIXI.EXE | /winsupd-fix | Q155701 |
| ZIP-FIXI.EXE | /zip-fix | Q154094 |
The file names above are for the Intel platform (hence the ending I), but they may also be available for Alpha and PPC, just substitute the I for a A(Alpha) or P(PPC).
I should note a health warning, "If it ain't broke, don't fix it" and I would tend to agree with this, so unless you have a problem, or require a new feature of a Service Pack think if you really want it. Also if you are going to apply it to a live system, try and test it first, as sometimes a Service Pack will introduce new problems.
Q. What are the Q numbers and how do I look them up?
A. The Q numbers relate to Microsoft Knowledge Base articles and can be viewed at http://www.microsoft.com/kb
Q. How do I install the Service Packs?
A. If you receive the Service Pack by downloading from a Microsoft FTP site, then copy the file to a temporary directory and then just enter the file name (e.g. Sp2_400i.exe). The file will be expanded and among the files created a file called UPDATE.EXE will be created. Just run this file. If there is no UPDATE.EXE, just .sym files you have downloaded the symbols version which is used for debugging NT, download the normal version (see above).
If you receive Service Packs via CD, if you just insert the CD (for SP2 and later) and an Internet Explorer page will be shown and you can just click on install for the Service Pack.
Q. How do I install the Hot fix?
A. Again copy the file to a temporary directory and run the file name. A few files will be created, one called HOTFIX.EXE. Run "HOTFIX /install" which will install the Hot Fix.
The newer Hot fixes (Java fix for Service Pack 3 onwards) you just double click on the downloaded file.
A. Use the command Hotfix /remove. To force the remove using the registry editor (regedt32) HKEY_LOCAL_MACHINE\Software\Microsoft\Windows NT\CurrentVersion\HOTFIX and delete the entry for the HOTFIX. Then use explorer to goto %SystemRoot%\HOTFIX\HF00?? and copy the backed up files back to their original location.
Q. How do I install Service Pack 3?
A. Before you install Service Pack 3 you must remove Internet Explorer 4.0 preview if installed:
Also before installing SP3 make sure you have an up to date Repair Disk (RDISK /S). To install Service Pack 3 download Nt4sp3_i.exe and follow the instructions below
Q. Emergency Repair Disk issues after installation of Service Pack 3.
A. Due to changes in Service Pack 3 the Emergency Repair Disk process has changed. The file setupdd.sys that is on the 2nd NT installation disk has been superseded by the one supplied with service pack 3. To extract the file from the Service Pack 3 executable, follow the instructions below:
This is discussed in the Service Pack 3 readme file, and also in knowledge base article Q146887.
Q. How do I remove the Java Hotfix for Service Pack 3?
A. Manually unpack the hotfix
javafixi /x
Then type
hotfix -y
And it will remove the hotfix.
This method may become the new standard for hot fixes.
Q. How do I install multiple Hotfixes at the same time?
A. When you extract the files in a hotfix, generally the following will be extracted
The hotfix.exe is the same executable for all the hotfixes, and the hotfix.inf is basically the same, the only difference is the files that are to be copied, e.g. tcpip.sys, and a description of the hotfix. To install multiple hotfixes at the same time all that is needed is to decompress the hotfix files and update the hotfix.inf with the information on which files to copy.
The reason we copied the .inf files is that you can just cut and paste the hotfix specific information to the common hotfix.inf. When you decompressed a hotfix you will see which files were created, you could then search the .inf file for the file name and it would be in two places, the directory it belongs in and the [SourceDisksFiles] section. You could then go to the bottom of the file and cut and paste the HOTFIX_NUMBER and COMMENT and add to the end of HOTFIX.INF.
This is very hard to explain and an example is probably the best way to demonstrate this. Suppose you want to install
The procedure would be as follows
To install just type
hotfix
from the directory created (i.e. hotfix), you will see a dialog copying the files (the ones you have specified in the hotfix.inf file :-) ), and the system will reboot. To see what hotfixes are installed:
For more information have a look at Q166839 at http://www.microsoft.com/kb/articles/q166/8/39.htm
Q. How do I install Hotfixes the same time as I install Service Pack 3 onwards?
A. Update.exe that ships with Service Pack 3 checks for the existance of a hotfix subdirectory, and if in that directory the files hotfix.exe and hotfix.inf are present you are asked when running update.exe if you also want to install the hotfixes.
For more information have a look at Q166839 at http://www.microsoft.com/kb/articles/q166/8/39.htm
Q. I have installed Service Pack 3, now I cannot run Java programs.
A. Download the updated Java Virtual Machine from Microsoft at http://www.microsoft.com/java/download/dl_vmsp2.htm . Download build 1518 which works with IE3.01, IE 3.02 and IE 4.0 platform preview 1, do NOT install on IE 4.0 PP2 or the release version.
There is also a hotfix for Service Pack 3 available from Microsoft ftp://ftp.microsoft.com/bussys/winnt/winnt-public/fixes/usa/nt40/hotfixes-postSP3/java-fix/JAVAFIXI.EXE
A. This is caused by a mistake in the Service Pack 3 update.inf file. The entry for poledit.exe (the executable for the policy editor) is specified in the [MustReplace.system32.files] section whereas the file should actually be in the [SystemRoot.files].
To install the new Policy Editor perform the following
Alternatively you can update the update.inf fiile and move the location of poledit.exe from [MustReplace.system32.files] to [SystemRoot.files].
Q. How can I tell if I have the 128 bit version of Service Pack 3 installed?
A. The easiest way to tell this is to examine the secure channel dynamic link library (SCHANNEL.DLL):
Q. How do I install a service pack during a unattended installation?
A. There are various options, however all of them require for the service pack to be extracted to a directory, using
NT4SP3_I /x
and you then enter the directory where you want to extract to.
You could extract to a directory under the $OEM$ installation directory which would then be copied locally during the installation and you could add the line
".\UPDATE.EXE -U -Z"
to CMDLINES.TXT. This will increase the time of the text portion of the installation as the contents have to be copied over the network.
An alternate method is to install from a network drive, this requires a bit more work:
Q. What is new in Windows NT 5.0?
A. NT 5.0 (aka Cairo) is the next major release of NT. It is expected to include the following new features:
For more information on what's new please goto http://www.microsoft.com/ntserver/info/nt5_features.htm
Q. Where can I get more information on Windows NT 5.0?
A. Below is a list of useful links at Microsoft
Q. How can a FAT partition be converted to an NTFS partition?
A. From the command line enter the command convert d: /fs:ntfs . This command is one way only, and you cannot convert an NTFS partition to FAT. If the FAT partition is the system partition then the conversion will take place on the next reboot.
After the conversion File Permissions are set to Full Control for everyone, where as if you install directly to NTFS the permissions are set on a stricter basis.
Q. How can a NTFS partition be converted to a FAT partition?
A. A simple conversion is not possible, and the only course of action is to backup all the data on the drive, reformat the disk to FAT and then restore your data backup.
Q. How do I run HPFS under NT 4.0?
A. If you want NT support for HPFS, you can upgrade from 3.51 to 4.0 which will retain HPFS support. You can manually install the 3.51 driver under NT 4.0, however this is not supported by Microsoft.
Q, How do I compress a directory?
A. Follow instructions below (this can only be done on an NTFS partition)
Q. How do I uncompress a directory?
A. Follow the same procedure above, but uncheck the compress box.
Q. Is there an NTFS defragmentation tool available?
A. There are two for NT that I know of, the first is Executive Software which has a product called Disk Keeper Lite which is free, and also Norton Utilities has a defragmentation tool with its NT tool set (which I have never used). The full version of DiskKeeper allows the defragmentation to be done in the background so you don't have to worry about it.
A new piece of software called PerfectDisk NT from http://www.raxco.com is also now on the market but I have not tried it.
Q. Can I undelete a file in NT?
A. It depends on the file system. NT has no undelete facility, however if the filesystem was FAT then boot into DOS and then use the dos undelete utility. With the NT Resource kit there is a utility called DiskProbe which allows a user to view the data on a disk, which could then be copied to another file. It is possible to search sectors for data using DiskProbe.
Norton also provide a utility which can undelete files from within NT called Norton Utilities at http://www.symantec.com/
A. No. There are rumors that NT 5.0 will support FAT32.
Q. Can you read an NTFS partition from DOS?
A. Not with standard DOS, however there is a product called NTFSDos which enables a user to read from a NTFS partition. The homepage for this utility is http://www.ntinternals.com.
Q. How do you delete a NTFS partition?
A. You can boot off of the three NT installation disks and follow the instructions below:
Usually a NTFS partition can be deleted using FDISK (delete non-DOS partition), however this will not work if the NTFS partition is in the extended partition.
You can delete an NTFS partition using Disk Administrator, by selecting the partition and pressing DEL (as long as it is not the system/boot partition).
There is also a utility called delpart.exe that will delete a NTFS partition from a DOS bootup.
Q. Is it possible to repartition a disk without losing data?
A. There is no standard way in NT, however there is a 3rd party product called Partition Magic which will repartition FAT, NTFS and FAT32, however there is a bug in the product which makes the boot partition unbootable if it is repartitioned. A fix is available for this from their web site
Q. What is the biggest disk NT can use?
A. The simple answer to this question is that NT can view a maximum partition size of 2 terabytes (or 2,199,023,255,552 bytes), however there are limitations that restrict you well below this number.
FAT has internal limits of 4 GB due to thefact it uses 16-bit fields to store file sizes, 2^16 is 65,536 with a cluster size of 64 KB gives us the 4 GB.
HPFS uses 32bit fields and can therefore handle greater size disks, but the largest single file size is 4GB. HPFS allocates disk space in 512 byte sectors which can cause problems in Asian markets where sector sizes are typically 1024 bytes which means HPFS cannot be used.
NTFS uses 64-bits for all sizes, leading to a max size of..... 16 exabytes!!! (18,446,744,073,709,551,616 bytes), however NT could not handle a volume this big.
For IDE drives, the maximum is 136.9 GB, however for a standard IDE drive this is constrained to 528MB. The new EIDE drives can access much larger sizes.
It is important to note that the System partition (holding ntldr, boot.ini, etc.) MUST be entirely within the first 7.8Gb of any disk (if this is the same as the boot partition this limit applies) This is due to the BIOS int 13H interface used by ntldr to bootstrap up to the point where it can drive the native HDD IDE or SCSI. int 13H presents a 24 bit parameter for cylinder/head/sector for a drive. If say by defragmentation the system are moved beyond this point you will not be able to boot the system.
Q. Can I disable 8.3 name creation on a NTFS?
A. From the key HKEY_LOCAL_MACHINE\SYSTEM\CurrentControlSet\Control\FileSystem, change the value NtfsDisable8dot3NameCreation from 0 to 1
Q. How can I stop NT from generating LFN's (Long File Names) on a FAT partition?
A. Using the registry editor change the value HKEY_LOCAL_MACHINE\SYSTEM\CurrentControlSet\Control\FileSystem\Win31FileSystem from 0 to 1 and only 8.3 file names will be created.
The reason for not wanting the LFN's to be created is that some 3rd party disk utilities that directly manipulate FAT can destroy the LFN's. Utilities such as SCANDISK and DEFRAG that come with DOS 6.x and above do not harm LFN's.
Q. I can't create any files on the root of a FAT partition.
A. The root of a FAT drive has a coded limit of 512 entries, so if you have exceeded this you will not be able to create any more files. I don't have this many! Remember Long File Names take up more than one entry, see the next FAQ for more information, so if you have many LFN's on the root this will drastically reduce the number of files you can have.
A. Long File Names are stored using a series of linked directory entries. A LFN will use one directory entry for its alias (the alias is the 8.3 name automatically generated), and a hidden secondary directory entry for every 13 characters in its name, so if you had a 200 character long file name, this would use 17 entries!
The alias is generated using the first six characters of the
LFN, then a ~ and a number for the first 4 versions of a files
with the same first six characters, e.g. for the file
john savills file.txt
the names generated would be johnsa~1.txt, johnsa~2 etc.
After the first 4 version of a file, only the first two characters of the file name are used, and the last 6 are generated, e.g. jo0E38~1.txt
Q. How do I change access permissions on a directory?
A. You can only set access permissions on an NTFS volume. Follow the instructions below:
Q. How can I change access permissions from the command line?
A. A utility called CACLS.EXE comes as
standard with NT, and can be used from the command prompt. Read
the help with the CACLS.EXE program (cacls /?). To give user john
read access to a directory called files enter:
CACLS files /e /p john:r
/e is used to edit the ACL instead of replacing it, therefore
other permissions on the directory will be kept. /p sets
permission for user:<permission>
Q. I have a CHKDSK scheduled to start next reboot, but I want to stop it.
A. If the command chkdsk /f /r (find bad sectors, recover information from bad sectors and fix errors on the disk) is run, on the next reboot the check disk is scheduled, however you may want to cancel this check disk. To do this perform the following:
Q. My NTFS drive is corrupt, how do I recover?
A. To restore an NTFS drive using the information below, it must have been created using Windows NT 4.0, if it was not created using NT 4.0 you should see Knowledge base article Q121517. To restore an NTFS partition you must locate the spare copy of the boot sector and copy it to the correct position on the drive. You need the NTdiskedit utility (you can also use Disk Probe that comes with the resource kit or Norton disk edit) which is available from Microsoft Support Services.
Q. How can I delete a file without it going to the recycle bin?
A. When you delete the file, hold down the shift key.
Q. How can I change the serial number of a disk?
A. The serial number is located in the boot sector for a volume. For FAT drives its 4 bytes starting at offset 0x27; for NTFS drives its 8 bytes starting at offset 0x48. You'll need a sector-level editor to modify the number (like the Resource Kit's Diskprobe).
Q. How can I backup the Master Boot Record?
A. The Master boot record on the hard disk used to start the computer (the system partition) is the most critical sector so make sure this is the sector you backup. The boot partition is also very important (where %systemroot% resides). You need the DiskProbe utility that comes with the Resource Kit.
Q. How do I restore the Master Boot Record?
A. Follow the instructions below, however be very careful!!!
Q. What CD-ROM file systems can NT read?
A. NT's primary file system is CDFS a read only file system, however it can read any file system that is ISO9660 compliant.
Q. How do I disable 8.3 name creation on VFAT?
A. Start the registry editor (regedit.exe) and set the value HKEY_LOCAL_MACHINE\SYSTEM\CurrentControlSet\Control\FileSystem\Win95TruncatedExtensions to 0.
Q. How do I create a Volume Set?
A. A volume set allows you to take all the unused space on one or more drives (up to 32 drives per volume set) and combine it into a single, large, system recognizable drive. To create a volume set:
The main problem with volume sets is that if one drive in the volume set fails, the entire volume set becomes unavailable.
Q. How do I extend a Volume Set?
A. Extending a volume set is very simple, however a reboot will be required
The reboot will take longer than normal as the new area added has to be formatted to the same file system as the rest of the volume set.
Note: Only NTFS Volume Sets can be extended.
Q. How do I delete a Volume Set?
A. When you delete a volume set all the data stored will be lost. To delete a volume set:
Q. What is the maximum number of characters a file can be?
A. This depends on if the file is being created on a FAT or NTFS partition. The maximum file length on a NTFS partition is 256 characters, and 11 characters on FAT (8 character name, . , 3 character extension). NTFS filenames keep their case, whereas FAT filenames have no concept of case (however the case is ignored when performing a search etc on NTFS). There is the new VFAT which also has 256 character filenames.
NTFS filenames can contain any characters, including spaces, uppercase/lowercase except for the following
" * : / \ ? < > |
which are reserved for NT, however the file name must start with a letter or number.
VFAT filenames can also contain any characters except for the following
/ \ : | = ? " ; [ ] , ^
and once again the file name must start with a letter or number.
NTFS and VFAT also creates a 8.3 format file name, see Q. How to LFN's work?
Q. How can I stop chkdsk at boot time from checking volume x?
A. When NT boots it performs a check on all volumes to see if the dirty bit is set, and if it is a full chkdsk /f is run. To stop NT performing this dirty bit check you can exclude certain drives. The reason you may want to do this is for some type of removable drive, e.g. Iomega drives:
Where x is the drive letter, e.g. if you wanted to stop the check on drive f: you would type autocheck autochk /k:f *. To stop the check on multiple volumes just enter the drive names one after another, e.g. to stop the check on e: and g: autocheck autochk /k:eg *, you do not retype the /k each time.
If you are using NT 4.0 with Service Pack 2 or above, you can also use the CHKNTFS.EXE command which is also used to exclude drives from the check and updates the registry for you. The usage to disable a drive is
chkntfs /x <drive letter>:
e.g. chkntfs /x f: would exclude the check of drive f:
To set the system back to checking all drives just type
chkntfs /d
Q. How can I compress files/directories from the command line?
A. A utility is supplied with the resource kit called compact.exe which can be used to view and change the compression characteristics of a file/directory.
Q. What protections can be set on files/directories on a NTFS partition?
A. When you right click on a file in Explorer and select properties (or select Properties from the File menu) you are presented with a dialog box telling you information such as size, ownership etc. If the file/directory is on a NTFS partition there will be a security tab, and within that dialog, a permissions button. If you press that button you can grant access to users/groups on the resource at various levels.
There are six basic permissions
These can be assigned to a resource, however they are grouped for ease of use
The permissions above can all be set on a directory, however this list is limited for a file, and permissions that can be set are only No Access, Read, Change and Full Control.
Another permission exists called "Special Access" (on a directory there will be two, one file files, one for directories), and from this you can set which of the basic permissions should be assigned.
Q. How can I take ownership of files?
A. Sometimes you may want to take ownership of files/directories, usually as someone has removed all access on a resource and can't see it. You would log on as the Administrator and take ownership. You cannot give ownership to someone else, only take ownership.
This is a utility called owner.exe than can be used to give ownership of a file to someone else, you need the Restore privilege. This utility can be downloaded from http://www.savilltech.com/ntfaq/download/owner.zip.
Q. How can I view the permissions a user has on a file from the command line?
A. A utility is supplied with the resource kit called perms.exe which can be used to view permissions on files/directories. The usage is
perms <domain>\<user> <file>
e.g. perms savilltech\savillj d:\file\john\file.dat
You can add /s to also show details of sub files/directories. The permissions shown equate to
| R | Read |
| W | Write |
| X | Execute |
| D | Delete |
| P | Change Permission |
| O | Take Ownership |
| A | All |
| None | No Access |
| * | User is the owner |
| # | A group the member is a member of owns the file |
| ? | Permissions cannot be determined |
To output to a file just add > filename.txt at the end, e.g.
perms <user> <file> > file.txt
Q. How can I tell the total amount of space used by a folder (including sub folders)?
A. There are two ways of doing this (there are more!), one using explorer and one from the command line. Using Explorer
From the command line you can just use the dir command
with /s qualifier which also lists all
sub-directories, e.g.
dir/s d:\savilltechhomepage
would list all files/folders in the savilltechhomepage
directory and at the end the total size.
Q. There are files beginning with $ at the root of my NTFS drive, can I delete them?
A. NO!!! These files hold the information of your NTFS volume. Below is a table of all the files used by the file system:
| $MFT | Master File Table |
| $MFTMIRR | A copy of the first 16 records of the MFT |
| $LOGFILE | Log of changes made to the volume |
| $VOLUME | Information about the volume, serial number, creation time, dirty flag |
| $ATTRDEF | Attribute definitions |
| $BITMAP | Contains drive cluster map |
| $BOOT | Boot record of the drive |
| $BADCLUS | A list of bad clusters on the drive |
| $QUOTA | Quota information (used on NTFS 5.0) |
| $UPCASE | Maps lowercase characters to uppercase version |
If you want to have a look at any of these files use the command
dir /ah $mft
Its basically impossible to delete these files anyway as you can't remove the hidden flag and if you can't remove the hidden flag you can't delete it!
Q. What file system do Iomega ZIP disks use?
A. By default, the formatted ZIP disks are FAT, however you can format these with NTFS is you want. NTFS has a higher overhead than FAT on small volumes (an initial 2MB) which is why you don't have NTFS on 1.44 floppy disks.
Q. What cluster size does a FAT/NTFS partition use?
A. The default cluster size for a FAT partition is as follows:
| Partition size | Sectors per cluster | Cluster size |
| <32MB | 1 | 512 bytes |
| <64MB | 2 | 1K |
| <128MB | 4 | 2K |
| <255MB | 8 | 4K |
| <511MB | 16 | 8K |
| <1023MB | 32 | 16K |
| <2047MB | 64 | 32K |
| <4095MB | 128 | 64K |
This is why FAT volumes larger than 511MB are not recommended due to the amount of potentially wasted space due to the 16KB and above cluster size.
The default for NTFS is as follows:
| Partition size | Sectors per cluster | Cluster size |
| <512MB | 1 | 512 bytes (or hardware sector size if greater than 512 bytes) |
| <1024MB | 2 | 1K |
| <2048MB | 4 | 2K |
| <4096MB | 8 | 4K |
| <8192MB | 16 | 8K |
| <16384MB | 32 | 16K |
| <32768MB | 64 | 32K |
| >32768 MB | 128 | 64K |
NTFS better balances the trade off between disk defragmentation due to smaller cluster size and wasted space due to a large cluster size.
When formatting a drive you can change the cluster size using the /a:<size> switch, e.g.
format d: /a:1024 /fs:ntfs
Q. What is Distributed File System?
A. Distributed File System (or Dfs) is a new tool for NT server that was not completed in time for inclusion as part of NT 4.0, but is now available for download. It basically allows Administrators to simulate a single server share environment that actually exists over several servers, basically a link to a share on another server that looks like a subdirectory of the main server.
This allows a single view for all of the shares on your network, which could then simplify your backup procedures as you would just backup the root share, and Dfs would take care of actually gathering all the information from the other servers across the network.
You so not have to have a single tree (Dfs directory structures are called trees), but rather could have a separate tree for different purposes, i.e. one for each department, but that could have exactly the same structure (sales, info. etc).
For more information on DFS see http://www.microsoft.com/ntserver/dfs/dfsdocdl.asp
A. Dfs is available for download from Microsoft http://www.microsoft.com/ntserver/guide/dfsdl.asp . Follow the instructions at the site and fill in the form about your site. The file you want for the I386 platform is dfs-v41-i386.exe.
Once downloaded just double click on the file, and agree to the license. It will then install files to your drive which you need to install.
A. Follow the instructions below, you must have first downloaded and expanded the file dfs-v40-i386.exe:
Q. How do I create a new folder as part of the Dfs?
A. Once Dfs is installed a new application, the Dfs Administrator, is created in the Administrative Tools folder. This app should be used to manage Dfs. To add a new area as part of the Dfs tree follow the procedures below:
A. Follow the procedure below:
A. The easiest way is to install TWEAKUI, and goto the Network Tab and just fill in the boxes. It can be done manually through the registry by following the instructions below:
The instructions above should only be done by someone who is happy with using the registry editor.
It is also possible using a program called autolog.exe that comes with the resource kit. Just run the executable and you will be able to fill in the information.
To logon as a different user you need to hold down the shift key as you logoff.
Q. How do I disable AutoLogon?
A. Again use TWEAKUI, or in REGEDIT set AutoAdminLogon to 0, and clear the DefaultPassword
Q. How do I add a warning Logon message?
A. You need to use the registry editor
This can also be done via the policy editor (poledit.exe)
Alternatively, a text message can be displayed by creating the key LogonPrompt in HKEY_LOCAL_MACHINE/SOFTWARE/Microsoft/Windows NT/CurrentVersion/Winlogon
Q. How do I change Domain Names?
A. This is not so much a procedure but things to think about.
Q. How do I move a Workstation to another Domain?
A. Logon to the Workstation locally as Administrator (i.e. name of machine) and goto Control Panel. Double click Network and click change. Enter the new Domain name and click OK. You will receive a message "Welcome to Domain x". Reboot the machine and you are part of the new domain.
If you wish to administer this box from the new domain you will need to add <Domain>\DomainAdmins to the local administrators group by connecting to the local user database via User Manager for Domains (i.e. \\computername)
Q. How do I assign User Rights for a standalone server (not the PDC/BDC) in a domain?
A. In NT Workstation, User Manager/Policies/User Rights... assigns the privileges (e.g. the Shutdown or Log On Locally privilege) for the local machine. However, in NT Server the User Rights you assign with User Manager for Domains affect the Domain Controller(s). To modify privileges for the local machine, first choose Select Domain... from the User menu, and type in the name of the computer at the Domain prompt (you cannot browse the domain).
Q. I can't FTP to my server, although the FTP service is running?
A. Have you unchecked the "Allow only anonymous connections" option, but still receive a "530 User xyz cannot log in. Login failed." message? To log on to the FTP server with your domain account, it is not sufficient to specify your name at the User prompt. The FTP service checks local accounts only, even if the computer is participating in a domain. Use domainname\username instead, e.g. if the domain name was savilltech and the user was john, enter savilltech\john as the username.
Q. How do I validate my NT Logon against a UNIX account?
A. There is software to do this available at
Q. Can I synchronize the time of a NT Workstation with a NT Server?
A. Yes, enter the command
NET TIME \\computername /SET /YES
Please note that users will require "Change System Time" user right, via User Manager\User rights. There is a utility on the resource kit called TimeServ which runs the time synchronization as a service and works even when there are no logged on users.
Also see Q. How do I configure a user so it can change the system time?
Q. How can I send a message to all users?
A. Ensure the "Messenger" service
is started (Control Panel - Services - Messenger - Auto). To send
a message type:
c:> net send <machine name>
"<message>"
Or instead of a machine name type * to broadcast to all stations
There are also various GUI utilities, and one of the best is NT Hail at http://www.geocities.com/SiliconValley/Bay/1999/NT_Hail.html
Q. How do I change a Workstations Name?
A. Follow the steps below
Q. How do I automatically logoff clients after n minutes of inactivity?
A. The registry entry HKEY_LOCAL_MACHINE\SYSTEM\CurrentControlSet\Services\LanmanServer\Parameters. Add a new variable (Edit - New - Dword value) and call it Disc. Set the value to the number of minutes inactivity wanted. Some network programs constantly communicate with the server (such as mail) so this will not always work. This will only terminate remote connections, to actually logoff from a session use the winexit.scr that comes with the resource kit.
Q. How do I create a queue to a Network Printer?
A. If you have a printer that has its own network card and IP address, you can create a queue to the device by following the instructions below
Q. How many user accounts can I have in one Domain?
A. The real problem is that each user account and machine account takes up space in the SAM file, and the SAM file has to be memory resident. A user account takes up 1024 bytes of memory (a machine account half as much), so for each person (assuming they each had one machine) would be 1.5 KB. This would mean for a 10,000 user domain each PDC/BDC would need 15MB of memory just to store the SAM! Imagine a network with 100,000 people. This is one of the reasons you have multiple domains and then setup trust relationships.
Q. How to I change my server from Stand Alone to a PDC/BDC?
A. You cannot change the role of a NT server, you will need to reinstall NT.
A. A PDC is a Primary Domain Controller, and a BDC is a Backup Domain Controller. You must install a PDC before any other domain servers. The Primary Domain Controller maintains the master copy of the directory database and validates users. A Backup Domain Controller contains a copy of the directory database and can validate users. If the PDC fails then a BDC can be promoted to a PDC. Possible data loss is user changes that have not yet been replicated from the PDC to the BDC. A PDC can be demoted to a BDC if one of the BDC's is promoted to the PDC.
Q. How many BDC's should I have?
A. Microsoft say one BDC for every two thousand users. This is fine considering a 486DX2 with 32MB of RAM can, on average, perform at least 10 logons per minute, however if everyone in your company arrives at 9:00 on the dot and log on (except for the helpful people who arrive half an hour late) there will be a surge of logon requests to deal with, resulting in large delays. To try and improve on this, it is possible to configure the Server service to throughput for Network Applications rather than File Applications. Remember the more powerful the processor, the more logons (for a Pentium 133, would be able to logon at least 30 people).
Q. How do I stop the default admin shares from being created?
A. This can be done through the registry.
This can also be done using the policy editor. Start the policy editor (poledit.exe), load the default computer profile, and expand the Windows NT Network tree, then Sharing and set "Create hidden drive shares" to blank for server/workstation.
There are a few other options though. The first is to use NTFS
and set protections on the files so people may be able to connect
to the share, but they will not be able to see anything. The
second is to delete the shares each time you logon, this can be
done through explorer, but it would be better to have a command
file run each time with the lines
net share c$ /delete
and for all the other shares, however these shares are there for
a reason so your machine can be administered by the servers, so
if you delete them system managers may have something to say
about it!
Q. How do I disconnect all network drives?
A. Use net use * /del /yes
Q. How do I hide a machine from Network Browsers?
A. Using the registry editor set the key HKEY_LOCAL_MACHINE\System\CurrentControlSet\Services\LanManServer\Parameters and set value Hidden from 0 to 1. You should then reboot. You can also type net config server/hidden:yes. You can still connect to the computer, but it is not displayed on the browser.
A. NT does not support remote boot. It is possible to reboot a machine from another computer using the Shutdown Manager that comes with the NT resource kit.
Q. How do I stop the last logon name being displayed?
A. Set the registry setting HKEY_LOCAL_MACHINE\SOFTWARE\Microsoft\Windows NT\CurrentVersion\Winlogon\DontDisplayLastUserName from 0 to 1
This can also be done using the policy editor, and is under the Windows NT System - Logon tree, and tick "do not display last logged on username".
Q. How can I get a list of users currently logged on?
A. Use the net sessions command, however this will only work if you are an Administrator. You can also use control panel and choose server.
Q. How do I configure NT to be a gateway to an ISP?
A. Firstly the hardware required would be a network and a modem. The network card would be so the other clients in the network can communicate with the "to be" gateway, and the modem to connect to the gateway. Dial-up networking is not covered here, and you should first be confident with dial-up networking before attempting this.
This would enable the machines to send out IP packets to the internet, however the packets would have no way of finding there way back, as the ISP would not know to route them through the gateway, so you ISP will have to either a) have host entries for each of the machines or b) point to the gateway as another DNS.
Q. How do I install the FTP server service?
A. In prior version of NT, the FTP server service was installed as part of TCP/IP, however as of NT 4.0, it became part of IIS/PWS, so it needs to be installed manually. Before you install the FTP server, TCP/IP must be installed.
Q. How do I get a list of all connections to my PC?
A. Use the command netstat -a
Q. Is it possible to create non-NT PPTP connections to an NT Server?
A. Yes. A third party product called TunnelBuilder by Network TeleSystems lets you create encrypted tunnels over the Internet using PPTP. The TunnelBuilder client talks to a PPTP server, available with NT Server 4.0. TunnelBuilder can be used with any ISP -- the ISP isn't even aware that encrypted tunnels are being built across their network. TunnelBuilder is available for Windows 95, WFW 3.11, 3.1, and Mac OS computers. More information on the product can be found at http://www.NTS.com.
Q. How can I stop people logging on to the server?
A. If you want to disable an NT servers ability to handle authentication then it is possible to stop the "Net logon" service:
To disable all of NT's server services, click on Server and click stop, which will stop "Net Logon", "Computer Browser" and any other server services.
Q. How can I get the Ethernet address of my Network card?
A. Type ipconfig /all from a command box.
Q. How can I configure the preferred Master Browser?
A. On the NT server you want to be the preferred master browser change the registry setting HKEY_LOCAL_MACHINE\SYSTEM\CurrentControlSet\Services\Browsers\Parameters\IsDomainMaster to True
Q. Is it possible to protect against Telnet attacks?
A. There was a recent well-known problem that a telnet client could connect to an NT machine on port 135, type 10 characters and it would hang NT. There is no simple way to protect NT from a certain port attack. It is possible to configure NT to only accept incoming packets from a set of configured ports, however you have to name the ports you want to accept input from:
To protect against the port 135 attack, install the RPC hotfix for Service Pack 2.
Service Pack 3 and some its Hotfixes are also highly desirable, and address a number of Internet attack methods.
Q. What Telnet Servers/Daemons are available for Windows NT?
A. A Telnet Server on NT allows connection to an NT machine using a Telnet client from any hardware platform. Products are available from:
Q. How do I install MSN under NT?
A. The new MSN 2.0 only runs under Windows 95, however a version for NT 4.0 is being developed. In the mean time it is possible to use MSN to connect to the Internet, however you cannot read Mail
Q. What FireWall products are available for NT?
A. Below are a selection of FireWall systems for NT:
Q. How do I delete a network port (e.g. LPT3:)?
A. Network ports are defined in the registry at HKEY_LOCAL_MACHINE\SOFTWARE\Microsoft\Windows NT\CurrentVersion\Ports. Select the port you wish to delete and from Edit Menu select Delete.
You can also delete from the command line
net use lpt3: /del
Q. How do I install the Remoteboot Service?
A. Before installing the Remoteboot service you must have both the NetBEUI and DLC protocols installed. The remoteboot service will only run on NT server.
Q. How many connections can NT have?
A. NT workstation can have up to 10 concurrent connections, with one exception, Peer Web Services which allows unlimited concurrent connections.
Q. How do I configure a Trust Relationship?
A. Domains by default are unable to communicate with other domains, which means somewhere in domain x cannot access any resource that is part of domain y. Before a trust relationship is configured
After a trust relationship is defined, say x trusts y the following happens
In the example above x is the trusting domain, and y is the trusted domain. Also the above is a one-way trust relationship, i.e. while domain y users can use domain x resources, users of domain x cannot use domain y resources. A two-way relationship would allow each domain to access resources of the other (if given permission).
The basics of a trust relationship is to first configure domain y to allow domain x to trust it, and then configure domain x to trust domain y:
Q. How do I terminate a Trust Relationship?
A. Firstly you have to stop domain x trusting domain y, then remove domain x's ability to trust domain y:
Q. How can I secure a server that will be a Web Server on the Internet?
A. Below are points to be aware of
Q. How can I tell the role of my NT machine?
A. There are several ways to do this, however
the easiest is to type the command
net accounts
And at the bottom of the output, the Computer Role will be shown
as one of the following:
WORKSTATION - A normal NT Workstation machine
SERVER - A standalone NT Server machine
PRIMARY - A Primary Domain Controller (PDC)
BACKUP - A Backup Domain Controller (BDC)
Q. How can I stop a user logging on more than once?
A. There is no way in NT to stop a user logging on more than once, however it is possible to restrict a workstation so that only a certain user can login, and with this method each user would be tied to one workstation and thus could only logon once.
This solution is far from ideal, and it may be plausible to write a login script that checked if a user was currently logged on and if so, logoff straight away (using the logout command line tool).
Q. How can I get information about my domain account?
A. From the command prompt type
net user <username> /domain
And all your user information will be displayed including last logon time, password change etc.
Q. Users fail to logon at a server.
A. By default members of Domain Users will not be able to logon to a server, i.e. a PDC or a BDC, and if they try the error "The local policy of this system does not allow you to logon interactively". If you want users to be able to logon to a server (why I don't know) follow the procedure below:
Q. A machine is shown as Inactive in Server manager when it is not.
A. Sometimes Server Manager fails to see a
machine has become active, you can attempt to force it to see the
machine by typing
net use \\<machine name>\IPC$
If this fails it may be the machine has been configured to be
invisible to the network.
Q. How do I automatically FTP using NT?
A. I use a basic script to update my main site and the mirrors using two batch files. The first consists of a few lines:
d:
cd \savilltechhomepage
ftp -i -s:d:\savmanagement\goftp.bat
The -i suppresses the prompt when performing a multiple put, and the -s defines an input file for the FTP like:
open ftp.savilltech.com - the name of the
FTP server
johnny - username
secret - password
cd /www - remotely move to a base directory
lcd download - locally change directory
cd download - remotely move to a sub directory of
the current directory
binary - set mode to binary
put faqcomp.zip - send a file
cd .. - move down a directory remotely
lcd .. - move down a directory locally
cd ntfaq
lcd ntfaq
mput *.html - send multiple files (this is why we
needed -i)
close - close the connection
Q. How can I change the time period used for displaying the password expiration message?
A. Follow Instructions below:
Q. How can I tell who has which files open on a machine?
A. To view which files are currently open,
and which user has them open use the
net file
command which displays information in the form of
ID Path Username, e.g.
10845 c:\file\john.doc savillj
Also using net file, it is possible to delete a file lock
using
net file 10845 /close
which would remove this lock.
To use Net File you must have the server service running on the machine (check Start - Settings - Control Panel - Services)
You can also use the Server Control Panel Applet on the domain controller (In Use).
There is a freeware utility called OFL (Open File List) from http://www.merxsoft.com/ which provides more information.
Q. How can I modify share permissions from the command line?
A. The Windows NT resource kit ships with a utility called RMTSHARE.EXE that is used to modify permissions on shares, the syntax to grant access to a share is as follows
rmtshare \\<server name>\<share> /grant
<username>:<permission>, e.g.
rmtshare \\bugsbunny\movies /grant savillj:f
Valid permissions are f for full, r for read, c for change and n for none. To revoke access to a share type
rmtshare \\<server name>\<share> /grant
<username>, e.g.
rmtshare \\bugsbunny\movies /grant savillj
This would remove savillj's access to the share. To view share permissions enter:
rmtshare \\<server name>\<share> /users, e.g.
rmtshare \\bugsbunny\movies /grant
RMTSHARE.EXE also allows the creation and deletion of shares. Type rmtshare /? for help.
Q. How can I change the protocol binding order?
A. Network bindings are links that enable communication between the network adapter(s), protocols and services. If you have multiple protocols installed on a machine you can configure NT to try a certain protocol first for communication:
Q. What criteria are used to decide which machine will be the Master Browser?
A. There are 5 roles a machine can have
When an election takes place, a number or criteria are used. Firstly the browser type
If two machines have the same role then the operating system is used
If there is still a tie, the Windows NT version is used
To set a machine as a certain type of browser perform the following
Q. How can I get a list of MAC to IP addresses on the network?
A. An easy way to get a list of MAC to IP addresses on the local subnet is to ping every host on the subnet and then check you ARP cache, however pinging every individual node would take ages and the entries only stay in the ARP cache for 2 minutes. An alternative is to ping the broadcast mask of your subnet which will ping every host on the local subnet (you can't ping the entire network as you only communicate directly with nodes on the same subnet, all other requests are via the gateway so you would just get a ARP entry for the gateway).
What is the broadcast mask? The broadcast mask is easy to calculate if the subnet mask is in the format 255.255.255.0 or 255.255.0.0 etc. (multiples of 8 bits). For example if the IP address was 134.189.23.42 and the subnet mask was 255.255.0.0 the broadcast mask would be 134.189.255.255, where 255 is in the subnet mask the number from the IP address is copied over, where 0 it is replaced with 255, basically the network id part is kept. If the subnet mask is not the basic 255.255 format, you should use the following, all you need is the IP address and the subnet mask
for example, IP address 158.234.24.98 and subnet mask 255.255.248.0
Network |
Host |
|||||||||||||||||||||||||||||||
| 1 | 1 | 1 | 1 | 1 | 1 | 1 | 1 | 1 | 1 | 1 | 1 | 1 | 1 | 1 | 1 | 1 | 1 | 1 | 1 | 1 | 0 | 0 | 0 | 0 | 0 | 0 | 0 | 0 | 0 | 0 | 0 | |
| 1 | 0 | 0 | 1 | 1 | 1 | 1 | 0 | 1 | 1 | 1 | 0 | 1 | 0 | 1 | 0 | 0 | 0 | 0 | 1 | 1 | 0 | 0 | 0 | 0 | 1 | 1 | 0 | 0 | 0 | 1 | 0 | |
| 1 | 0 | 0 | 1 | 1 | 1 | 1 | 0 | 1 | 1 | 1 | 0 | 1 | 0 | 1 | 0 | 0 | 0 | 0 | 1 | 1 | 1 | 1 | 1 | 1 | 1 | 1 | 1 | 1 | 1 | 1 | 1 | |
Byte 1 |
Byte 2 |
Byte 3 |
Byte 4 |
|||||||||||||||||||||||||||||
The first row is the subnet mask 255.255.248.0, the second row the IP address 158.234.24.98 and the third row is the broadcast mask, 158.234.31.255.
To get the MAC to IP addresses, you would therefore perform the following
ping <broadcast mask>
arp -a
Voila, a list of IP addresses and their MAC address (you can add > filename to get the list to a file, e.g. arp -a > iptomac.lst). You could repeat this exercise on the various subnets of your organization.
Q. How can I control the list of connections shown when mapping a network drive?
A. When you map a network drive (Explorer - Tools - Map network drive), if you click the down arrow on the path, a list of previous connections will be shown. These are stored on the registry and can be edited
Q. How do I grant users access to a network printer?
A. The same way as files have security information, so do printers, and you need to set which users can perform actions on each network printer
Q. How can I join a domain from the command line?
A. The NT Resource Kit Supplement 2 ships a new utility called NETDOM.EXE which can be used to not only join domains, but create computer account and trust relationships.
To join a domain there are 2 paths, the first is to just add the computer to the domain and create the computer account simultaneously which is OK if you are logged on as a domain administrator, if you are not a domain administrator the account needs to be added in advance and then you join the domain.
If you are logged on as a domain administrator then enter the command below to create the account and join the domain
netdom /domain:savilltech /user:savillj
/password:nottelling member <computer name> /joindomain
where <computer name> is the name of your machine,
e.g. johnstation
If you are not an administrator the domain admin people will have to add you an account first using either server manager or using NETDOM.EXE
netdom /domain:savilltech /user:savillj /password:nettelling member <computer name> /add
Once the account has been add the normal user could join the domain using the first command shown.
Q. How can I create a share on another machine over the network?
A. The Windows NT Resource kit comes with a utility called RMTSHARE.EXE and this can be used to create shares on other machines providing you have sufficient privilege. The basic syntax is as follows
rmtshare \\<computer name>\"<share name
to be created>"="<path>"
/remark="<share description>"
e.g. rmtshare \\savillmain\miscfiles=d:\files\misc
/remark="General files"
You only need to use double quotes around the share to be created and the path if there are spaces in the share/file name, e.g. if the share was to be called misc files instead of miscfiles it would have to be in quotes, e.g.
rmtshare \\savillmain\"misc files"="d:\my files\misc" /remark="With space share"
Q. I get errors accessing a Windows NT FTP Server from a non Internet Explorer browser.
A. If you run the Microsoft FTP Server Service then you may find problems accessing an area other than the root from a non Internet Explorer browser. This is because most other FTP Servers use the UNIX type naming conventions and that is what browsers such as Netscape expect, however the Microsoft FTP service outputs using dos naming conventions. This can be resolved by forcing the FTP server service to use Unix conventions rather than dos
You will need to stop and start the FTP server service for this change to take effect (Start - Settings - Control Panel - Services - FTP Service - stop - start)
Q. How can I view which machines are acting as browse masters?
A. There are 2 utilities shipped with the NT resource kit (one GUI, on command line) which can be used to view current browse master status.
BROWMON.EXE - Select from the Diagnostics Resource Kit menu. The master browser will then be displayed for each domain. Double clicking on a machine will then list the other machines that are browsers and a subsequent double click on these machines will tell their status, e.g. backup browser.
BROWSTAT.EXE - Start a command session. There
are a number of commands that can be used, however to get a
general view enter the command
browstat status <domain name>
Browsing is active on domain.
Master browser name is: PDC
Master browser is running build 1381
2 backup servers retrieved from master PDC
\\PDC
\\WORKSTATION
As can be seen the master browser name is shown, as are backup servers.
Q. How do I demote a PDC to a BDC?
A. Normally when you promote a BDC to the PDC, the existing PDC is automatically demoted to a BDC, but in the event that the PDC was taken off line and then a BDC promoted when the old PDC is restarted it will still think its the PDC and when it detects another PDC it will simply stop its own netlogon service.
To actually modify the machine to be a BDC the registry needs to be changed directly:
Q. How can I configure a BDC to automatically promote itself to a PDC if the PDC fails?
A. There is no way to do this, the assumption is that the PDC would be configured to write out the dump information and then reboot itself thus coming back online. You configure this behavior using the System Control Panel Applet - Startup/Shutdown tab.
A. To rename a Primary Domain Controller perform the following:
To Rename a Backup Domain Controller
Note: If the BDC begins to receive 7023 or 3210 errors after synching the domain in server manager, on the PDC choose the BDC and then synch that specific BDC with the PDC. After an event indicating that the synch is complete, restart the BDC.
Q. How do I configure my print jobs to wait until out of hours?
A. If you have large print jobs that you would rather run out of hours it is possible to configure usage hours on a print queue:
Jobs submitted to this print queue will now only be printed between the hours specified. If you wanted some jobs to be printed straight away you should define 2 queues, one for overnight, one for all hours.
Q. Where in the registry are the entries for the DNS servers located?
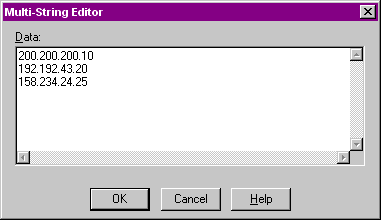
A. The entries for the DNS servers are stored in the registry in the location HKEY_LOCAL_MACHINE\SYSTEM\CurrentControlSet\Services\Tcpip\Parameters under the NameServer value. Each entry should be separated by a space. Using the Resource Kit utility REG.EXE the command to change would be as follows
reg update HKLM\System\CurrentControlSet\Services\Tcpip\Parameters\NameServer="158.234.8.70 158.234.8.100" \\<machine name>
where 158.234.8.70 and 158.234.8.100 were the addresses of the DNS servers you wanted to configure. Note it sets the value, it does not append so ensure you enter in the existing DNS servers as well as the new ones.
This may be useful for granting users access to the internet by remotely updating their registry to know which DNS servers to use.
Q. Is there any way to improve the performance of my modem internet connection?
A. It is possible to force NT to discover the Maximum Transmission Unit (MTU) (packet size) over the path to a remote host. If the transmission packets are restricted to this size then packet fragmentation is eliminated at the routers resulting in improved performance.
The parameter EnablePMTUDiscovery set to 1 forces NT to use a MTU of 576 bytes for all connections that are not on the local subnet. To change this perform the following:
The main issue is that MTU's are maximised for the Ethernet or LAN side of the network connection. Because of the packet sizes (1500), the host machine broadcasts packets and they are not delivered fast enough to provide an acknowledgement to the host. Therefore, the host resends the packet. Due to the speed of the connections the host may resend the packet three times before it gets an acknowledgement. This clogs the system and slows down performance. By changing the MTU to (576) at the ISP and on your server the throughput should increase significantly.
Q. How do I connect two Workstations using RAS?
A. NT Workstation supports one inbound RAS connection so one NT station will be the RAS server, and one will be the client. The procedure below is what I did to connect two machines.
Server
If RAS is already installed
If RAS is not already installed, goto "My Computer" and double click "Dial-up Networking", it will then detect your modem and then take you to step 3 as above.
Client
This assumes RAS is not installed
Q. Is it possible to dial an ISP using the command line?
A. Yes, use RASPHONE -d <entry>. To disconnect you can type RASPHONE /disconnect.
Q. How can I stop the RAS connections closing when I logoff?
A. Perform the following:
Q. How can I create a RAS Connection Script?
A. It is possible to write a script that will run when you connect during a RAS connection to automate actions such as entering your username and password. To specify a script perform the following
An example addition to the SWITCH.INF would be
; the phonebook entry
[Savill1]
; send initial carriage return
COMMAND=<cr>
; wait for : (after username, may be different at your site) omit
the U as it may be capitals. You could just have :
OK=<match>"sername:"
LOOP=<ignore>
; send username as entered in the connection dialog box,
alternaticly you could just enter the username e.g.
savillj<cr>
COMMAND=<username><cr>
; wait for : (after password this time, may be different at your
site)
OK=<match>"assword:"
LOOP=<ignore>
; send the password entered in the connection dialog box, again
you could just manually enter the password, e.g.
password<cr>
COMMAND=<password><cr>
NoResponse
; send the "start ppp" command
COMMAND=ppp default<cr>
OK=<ignore>
In depth information on all of the commands can be found in the SWITCH.INF file.
Q. How can I debug the RAS Connection Script?
A. It is possible to create a log file of the connection by performing the following steps
Each dial-up session will now be appended to the file %systemroot%/system32/RAS/device.log. To stop logging perform the steps above but set the value back to 0.
Q. How do I configure RAS to connect to a leased line?
A. The method will vary depending on your systems current setup, however assuming you have RAS already installed below are the actions needed to configure in your leased line. It is assumed the modems (at both ends) are configured correctly for leased line usage (&D0 for DTR override).
You should now configure the RAS connection (server/client) in the normal way (use the RAS service properties).
Once this has been done you may also want a phonebook entry for outgoing use as you would normally except under the Dialing section check the "Persistent connection" box.
Q. How can I disable RAS AutoDial?
A. The easiest way to do this is to disable the RAS AutoDial service:
To re-enable you would repeat the above but change the startup to automatic.
Q. RAS tries to dial out even on local resources.
A. Perform the following:
You may also wish to add addresses to the disabled list:
You will need to reboot the machine in both of the above cases.
A. When you configure the RAS server you set for each protocol the scope of the connection, the server or the whole network. To change this perform the following:
Clients should now be able to view the entire network.
A. If you are viewing this page on the web then you are using TCP/IP now! TCP/IP is a suite of related protocols and utilities used for network communications. TCP/IP is actually two protocols, Internet Protocol (IP) and Transmission Control Protocol (TCP). There are many different implementations of TCP/IP however they all conform to a standard which means different implementations can communicate with each other.
Each machine that uses TCP/IP must have a unique TCP/IP address which is a 32 bit number, which is usually displayed in the dotted quad (or dotted decimal) format xxx.xxx.xxx.xxx, where xxx is a number from 0 to 255, for example the IP address 147.98.26.11 is shown in its 32 bit form, and how it breaks down into the dotted quad format
10010011 |
01100010 |
00011010 |
00001011 |
147 |
98 |
26 |
11 |
TCP/IP was originally used on ARPANET, a military network and grow to universities and is now used on virtually every computer system. Have a look at http://rs.internic.net/nic-support/15min/modules/arpanet/sld01.html for more information on Arpanet.
A. Below are the instructions on installing a non-DHCP clients:
Q. Is there a way to trace TCP/IP traffic using NT?
A. As part of the Systems Management Server there is a Network Monitor module which enables the entire network to be monitored, also traffic over a modem. There is a limited version of this with NT 4.0 server, however only communications between the server and other computers can be monitored. The Network Monitor Service has to be installed (Control Panel - Network - Services - Add).
There are also 3rd party products available that are superior to Network Monitor, such as NetXRay from http://www.cti-llc.com/cinco.htm which retails for around $999.
Q. I do not have a network card, but would like to install TCP/IP.
A. Microsoft provide a Loopback adapter that can be used for the testing of TCP/IP. To install the Loopback adapter perform the following actions:
Q. I have installed TCP/IP, what steps should I use to verify the setup is correct?
A. Follow the steps below:
Q. How can I trace the route the TCP/IP packets take?
A. In general TCP/IP packets will not always take the same route to a destination, however the start of the journey is likely to be the same, i.e. to your gateway, to the firewall etc. The command to use is tracert and the syntax is as follows
c:\tracert <host name or IP address>,e.g.
c:\tracert news.savilltech.com
Tracing route to news.savilltech.com [200.200.8.55]
over a maximum of 30 hops:
1 <10 ms <10 ms <10 ms 200.200.24.1 200.200.200.24.1
is the gateway
2 <10 ms 10ms <10 ms 200.200.255.81
3 30 ms 10 ms 10 ms news.savilltech.com [200.200.8.55]
Trace complete
The first column is the hop count, the next 3 columns show the time taken for the cumulative round-trip times (in milliseconds), the 4th column is the hostname if the IP address was resolved, and the last column is the IP address of the host. It is really like a street map telling each turn to take. An important thing to note is to look for looping routes, so host a goes to b then c then back to a, as this indicates a problem usually.
Tracert will not always work with some FireWalls for hosts outside the FireWall.
A. As has been shown the IP address consists of 4 octets and is usually displayed in the format 200.200.200.5, however this address on its own does not mean much and a subnet mask is required to show which part of the IP address is the Network ID, and which part the Host ID. Imagine the Network ID as the road name, and Host ID as the house number, so with "54 Grove Street", 54 would be the Host ID, and Grove Street the Network ID. The subnet mask shows which part of the IP address is the Network ID, and which part is the Host ID.
For example, with an address of 200.200.200.5, and a subnet mask of 255.255.255.0, the Network ID is 200.200.200, and the Host ID is 5. This is calculated using the following:
| IP Address | 11001000 | 11001000 | 11001000 | 00000101 |
| Subnet Mask | 11111111 | 11111111 | 11111111 | 00000000 |
| Network ID | 11001000 | 11001000 | 11001000 | 00000000 |
| Host ID | 00000000 | 00000000 | 00000000 | 00000101 |
What happens is a bitwise AND operation between the IP address and the subnet mask, e.g.
1 AND 1 = 1
1 AND 0 = 0
0 AND 1 = 0
0 AND 0 = 0
There are default subnet masks depending on the class of the IP address as follows:
Class A : 001.xxx.xxx.xxx to 126.xxx.xxx.xxx.xxx uses subnet
mask 255.0.0.0 as default
Class B : 128.xxx.xxx.xxx to 191.xxx.xxx.xxx.xxx uses subnet mask
255.255.0.0 as default
Class C : 192.xxx.xxx.xxx to 224.xxx.xxx.xxx.xxx uses subnet mask
255.255.255.0 as default
Where's 127.xxx.xxx.xxx ??? This is a reserved address that is used for testing purposes. If you ping 127.0.0.1 you will ping yourself :-)
The subnet mask is used when two hosts communicate. If the two hosts are on the same network then host a will talk directly to host b, however if host b is on a different network then host a will have to communicate via a gateway, and the way host a can tell if it is on the same network is using the subnet mask. For example
Host A 200.200.200.5
Host B 200.200.200.9
Host C 200.200.199.6
Subnet Mask 255.255.255.0
If Host A communicates with Host B, they are both have Network ID 200.200.200 so Host A communicates directly to Host B. If Host A communicates with Host C they are on different networks, 200.200.200 and 200.200.199 respectively so Host A would send via a gateway.
Q. What diagnostic utilities are there for TCP/IP?
A. We have already seen PING and TRACERT, and below is a full list
For more information on these commands just enter the command with a -?, e.g. netstat -?
Q. What is routing and how is it configured?
A. When host a wants to send to host b, if they are on the same local network then the IP protocol resolves the IP address to a physical address using ARP (Address Resolution Protocol), and the physical address (e.g. 00-05-f3-43-d3-3e) of the source and destination hosts are added to the IP datagram to form a frame, and using the frame, the two hosts can communicate directly with each other.
If the 2 hosts are not on the same local network, then they cannot communicate directly with each other, and instead have to go through a router. You have probably already come across a router when you install TCP/IP, as the default gateway is just a router that you have chosen to use as a means of communicating with hosts outside your local network if no specific route is known. A router can be a Windows NT computer with 2 or more network cards (one card for connection to each separate local network) or it can be a physical hardware device, such as Cisco routers.
Assuming our two hosts are not on the same local network, host A will check its routing table for a router that connects to the local network of host B. If it does not find a match then the data packets will be send to the "default gateway". In most cases, there will not be one router that connects straight to the intended recipient, rather the router will know of another route to pass on your packet, which will then goto another router etc.
For example:
Host A - 200.200.200.5
Host B - 200.200.199.6
Subnet Mask - 255.255.255.0
Router - 200.200.200.2 and 200.200.199.2
Host A's routing table - Network 200.200.199.0 use router
200.200.200.2
In this example, Host A would deduce that Host B is on a separate network, as its Network ID is 200.200.199. Host A would then check its routing table and see that it knows for network 200.200.199 (the zero means all) it should send to 200.200.200.2. The router would receive the packets and then forward them to network 200.200.199.
What actually happens is each router will have its own routing table that will point to other routes.
To actually configure a route, you use the route command, for example to configure a root for network 200.200.199 to use router 200.200.200.2 you would type
route -p add 200.200.199.0 mask 255.255.255.0 200.200.200.2
The -p makes the addition permanent, otherwise it will be lost with a reboot.
To view your existing information type route print.
A. ARP stands for Address Resolution Protocol and was touched on in the previous question as a means of resolving a IP address to an actual physical network card address.
All network cards have a unique 48 bit address, that is written as six hexadecimal pairs, e.g. 00-A0-24-7A-01-48, and this address is hard coded into the network card. You can view your network cards hardware address by typing
ipconfig /all
.
Ethernet adapter Elnk31:
Description . . . . . . . . : ELNK3 Ethernet Adapter.
Physical Address. . . . . . : 00-A0-24-7A-01-48
DHCP Enabled. . . . . . . . : No
IP Address. . . . . . . . . : 200.200.200.5
Subnet Mask . . . . . . . . : 255.255.255.0
Default Gateway . . . . . . : 200.200.200.1
Primary WINS Server . . . . : 200.200.50.23
Secondary WINS Server . . . : 200.200.40.190
As discussed in the Subnet question, if a packets destination is on the same local network as the senders, then the sender needs to resolve the destinations IP address into a physical hardware address, otherwise the sender needs to resolve the routers IP address into a physical hardware address. When a NT machines TCP/IP component starts, it broadcasts an ARP message with its IP to hardware address pair. The basic order of events for sending to a host on the local network is as follows:
If you are sending to a destination not on your local network, then the process is similar except the sender will resolve the routes IP address instead.
To inspect your machines ARP cache, type:
arp -a
and a list of IP address to hardware address pairs will be shown.
Try pinging a host on your local network and then displaying the
ARP cache again and you will see an entry for the host, also try
pinging a host outside your local network and check the ARP cache
and an entry for the router will have been
added. You will notice that the word dynamic is listed with the
records, and this is because they were added as needed and are
volatile, hence will be lost on reboot. In fact the entries will
be lost quicker than this! If an entry is not used again within 2
minutes then it will be deleted from the cache. If it is used
within 2 minutes, it will not be deleted for a further 10
minutes, unless used again and then it would be ten minutes from
when used :-).
You may wish to add static entries for some hosts (to save
time with the ARP requests) and the format is
arp -s <IP address> <hardware address>,
e.g.
arp -s 200.200.200.5 00-A0-24-7A-01-48
Q. My Network is not connected to the Internet, can I use any IP address?
A. The basic answer would be Yes, however it is advisable to use one of the following ranges which are reserved for use by private networks:
10.0.0.0 - 10.255.255.255 this is a single class A
network
172.16.0.0 - 172.31.255.255 this is a group of 16
contiguous class B networks
192.168.0.0 - 192.168.255.255 this is a
contiguous group of 256 class C networks
The addresses above are detailed in RFC 1918 (Request for comment) and can be viewed at http://ds.internic.net/ds/dspg01.html . The advantage of these addresses is that they are automatically filtered out by routers, thus protecting the internet. Obviously if you did one day want to part of your network on the internet you would need to apply for a range of IP addresses (from Internic or from your ISP).
Q. How can I increase the time entries are kept in the ARP cache?
A. The default 2 minutes can be changed by performing the following:
Q. What other registry entries are there for TCP/IP?
A. There is a whole knowledge base article on them that may be useful at http://premium.microsoft.com/support/kb/articles/q120/6/42.asp .
Q. How can I configure more than 6 IP addresses?
A. Using the TCP/IP configuration GUI you are limited to 6 IP addresses however more can be added by directly editing the registry:
A. DHCP stands for Dynamic Host Configuration Protocol and is used to automatically configure a host during boot up on a TCP/IP network and also to change settings while the host is attached.
This means that you can store all the available IP addresses in a central database along with information such as the subnet mask, gateways, DNS servers etc.
The basics behind DHCP is the clients are configured to use DHCP instead of being given a static IP address. When the client boots up it sends out a BOOTP request for an IP address. A DHCP server then offers an IP address that has not been assigned from its database, which is then leased to the client for a pre-defined time period.
Q. How do I install the DHCP Server Service?
A. The DHCP server service can only be install on a NT Server.
Q. How do I configure DHCP Server Service?
A. The DHCP Server Service is configured using "DHCP Manager" that is installed after the installation of the DHCP Server Service.
Usually items such as DNS servers, WINS server etc will be configured on a global scale and this is also done using Server Manager
Q. How do I configure a client to use DHCP?
A. For NT workstation and Windows95 follow the instructions below:
Q. How can I compress my DHCP database?
A. NT Server ships with a utility called JETPACK.EXE which can be used to compact DHCP and WINS databases. To compact your DHCP database perform the following:
Note: While you stop the DHCP service, clients using DHCP to receive a TCP/IP address will not be able to start this protocol and may hang.
Jetpack actually compacts DHCP.MDB into TMP.MDB, then deletes DHCP.MDB and copies TMP.MDB to DHCP.MDB! Simple :-)
For more information, see Knowledge base article Q145881 at http://www.microsoft.com/kb/articles/q145/8/81.htm
Q. How can a DHCP client find its IP address?
A. Depending on the client:
Windows NT machine - type ipconfig from the
command prompt
Windows 95 machine - run winipcfg.exe
Q. How can I move a DHCP database from one server to another?
A. Perform the steps below on the server that currently hosts the DHCP Server service. Be warned that while doing this no DHCP clients will be able to start TCP/IP so this should be done outside working hours.
On the new DHCP server perform the following
Q. How do I create a DHCP Relay Agent?
A. If you have routers separating some of your DHCP clients from the DHCP server you may have problems if they are not RFC compliant. This can be solved by placing a DHCP relay agent on the local network area which is not actually a DHCP server which communicates on behalf of the DHCP Server. The DHCP Relay Agent must be a Windows NT Server computer.
Q. How can I stop the DHCP Relay Agent?
A. All you have to do is stop the DHCP Relay Agent service:
Q. How can I backup the DHCP database?
A. The DHCP database backs itself up automatically every 60 minutes to the %SystemRoot%\System32\Dhcp\Backup\Jet directory. This interval can be changed:
You could backup the %SystemRoot%\System32\Dhcp\Backup\Jet directory if you wish.
Q. How can I restore the DHCP database?
A. Perform one of the following:
Q. How do I reserve a specific address for a particular machine?
A. Before performing this you will need to know the hardware address of the machine and this can be found by entering the command
ipconfig /all
Look for the line
Physical Address. . . . . . : 00-60-97-A4-20-86
Now at the DHCP server perform the following
Q. How do I install the DNS Service?
A. The DNS Service can only be installed on NT Server and is installed as follows:
Q. How do I configure a domain on the DNS Server?
A. A new application has been added to the Administrative Tools group, DNS Manager, to configure the domain follow the procedures below:
Q. How do I add a record to the DNS?
A. To add a record, for example TAZ with IP address 200.200.200.4 perform the following
Q. How do I configure a client to use the DNS?
A. For an NT machine (and Windows 95) perform the following:
To test, you can start a command prompt and enter
nslookup <host name>
e.g. nslookup taz
The IP address of Taz will be displayed. Also try the reverse translation by entering
nslookup <ipaddress>
e.g. nslookup 200.200.200.4
The name Taz will be displayed.
Q. How do I change the IP address of a DNS server?
A. The information below assumes you have already changed the IP address of the machine ( Start - Settings - Control Panel - Network - Protocols - TCP/IP - Properties) and have rebooted. The scenario below assumes the old IP address was 200.200.200.3 and the new is 200.200.200.8
Update all the clients to use the new DNS server IP address.
The above procedure is the most complete way, however it should still work if you only perform steps 2 and 3.
Q. How can I configure DNS to use a WINS server?
A. Is is possible to configure the DNS to use a WINS server to resolve the host name of a Fully Qualified Domain Name (FQDN).
A. WINS stands for Windows Internet Name Service. WINS is a NetBIOS Name Server that registers your NetBIOS names and resolves into IP addresses.
If you're using NetBIOS over TCP/IP you will need to have WINS running so that each can find out the correct IP address of the other to communicate.
Need to browse over an interdomain network? WINS!
A. Once your machine is configured to point at a WINS server (and maybe a second backup WINS server);
A. WINS is a server service.
Go to Control Panel->Network->Services and install the
Windows Internet Name Service.
If you have any non-WINS clients, add them in as static
name->IP mappings.
Configure a WINS Proxy Agent if needed.
Configure WINS support on your DHCP server.
NT Workstation TCP/IP->Properties->WINS add the IP address of the WINS server (and your secondary if you have one).
Q. What is a WINS Proxy Agent?
A. If you have non-WINS machines on your
subnet and want them to be visible participants, you will want a
Proxy Agent to be active within this subnet.
A WINS Proxy Agent is a WINS client that allows non-WINS clients
to participate, by listening for broadcast name registrations and
requests and then forwards them to a WINS server. Use Registry
Editor to open
HKEY_LOCAL_MACHINE\SYSTEM\CurrentControlSet\Services\NetBT\Parameters
and set the EnableProxy parameter to 1.
Q. How do I configure WINS static entries for a non-WINS client?
A. Go into WINS Manager (under Admin Tools)
Mappings->Static Mappings->Add Mappings enter the NAME and
IP ADDRESS of the machine in question. Under TYPE usually you'll
just enter as Unique. Now click ADD.
Q. How do I configure WINS to work with DHCP?
A. If the computer is a DHCP client, then at the DHCP server, go into DHCP Administrator (Admin Tools) and add two new SCOPE options:
Q. How can I compress my WINS database?
A. NT Server ships with a utility called JETPACK.EXE which can be used to compact DHCP and WINS databases. To compact your WINS database perform the following:
Note: While you stop the WINS service, clients using WINS to resolve addresses will fail unless another mechanism of name resolution is in place.
Jetpack actually compacts WINS.MDB into TMP.MDB, then deletes WINS.MDB and copies TMP.MDB to WINS.MDB.
For more information, see Knowledge base article Q145881 at http://www.microsoft.com/kb/articles/q145/8/81.htm
Q. The Outlook/Exchange client takes a long time to start.
A. Sometimes the protocol binding for Exchange can be wrong if more than one protocol is installed, for example if you have NetBEUI and TCP/IP installed, and you connect to the Exchange server via TCP/IP, you need to ensure TCP/IP is first in the binding order, otherwise Exchange will attempt to communicate via NetBEUI initially. To check/set perform the following:
Q. How can I stop Outlook dialing my Internet Account on Startup?
A. Perform the following:
A. The following instructions are to install Exchange 5.0
It is a good idea to have a large pagefile.sys when running Exchange, a good size would be the amount of memory plus 100.
Q. How do I enable the Exchange Active Server Pages?
A. This functionality is new in 5.0, and enables a user to view their exchange mailbox from an Internet browser, such as Internet Explorer or Netscape. Before the Exchange Active Server Pages extension can be installed, there are two pre-requisites
NT Server 4.0 ships with IIS 2.0, therefore assuming you have not upgraded your system since then you will need to perform the following
Once this has finished, you will be able to connect to your Exchange mailbox by entering the URL
http://<Exchange server>/exchange
You then need to enter you Exchange alias and then click the "click here" text.
Q. How do I use the Exchange Optimizer utility?
A. After you install Exchange you are prompted to run the Exchange Optimizer utility, however it can also be run afterwards:
Q. How can I convert mail system X to Exchange?
A. Exchange is supplied with a migration wizard which can convert the following mail systems to Exchange
The wizard is in the Microsoft Exchange folder and below is an example of converting a MsMail Postoffice
Q. How can I create shortcut on the desktop with the "to" field completed?
A. As you may be aware, if you enter the
command
exchng32 /n
This creates a blank new message, however it is not possible
to specify a qualifier containing information to the content. A
workaround to this is the following
If you now double click on the desktop message icon it will create a new message which you can edit and then send with information already filled in!
Q. NT Server hangs at shutdown if User Manager is running.
A. This is caused by an Exchange dll file which is used by User Manager, to fix this perform the following
Q. How can I send a mail message from the command line?
A. You need to use the MAPISEND.EXE utility that is supplied with the Exchange Resource kit. The resource kit can be downloaded from http://www.microsoft.com/msdownload/exchange/rkintel/rkintel.htm and you need to download the AdminNT part.
Once downloaded double click on the zip file and it will expand to a specified location. Copy the MAPISEND.EXE from the restored path (i386\admin\mapisend) to an area of your choice. The usage is simple as long as the exchange client is installed on the computer already (outlook is also OK).
mapisend -u "<profile>" -p
<anything> -r <recipient> -s
"<subject>" -t <text file containing the
message>
e.g. mapisend -u "john savill" -p anything -r
john@savilltech.com -s "Test message" -t
c:\message\mail4.txt
This is just an example usage, and you may not be sure what you profile name is so instead of using -u and -p, use just -i and this allows interactive login and will also allow you to create a profile which you can then use in future. The full list of switches are
| -u | Profile name (user mailbox) of sender |
| -p | Login password |
| -i | Interactive login (prompts for profile and password) |
| -r | Recipient(s) (multiples must be separated
by ';' and must not be ambiguous in default address book.) |
| -c | Specifies mail copy list (cc: list) |
| -s | Subject line |
| -m | Specifies contents of the mail message, this is ignored if -t is specified |
| -t | Specifies text file for contents of the mail message |
| -f | Path and file name(s) to attach to message |
| -v | Generates an 8 line summary of the sent message |
In all cases if the passing parameter is more than one word it should be enclosed in quotes.
Q. What files does Exchange use?
A. Below is a list of the more common files used by Exchange
| File | Directory | Use |
| Priv.pat Pub.pat | Mdbdata | Patch files, safe to delete if no backup is taking place and no startup recovery is in operation |
| Dir.pat | DsaData | Patch files, as above |
| Dlv.log Snd.log Dlvxxxxx.log Sndxxxxx.log | Mdbdata | These are created when Sending and Delivering diagnostics logging for either the private and public information stores are set. These can be deleted at any time. Dlv.log and Snd.log are the most recent logs created. |
| PUB.EDB PRIV.EDB | MDBdata | Information store |
| DIR.EDB | DSAdata | Directory information |
| EDB.LOG | Transaction Log | |
| EDB00nn.LOG | Previous Transaction Logs | |
| EDB.CHK | Check Point file | |
| RES1.LOG RES2.LOG | Emergency logs for when disk is full | |
| TEMP.EDB | In progress transaction |
A. Internet Information Server (IIS) is a World Wide Web server, a Gopher server and an FTP server all rolled into one. IIS means that you can publish WWW pages and extend into the realm of ASP (Active Server Pages) whereby JAVA or VBscript (server side scripts) can generate the pages on the fly. IIS has fun things like application development environment (FrontPage), integrated full-text searching (Index Server), multimedia streaming (NetShow), and site management extensions.
Q. How do I install Internet Information Server?
A. IIS 2.0 is supplied with Windows NT Server 4.0. It can be installed at the time you installed NT 4.0 by checking the "Install Microsoft Internet Information Server" box, alternatively it can be installed at a later time by performing the following
Internet Information Server 3.0 is supplied on the Service Pack 2 CD-ROM and as part of Service Pack 3. It is supplied as an upgrade, so you must already have IIS 2.0 installed before applying the service pack.
Q. What is Internet Service Manager?
A. If you look under Programs->Microsoft Internet Server, you will find the Internet Service Manager. ISM is used to configure and monitor IIS. With ISM you can define user connections and user logon and authentication, the home directory location for each IIS service, logging and security.
A. It gives the ability to perform full-text searches and retrieve information from a Web browser. It can search HTML, text, and all Microsoft Office documents.
When started, it builds an index of the virtual roots and subdirectories on your Web server. You can select which directories and file types can be skipped.
The index is updated automatically whenever a file is added, deleted, or changed on the server.
Q. What are Active Server Pages?
A. ASP is server-side scripting. You can use ASP to create and run dynamic, interactive, Web applications. When your scripts run on the server, the SERVER does all the work involved in generating the HTML pages.
Q. How can I configure the Connection Limit?
A. This is configured using the Internet Service Manager and can be between 1 and 32,767
Q. How do I change the default file name?
A. The default file name is the file searched for if only a directory name is specified and can be changed by performing the following:
Q. How can I enable browsers to view the contents of directories on the server?
A. By default if you select a directory on a server and no default file name exists then an error is returned. It is possible to change this behavior to instead of an error a directory listing is displayed
You can only set this for the whole site, not on a per directory basis. If you want to set this on a directory basis enable the directory browsing and make sure the default file name exists in directories you do not want people to be able to browse.
Q. How can I configure the FTP welcome message?
A. Using the IIS admin utility a welcome, end and connect refused message can be displayed
Q. How do I configure a virtual server?
A. It is possible using Windows NT to bind multiple IP addresses to one network card and for each IP address it is possible to run a virtual domain server. The procedure below will add an IP address, add the new IP address as a domain and setup the new IIS virtual server.
To bind an additional IP address to your network card perform the following:
You now need to configure the DNS server to respond to the new name.com with the new IP address
Next update the IIS server to support the new domain
You will now be able to browse to this domain.
Q. How can I administer my IIS server using a web browser?
A. IIS comes with a built in HTML version of Internet Service Manager, with an address of <server name>/iisadmin/default.htm. It does have to be installed.
To check if its installed start the browser and move to the \iisadmin\default.htm and if you see the Internet Server Manager page but with no graphics, e.g.
To install perform the following:
If your default file name is not default.htm you may have a few navigation problems, if you do just enter default.htm after any directory name.
Once you connect using a browser to the iisadmin area you may have to enter a username and password depending on the browser you use, and you can then perform actions to administer the site.
Q. How can I configure FTP to use Directory Annotation?
A. Follow the procedure below:
You now need to create a file called ~ftpsvc~.ckm in each directory where you wish the annotation. The file is just a normal ASCII format file.
Q. Only the first line of the Directory Annotation is shown.
A. This is caused if you have no welcome message. Simply add a welcome message as described in Q. How can I configure the FTP welcome message?
Q. How can I configure the amount of IIS Cache?
A. By default InetInfo, the process responsible for WWW, FTP and Gopher uses a 3MB of cache for all of the services. This cache is used to store files in memory providing faster access than from disk. To change the amount of memory available for the cache perform the following:
If you wish to disable caching set the value to 0 however this could have a serious effect on performance.
Q. How can I remove the Active Desktop?
A. You can turn off the Active Desktop without removing it by performing the following:
To actually remove Active Desktop completely while leaving the browser intact:
Q. How can I get past the "Active Desktop Recovery" page?
A. This can usually be fixed by deleting the desktop.htt file:
Q. What keyboard commands can I use with Internet Explorer 4.0?
A. Below is a list of common keyboard commands:
| Alt + Left Arrow (or backspace) | Go Back |
| Alt + Right Arrow | Go Forward |
| Tab | Move to next Hyperlink |
| Shift - Tab | Move to previous Hyperlink |
| Enter | Move to page referenced by Hyperlink |
| Down Arrow | Scroll down |
| Page Down | Scroll down in greater jump |
| End | Move to bottom of document |
| Up Arrow | Scroll up |
| Page Up | Scroll up in greater jump |
| Home | Move to top of document |
| F5 | Refresh |
| Ctrl - F5 | Refresh not from cache |
| Esc | Stop download |
| F11 | Full screen/normal toggle |
Q. How can I create a keyboard shortcut to a web site?
A. It is possible to create your own keyboard shortcuts with a Ctrl + Alt + <letter> combination as follows:
You can also use the above to create a keyboard shortcut to a desktop item by right clicking on the shortcut and choosing properties.
Q. How can I customize folders with web view enabled?
A. If you have installed the Windows Desktop Update and have the view as web page enabled ( view - as web page) you can customize the folder (view - customize this folder) and then select the type (background picture or a whole HTML file) or you can change the default which is stored in a hidden HTML file (%systemroot%\web\folder.htt). You can then edit this file and change accordingly.
There is a line in folder.htt "HERE'S A GOOD PLACE TO ADD A FEW LINES OF YOUR OWN" which you can add your own links which will then appear on all folders.
There are 4 other templates you can edit:
As I said these are hidden so you will either need to remove the hidden attribute (attrib <file> -h) or just enter the name specifically in the edit utility you use to change these files. A word of warning, make a backup of these files before you break them :-).
Q. How can I change the icons in the Quick Launch toolbar?
A. The icons on the quick launch taskbar (Internet Explorer, Outlook Express, Show Desktop and Channels by default) are all stored in %systemroot%/profiles/<user>/Application Data/Microsoft/Internet Explorer/Quick Launch and to remove/add just add and remove the files from this directory using Explorer.
You can copy any shortcut to this directory and the update will be done straight away, no need to logoff/reboot. As you can see below I have added a shortcut for Word and Frontpage just by copying the shortcut to the Quick Launch directory, easy.
![]()
An alternative method is to just drag a shortcut over the Quick Launch bar and it will add the shortcut for you.
All the files in this folder are shortcuts except for Show Desktop and View Channels. See the next FAQ for their contents.
Q. I have lost Show Desktop/View Channels from the Quick Launch bar, help!
A. As was discussed in the previous FAQ these icons are just files in the %systemroot%/profiles/<user>/Application Data/Microsoft/Internet Explorer/Quick Launch directory. To get the Show Desktop/View Channels icons back create the following files in the Quick Launch directory (or copy from another user)
For Show Desktop, create "Show Desktop.SCF"
with the following content:
[Shell]
Command=2
IconFile=explorer.exe,3
[Taskbar]
Command=ToggleDesktop
For View Channels, create "View
Channels.SCF" with the following content:
[Shell]
Command=3
IconFile=shdocvw.dll,-118
[IE]
Command=Channels
Q. How do I change the default Search Engine?
A. The URL for the Search Engine used with the Go - Search the Web is stored in the registry so this can easily be changed:
Now when you select search you will be taken to this URL. If you want to change back to the default enter http://www.msn.com/access/allinone.htm
Q. How do I remove the Internet Explorer icon from the desktop?
A. This can be done from the advanced options of Internet Explorer:
A. As you may be aware when you connect to a site the information you view is cached locally to speed up future visits to the site (the cache size can be set View - Internet Options - General - Temporary Internet files - Settings). Its actually possible to view the web using only the cache when not connected, obviously you can only view sites that are stored in the cache. To work off line:
You can then enter URL's and link as normal but will receive an error if you attempt to link to a site that is not cached. To stop working Offline just deselect "Work Offline"
Q. How can I reclaim wasted space by Microsoft's Internet E-mail readers?
A. Microsoft's Internet E-mail clients (both Internet Mail under IE3 and Outlook Express under IE4) waste a large amount of disk space due to the method used to store mail. The reason behind this is to improve performance, however if you do want to reclaim some of the lost space perform the following:
Also set-up Outlook to automatically delete the "Deleted Items" folder contents
Q. How do I install NT Workstation 4.0?
A. The installation of NT is quite simple, and below is just a simple example of an installation of a Workstation using TCP/IP and NetBEUI connected to a Domain.
You now have NT Workstation installed :-).
Q. How do I install NT Server?
A. The installation of NT Server is the same as NT Workstation with a few exceptions
A. The best method is two create at least two partitions. The first around 200Mb and format to FAT, on this partition DOS will be installed. The reason 200Mb is suggested that this is enough space to later install Windows for Workgroups or Windows95 if needed. After installing DOS, install NT and install onto the second partition (and format FAT or NTFS). Once the installation is finished, on bootup of the machine you will have a choice of booting into DOS or NT. The advantage of having NT installed on a FAT partition is that if there is a problem then you can boot up in DOS mode and access the NT partition and possibly restore files, although that core NT startup files are located on the C partition anyway (boot.ini, ntdetect.com and ntldr).
Q. Installation hangs when detecting the hardware.
A. The program being called is NTDETECT.COM. The best course of action is to use the DEBUG version of NTDETECT.COM.
In the support area of the NT installation cd (/support) there is a file NTDETECT.CHK. Follow the instructions to use it:
Q. Is it possible to install NT without using boot disks or temp files?
A. This is not possible on the Intel platform. On Intel you can either have it not using disks (winnt(32) /b) or not using temp files but not both. On the Alpha platform, it is possible to boot from the retail or MSDN CD of NT 4.0 and install so no boot disks or temp files are used.
The Compaq servers allow you to boot off of the CD, by making the CD a bootable device. Other hardware may also be able to do this, it will depend on the motherboard.
Q. Does NT have to be installed on the C drive?
A. No, NT can be installed on any drive, however it does place a few files on the active partition in order for NT to boot.
Q. There is a file \Support\Deptools\<system>\ROLLBACK.EXE. What is it?
A. It is used by developers to wipe the Registry completely. Do NOT use it!
Q. I have NT installed, how do I install DOS?
A. Follow the steps below
The procedure above will only work if the C drive is FAT.
Q. How do I convert NT Workstation to NT Server?
A. There are various discussions about the changing of 2 registry keys that turns a Workstation into Server, which in turn change a number of other keys, however this is against license agreements and should not be attempted.
Workstation can be upgraded to a Server, but it cannot become a PDC or BDC, to do this a fresh installation of NT server would be needed. To convert follow steps below
Q. I have bought a new disk, how do I move NT to this new disk?
A. There are various methods, depending on your setup and needs. The best method is to:
If the tape drive is not an option and the partition is NTFS you can use the utility scopy that is supplied with the NT resource kit by fitting the new hard disk, creating an NTFS partition on it and then performing
scopy <source drive>: <target drive>: /o /a /s
To use the scopy command you must have Backup and Restore User Rights. Once the copy is complete shutdown NT, remove the old drive, and set the new drive to master (if IDE) or SCSI 0/6 (if SCSI) and boot of the NT installation disks, and again repair everything except "Check System Files". If you have time it can be worth creating a temporary NT installation on the drive before performing the copy, booting off of this minimal installation and perform the scopy from there as this means no files will be locked, and then you would only need to repair the boot sector.
Other methods include ghost copy from http://www.ghostsoft.com and DriveCopy from http://www.powerquest.com which copy and entire disk which should eliminate the need for performing a repair. I have used the ghostsoft utility and it works well.
Make sure if you are moving NT to a different type of disk, i.e. one that needs a different driver, you install the new driver before you perform the copy so that when NT boots off of the new disk it has the needed drivers.
Q. Can I upgrade from Windows95 to NT 4.0?
A. There is no upgrade path from Windows95 to NT4.0. The best option would be to have a dual boot if you have 150Mb of uncompressed space free. Just install NT4.0 into a DIFFERENT directory (if you install NT4.0 into the same directory as Windows95 it will corrupt the 95 registry) and when booting the machine you will have a choice of NT4.0 or Windows95.
Q. How do I remove NT from a FAT partition?
A. Boot MS-DOS with the deltree utility.
Q. How do I remove NT from a NTFS partition?
A. The best way is to delete the partition. Start the computer from the NT installation disks. When the option to create/choose partitions select the NTFS partition NT is installed on and press D to delete the partition, and then L to confirm.
Q. How do I install the Iomega Parallel Disk Drive?
A. Follow the steps below
Notes:
When you start up your pc, make sure there is no ZIP disk in the
drive- otherwise NT will run checkdisk on the drive, which can
take an eternity.
If you do not have the ZIP drive attached when you boot up, you will get an error at bootup that a service did not start up.
Q. How do I install at tape drive on NT Server?
A. Follow instructions below
NT 4.0 will also detect and install certain tape drivers (such as 4mm DAT) which means there is no need for a reboot after the installation.
Q. How do I install the NEC 4x4 CD changer?
A. NEC does not currently have drivers for NT 4.0, so the CDROM must rely on Microsoft's generic drivers. I've been able to get all four slots to read data correctly without any special tweaking; however, there are some annoyances that still remain.
Q. What are symbol files, and do I need them?
A. Symbol files are created when images are compiled and are used for debugging an image. They allow someone with the correct tools to view code as the software is running. You do not need symbol files unless you are a developer.
Q. How do I install NT and Linux?
A. Linux has a boot manager called LILO (which is a separate utility), and it will boot Linux on its native EXT2 partition, and any other DOS/WIN bootimages residing on a FAT16 partition. It doesn't really care whether it is dos/win95/NT, it will boot it. So as long as NT is installed on a FAT16 partition, there is no problem with LILO. Apparently the latest Linux kernel has FAT32 support, so that may also be an option as well. Actually Linux supports FAT16 and can mount the FAT16 partition under its filesystem and have all the DOS/WIN files visible if you want it to. An alternative to LILO is Grub which can be downloaded from http://www.uruk.org/~erich/grub .
There is something else called LOADIN, allowing linux to be installed as a MSDOS subdirectory in a DOS/WIN system. This allows Linux to be run as an application after you started DOS. This does not work with NT. This is as Linux needs to run in supervisor mode and not user mode. NT will not yield at all on this. Windows 95 is the same but you can set loadlin to run in Dos mode where it just sees Dos 7 and works fine.
Linux and NT will work even if Windows NT is on NTFS. You need to set in linux fdisk for the Linux drive to be flagged bootable, not NT. Then install lilo and select to boot the linux partition and NT (which will say OS/2 in lilo). This way you can use both NT and Linux and still have a NTFS partition. Lilo must reside on the Linux root sector and not the MBR.
You can learn more about it from the Linux documentation project and the FAQ inside. It is mirrored everywhere. This is one of the mirrors ftp://ftp.ox.ac.uk/pub/linux/LDP_WWW/linux.html
Q. How do I install NT over the network?
A. If you do not currently have any operating system installed on your machine, then you need to create a bootable floppy disk that contains a driver for your network card and network protocol. A tool is provided called "Network Client Administrator" which automatically creates a bootable disk used to install Windows95 or Network Client. It is possible to use this tool to also create a disk that can be used to install NT with a bit of tweaking :-)
Q. Is it possible to use Disk Duplication to Distribute Windows NT?
A. It is OK to use disk duplication to install NT, but not a complete NT installation. You should follow the steps below:
Q. How do I perform an unattended installation?
A. It is possible to specify a text file that can be passed to the Windows NT installation program that contains answers to the questions the installation procedure asks. This file is usually called unattend.txt and is passed to the Windows NT installation program using the /u:unattend.txt qualifier. The answer file has to adhere to a strict format which can be very complex, however there is a utility on the NT Server CD called SETUPMGR.EXE (in the Support/Deptools/I386) that allows the information to be filled into dialog boxes and it will then create the unattend.txt (or any other name) for you. Below is an example of how to use the SETUPMGR.EXE file:
Microsoft have a document on automated installations at http://www.microsoft.com/NTWorkstation called "Deployment Guide to Windows NT Setup"
Q. Is it possible to specify unique items during an unattended install?
A. The unattended installation file contains details for settings that will apply to all machines, however there are some settings that you may want to be different from machine to machine, such as user name, computer name, TCP/IP address etc. This can be accomplished by producing a text file in a certain format, with different sections for each computer. The UDF file is used by specifying the /UDF:ID[,<database file name>]. An example UDF file would be
[UniqueIds]
u1 = UserData,TCPIPParams
u2 = UserData,TCPIPParams
[u1:UserData]
FullName = "John Savill"
ComputerName = SavillComp
ProductID = xxx-xxxxxx
[u1:TCPIPParams]
IPAddress = 200.200.153.45
[u2:UserData]
FullName = "Kevin Savill"
ComputerName = KevinComp
ProductID = xxx-xxxxxx
[u2:TCPIPParams]
IPAddress = 200.200.153.46
The ID specified would be (in the case above) u1 or u2. If the
above file was saved as udf.txt to perform an
unattended installation for machine one you would use
winnt /b /s:z: /u:unattend.txt /UDF:u1,udf.txt
which would set the installation as user John Savill, computer
name SavillComp and IP address 200.200.153.45. If a parameter is
specified in both the unattend answer file and the UDF the value
in the UDF will be used. (The /b means its a floppyless
installation and the /s specifies the source for the installation
files and UDF etc. You would needed to have created the
connection to z: already (net use z: //savillcomp/dist))
The structure of the UDF uses a subset of the sections available in the unattended answer file.
Q. How do I automatically install applications as part of the unattended installation?
A. A utility is supplied on the NT distribution CD called SYSDIFF.EXE which is used to create a file containing files and registry changes needed for an application or set of applications to be installed. To use SYSDIFF just copy it from the CD to your hard disk
The basics behind SYSDIFF is it creates a snapshot of the system before the application is installed, the application is installed and SYSDIFF is run again which compares the current system to the snapshot taken, and any changes to the registry and files are saved. An example usage need to include the following
Note: Using the /apply method the %systemroot% has to be the same on all machines, i.e. if the diff file was created on a machine with a %systemroot% of d:\winnt\ all machines must be installed to d:\winnt\ ([Unattended] TargetPath)
Q. Install detects the wrong video card and locks the installation.
A. When NT detects a video card it insists that you click the "Test" button. If the NT installation procedure incorrectly detects the hardware then it can cause the NT installation to hang and the only way to continue is to press the Reset button (e.g. the Number 9FX Reality card). To solve this problem when it detects the card just click the CANCEL button and it will leave the default VGA driver.
After the installation has finished manually install the new driver supplied with the graphics card, or download it from the makers web site.
Q. How do I upgrade from NT 3.51 to NT 4.0?
A. The scenario below is for upgrade an NT Workstation 3.51 machine to a NT Workstation 4.0 machine. It is the same to upgrade a NT Server 3.51 to a NT Server 4.0, except that if you upgrade a server you will also be given the option to install IIS (Internet Information Server).
The only problem with the upgrade is it does not remove old applications that were part of 3.51, such as cardfile.exe.
Q. When I use an unattended installation, how do I avoid the click "Yes" at the license agreement?
A. In the [unattended] section of your unattended answer file insert the line
OemSkipEula = yes
Q. I have NT installed, how do I install Windows95?
A. If you already have DOS installed, then boot to DOS and install Windows95. The instructions below are if you only have Windows NT installed.
For this procedure to work the system partition (c:) must be FAT.
Q. How do I remove Windows95/Dos from my NT system?
A. The procedure below should be used on systems with Windows95 and/or DOS installed, however be aware it is sometimes good idea to have a small DOS installation for use with hardware setup etc. Before you start this make sure you have an up-to date ERD (rdisk -s) and the 3 NT installation disk (winnt32 /ox) just in case :-)
Q. I can't create a NTFS partition over 4GB during installation.
A. During the text based portion of the NT installation, it is possible to create and format partitions. The maximum size for an NTFS partition is very large (16 exabytes), however the maximum size for a FAT partition under NT is 4GB (2GB under DOS). If you format a partition as NTFS during NT installation, it originally formats it as FAT and then converts it in the final stages of the NT installation, and this you are limited to a maximum partition size of 4GB during the NT installation.
To get round this problem there are several paths of action open to you
For more information see knowledge base articles:
Q. I cannot upgrade my 4.0 NT installation with the NT 4.0 upgrade CD.
A. Microsoft have confirmed this to be a problem with the software, and more information can be found in knowledge base article q154538 at http://www.microsoft.com/kb/articles/q154/5/38.htm .
A workaround is available, as the setup procedure checks the registry entry HKEY_LOCAL_MACHINE\SOFTWARE\Microsoft\Windows NT\CurrentVersion\CurrentVersion for the version number, and only upgrades if the version is 3.1 ,3.5 or 3.51. You can therefore edit this entry and change the current version number
You should now be able to upgrade.
Q. How do I create the NT installation disks?
A. Follow the procedure below:
Q. How can I use a Network card that is not one of those shown with Network Client Administrator?
A. The Network Client Administrator tool located in the Administrative Tools section is a very useful tool, but lacks the seemingly obvious function of "Have disk" to use a NDIS 2.0 compatible driver supplied with the network card. You can get round this though with a minimum of hassle.
The Network Client Administrator disk is now configured to use your network card. A known problem is with Irmatrac/Microdyne token ring adapters, and will not work unless the net sub-directory on the disk is renamed to dev.
This solution is fine for one off disk creations, however you may want to have the network card displayed as an option by the Network Card Administrator program, to do this perform the following
Network Client Administrator will now list the new card as an option as a Network card.
A. The easiest way to do this is to use the net localgroup command, however before you can use the command you have to have connected to the PDC and start the netlogon service. The following commands can be used in the unattended installation using the CMDLINES.TXT file:
net use \\<machine name of the PDC> /user:<domain
name>\<username> <password>
net start netlogon
net localgroup Administrators "<domain
name>\<user>" /add
Q. I have problems running a program as part of the unattended installation?
A. You can use the /e switch during the unattended installation to specify a program to run, e.g.
winnt.exe /u:unattend.txt /s:w: /e:"w:\servpack\update -u -z"
The above would be used to install a service pack after the NT installation (-u for unattended, -z for no reboot), however you may get an error and in setuplog.txt the following error:
"Warning:
Setup was unable to invoke external program
<drive>:\<directory>\<program> because of the
following error:
CreateProcess returned error 3."
This is because after the installation network drives are no longer mapped and w: no longer exists. Any source files need to be locally stored to be able to be run and then with the /e use a local drive letter.
A. The basic idea behind Windows NT licensing is that you purchase NT Server and license which allows you to install the software on one machine, however you cannot use the software unless you have a client license. A client license is just a piece of paper, no codes, no passwords, just a piece of paper saying you can use one more client. A client license is around US$40, which means you have to buy the NT server software (around US$650) and then US$40 times the number of clients to the machine, plus the cost of the client software and licenses!
There are two methods of licensing, per seat and per server. Per seat licensing is where each network user has a license, and allows the user to access as many/all of the servers in the enterprise. This is the most popular and cost effective method if you have two or more NT servers.
The second method, per server, also known as concurrent licensing is where licenses are purchased and "installed" on the server. For example, if you purchased 50 client licenses and installed them on the server, up-to 50 connections at a time would be allowed. If you then purchased another server, you would need to buy another 50 client licenses for connections to that server.
From the above you can see that if you have more than 2 NT Servers you will want per seat, with the exception of a machine such as an Internet service server, which would have different people connecting to the site all the time, so you would need x client licenses, where x is the maximum number of people you expect to connect at any one time.
It is possible to perform a once only conversation of per server licenses to per seat licenses.
Q. How can I view what licenses I have installed/used?
A. NT Server has a utility called License Manager that enables you to inspect the licenses and their use:
Q. How do I install extra licenses?
A. This method is only for Per Server
For Per Seat
Q. How do I convert from Per Server to Per Seat?
A. This is legally a one way conversion process:
Q. How can I reset the License Information?
A. More information can be found in Knowledge Base article Q153140:
Q. How can I run the License Manager software on a NT Workstation?
A. The NT Workstation server tools do not include this software, however since Server and Workstation share much of the same code then you can just copy the following files from the %systemroot%/system32 directory on the server to the %systemroot%/system32 directory on the workstation
Q. How do I communicate with a Windows 95 client?
A. Enable the winpopup utility on all Windows 95 machines. The best way is to place winpopup in the Startup group under Program Files.
Q. How can I administer my domain from a Windows95 client?
A. Install the server tools that are part of the Windows NT installation CD. Right click on the file <CD ROM>:\clients\srvtools\win95\srvtools.inf
Q. How do I force a 95 machine to logon to a domain?
A. Using the Policy editor, create a new profile, or edit your existing profile
Q. How do I enable Windows 95 machines to use Group policies?
A. Copy the file group.dll from the windows95 installation CD to the system folder of each Windows 95 machine. This could be automated by adding the copy to a logon script.
Q. How do I enable Load Balancing on a Windows 95 machine?
A. Follow procedures below:
This will enable a Windows 95 machine to look for the script from the logon server.
A. Netware connectivity is available!
NT-based systems can integrate with existing Netware servers. The
IPX/SPX network protocol is supported on NT by using the NWLink
IPX/SPX Compatible Transport. So, on top of this protocol, you
need some tools to provide the integration.
Q. What are Client Services for Netware?
A. CSNW provides an NT workstation with basic file and printer connectivity to Netware. It supports both Bindery and NDS.
Q. What are Gateway Services for Netware?
A. GSNW is available only for NT servers. It includes the CSNW service to provide basic file and printer connectivity. In addition, GSNW allows an NT Server to act as a non-dedicated gateway. This means that your NT Server can connect to a Netware box and share the Netware drives as NT shares for all of your Microsoft network clients to access seamlessly (including those coming in via RAS).
While it works well, it's likely that it would be a bottleneck if you were going to link large networks using this single gateway!
The Netware server will need a special GROUP created called NTGATEWAY and a user account on Netware must be assigned to this group and to the gateway service on the NT Server.
Q. How do I install Gateway Services for Netware?
A. Perform the following:
Q. How do I attach to a NetWare 3.12 Server?
A. Perform the following:
Q. How do I attach to a NetWare 4.1 Server?
A. NetWare 4.1 connections is more complex than 3.12 connection as NetWare 4.1 has the complexity of NetWare Directory Services:
Q. What are File and Print Services for Netware?
A. CSNW and GSNW provide the ability to connect to Netware for file, printing and applications from your Microsoft network based clients.
FPNW does the reverse - it allows Netware clients to see the NT Server as if IT was a Netware box! FPNW allows you to appear as a Netware 3.12-compatible server.
Q. What is Directory Service Manager?
A. DSMN copies Netware user/group accounts to NT Server and will then propagate any changes BACK to the Netware box. This sharing of user/group information happens without you adding any software to the Netware side at all.
So, what does DSMN give you?
What is Migration Tool for Netware?
A. This is a tool to allow you to migrate user and group accounts as well as login scripts, files and directories from Netware servers to a PDC or BDC.
This tool is located under the Administrative Tools program group and is called "Migration tool for NetWare". When run you have to select the NetWare server to convert and the NT service to convert the information into. Also you have to select a prefix for the NetWare users and groups, nw_, is the norm. Once the migration starts it may take a long time depending on the number of records.
Q. What are the NT equivalents of NetWare Rights?
A. The table below outlines the NetWare rights and the NT equivalents:
| NetWare | Windows NT |
| Supervisor (S) | Full Control (All) |
| Read (R) | Read (RX) |
| Write (W) | Change (RWXD) |
| Erase (E) | Change (RWXD) |
| Modify (M) | Change (RWXD) |
| Create (C) | Add (WX) |
| File Scan (F) | List (RX) |
| Access Control (A) | Change Permissions (P) |
Q. How do I add the services for Macintosh?
A. Follow the instructions below:
Q. How can I read a Macintosh disk from Windows NT?
A. Mac Opener 2 by DataViz (http://www.dataviz.com/) allows Macintosh disks to be accessed by NT.
Q. Does NT RAS support AppleTalk?
A. No, however NBT (NetBIOS over TCP/IP) protocol is available for Macintosh from http://www.thursby.com (allowing Macintosh access to NT shares over RAS or LAN connections)
Q. Can NT act as an AppleTalk client?
A. No, however the AppleTalk protocol is available for NT from http://www.miramarsys.com
Q. How can I make a Macintosh PPP connection to Windows NT RAS?
A. There are full instructions at http://valleynet.on.ca/~aa158/mac-ras.html
Q. I am unable to write to the Microsoft UAM folder from the Macintosh?
A. The UAM (User Authentification Module) volume that shows up by default with SFM is set to read-only for the macs (except for Administrators). To change this start File Manager (winfile.exe) or Server Manager (under NT 4.0), from the MacFile menu choose View/Modify volumes. Select the volume, and clear the "This volume is read-only". You may also change permissions by clicking properties, then permissions. Permissions for Mac Users are set separately from standard NT file permissions.
Q. Does NT Workstation support RAID?
A. Workstation does not support fault tolerant RAID, e.g. RAID 1 or RAID 5, however it does support RAID 0 (stripe set without parity). Obviously hardware RAID will work as it is transparent to the Operating System.
There is much talk about changing the ProductType registry key to enable fault tolerance on NT Workstation and while it can be done this is against Microsoft licensing and would also be unsupported by Microsoft. Do NOT mail me asking for the method as I will not distribute it and will just delete the mail message without replying.
Q. What RAID levels does NT Server Support?
A. NT Server supports RAID 1 (disk mirroring) and RAID 5 (strip sets with parity check). NT also support RAID 0, which is Striping without Parity, however this offers no data redundancy.
Q. How do I create a Stripe Set with Parity?
A. Follow instructions below
Note - A stripe set will only use the lowest common disk space on each physical drive, i.e. with 3 disks of 100MB, 50MB and 40MB free, each part of the stripe set would only be 40MB with a maximum of 120MB partition in total.
Q. How do I recreate a broken Stripe Set?
A. When a member of a Stripe Set with Parity fails, you do not get a warning, and everything continues to work. Indications include when you start Disk Administrator and on the Event Log. Follow instructions below
Q. How do I remove a Stripe Set?
A. Follow instructions below
Note - You will lose ALL data on the stripe set
A. If NT is providing software RAID 0 or RAID 5 (stripe set or stripe set with parity) then neither the NT boot or system partition may be on a RAID 0 or RAID 5 volume. This is because using this type of volume requires the fault tolerant driver and that is loaded during NT's bootup. If you require NT to be on a stripped set then you will need to purchase hardware RAID.
Q. How do I create a Mirror Set (RAID 1)?
A. To create a mirror you should first create what the prime will be, and then you can create a mirror of it:
Q. How do I break a Mirror Set?
A. If part a Fault Tolerant is lost (by hardware failure etc.) then a message will be displayed "A disk that is part of a fault-tolerant volume can no longer be accessed". The drive will still be usable, but the Mirroring will have been suspended. To break the mirror set:
Q. How do I repair a broken Mirror Set?
A. Make sure you have an area of unpartitioned space that is at least the size of the Primary partition:
Q. Can I install NT on a stripe set?
A. No. See Q. Can NT be on a Stripe Set? for more information.
Q. How do I view all the applications/processes on the system?
A. You can use Task Manager that is standard part of NT (Right click on the Task Bar, and select Task Manager). There is also the PVIEW program that comes with Visual C++. For command line viewing there is TLIST that comes with the resource kit or ps that is freeware.
A. Follow procedures below:
Q. How big and where should my Pagefile be?
A. Below are things to consider.
Q. Users complain server response is slow, but when I use the server everything is fine.
A. It could be the server Screen Saver! The Open GL screen savers (especially the pipes) can use every CPU cycle off the Server. In general you should always use the blank screen saver on a server.
Q. Where can I get information about my machine?
A. There are several utilities available, however winmsd is good, and can produce a full printed report about your computer including IRP,DMA settings for devices. A command line version of winmsd is called winmsdp which is good to run regularly.
Q. Is there a RAM disk in NT4.0?
A. No. However there is a piece of software which creates a RAM disk. In general the NT cache does a very good job. Microsoft also produced a RAM disk which still works on NT 4.0 called NTRamdsk.
A commercial package SuperDisk-NT is now available from EEC Systems (http://www.eecsys.com/)
Q. How can I tell when NT was last started?
A. From the command prompt, enter the command net statistics workstation and at the top it says "statistics since ...". You will need to be quick with the Ctrl-S (to pause the output, Ctrl-Q starts it again). This will give the time since the workstation service was started, so if someone has performed a
net stop workstation
net start workstation
the time up will be incorrect.
The time NT has been up is also displayed from the PVIEW utility, and also there is a set of applications that display this information called 3UPTIMES.ZIP (there is a command line and a windows version included). These apps are from http://barnyard.syr.edu/~vefatica/. Be aware this gives incorrect information if the system has been up more than 50 days.
ElWiz from http://rcswww.urz.tu-dresden.de/~fh/nt/eventlog/#Elwiz will always give the right uptime (among lots of other usefull information) and it is free, too.
Q. How can I monitor disk performance?
A. NT's built in Performance monitor can be
used to monitor disk activity, however this is not active by
default, and needs to be activated by typing
diskperf -y
from the command prompt. You will then need to reboot, and then
disk activity can be viewed using Performance Monitor.
Q. How can I tell if I need a faster CPU?
A. You use Performance Monitor (Start - Programs - Administrative Tools - Performance Monitor) to see how much time the computer is waiting to use the CPU:
Q. I need to run a number of 16 bit apps, what is the best way to do this?
A. The best way is to create a shortcut to the 16 bit application, then right click on the shortcut and select properties. Click on the shortcut tab and check the box "Run in separate memory space". This will make the app run in its own VDM (Virtual Dos Machine) with its own memory space. This improves performance and system stability as one 16 bit app can no longer effect another's.
An application can also be forced to run in its own memory
space using:
start /separate <application name>
Q. I have lost my NT Installation CD-ROM case that had the Key number, how can I find it out?
A. The easiest way is to run WINMSD (Start - Run - Winmsd) and look at the Version tab. On the line above the register info you will see a number in the form of 50036-xxx-yyyyyyy-71345. The xxx-yyyyyyy is the number on the back of the CD case. This is also the same as the registry entry HKEY_LOCAL_MACHINE\SOFTWARE\Microsoft\Windows NT\CurrentVersion\ProductId.
Q. How can I run an Application at a higher priority?
A. It is possible to start an application at a priority other than normal, however if you run applications at high priority THEY may slow performance. Priorities range from 0 to 31, 0 - 15 are used by Dynamic applications, such as user applications and most of the operating system parts, 16-31 are used by real time applications like the kernel which cannot be written to the page file. Normal priority is level 8 (NT 3.51 normal was 7). The full list is
To start an application at a priority other than the default use the start command, e.g.
start /<priority> <application>, e.g. start /high winword
Be warned that if you run applications at high priority may slow performance as other application get less I/O time. To use the /realtime option you have to be logged on as a user with Administrator privileges.
To modify the privilege of a currently running application use Task Manager
It is also possible to increase the priority of whichever application is currently in the foreground, as opposed to the background processes.
Q. How can I monitor processes that start after I start the Performance monitor?
A. If you are running performance monitor in log mode, after the log is closed and you wish to view certain processes in the drop down list you only see processes that were running at the time you started the log. This is not true :-)
What this means is the instances shown are only those running at the start of the time window, so to add other processes running at other times, you may need to continue moving the start of the time window.
Q. How can I view information in the Event Log from the command line?
A. A utility called DUMPEL.EXE is supplied with the Windows NT Resource Kit which outputs a comma or tab separated file. It allows the events from all 3 logs to be dumped on the local or remote computer. For full information see the NT Resource Kit Tools help however below is the basic syntax.
dumpel -f <filename for output> [-s
\\<servername>] [-l <which log, e.g. system,
application,security>] -c
e.g., dumpel -f applog.txt -l application -c
This would dump out the application log as a comma separated file (alternatively use -t instead of -c for a tab separated file).
Another useful switch is -e <event> which allows you to only output a given event, e.g.
dumpel -f winlogon.txt -l application -c -m "winlogon"
Would display all information re winlogon (you don't need the quotes if the event is one word).
Q. How do I disable CD AutoPlay?
A. You can use the TweakUI utility and goto the paranoia tab, or edit the registry HKEY_LOCAL_MACHINE\SYSTEM\CurrentControlSet\Services\Cdrom and change Autorun 0x1 to 0x0 to disable autorun. If you use TWEAKUI it will only affect the current user, where as the registry entry will set it for all users. To achieve the same as TWEAKUI change HKEY_CURRENT_USER\Software\Microsoft\Windows\CurrentVersion\Policies\Explorer and set the value NoDriveTypeAutoRun from 0x95 to 0xff.
Q. How do I install a Joystick in NT?
A. On the NT CD goto directory drvlib\multimed\joystick\x86 and right click oemsetup.inf and select install.
Q. How do I change my Soundcards Settings (IRQ)?
A. From Control Panel, double click MultiMedia. Select the "devices" tab and expand the Audio Devices. Click on the soundcard and click properties. Click settings, and scroll to the setting you wish to change and click "change setting". Change the setting and click OK, then reboot.
Q. Does NT 4.0 support Direct X?
A. Direct X is built into NT 4.0, although limited. There is no way to upgrade the Direct X part of NT, however Service Pack 3 has complete Direct X 3.0 support. NT 4.0 pre Service Pack 3 supports the DirectDraw, DirectSound and DirectPlay components of DirectX.
Q. Does NT have a speaker driver?
A. There is no NT speaker driver like there was in DOS, however this used to hammer performance and it is better to buy a cheap soundcard.
The very nature of this driver prohibits its use. A preemptive multitasking operating system will not allow enough CPU cycles to generate the sound. The sound is generated by pulse with modulation which requires 100% of CPU time while the sound is being played. Sound cards offload this to their DAC chips
Q. How do I install my SoundBlaster Sound Card?
A. If you have one of the newer Plug and Play Sound Blaster cards then the install is simple.
If you have one of the older non-PNP sound cards download the file awent40.exe and follow the instructions that come with the file once expanded.
Q. How do I install a WaveBlaster card?
A. Follow the instructions below:
Q. How do I enable NumLock automatically?
A. The registry entry HKEY_CURRENT_USER\Control Panel\Keyboard. Change InitialKeyboardIndicators from 0 to 2 using the regedt32.exe registry editor. To set the numlock for before anyone logs on, change the .default user value from 0 to 2, e.g. HKEY_USERS\.DEFAULT\Control Panel\Keyboard\InitialKeyboardIndicators to 2.
An easier way is to turn NumLock on and the logoff using Ctrl-Alt-Del Logoff which will preserve the state of Numlock (logoff from Start menu does not do this).
Q. How do I disable Task Manager?
A. This can be done using the registry as follows
This can also be done using the policy editor
To remove Task Manager for all users just rename taskmgr.exe to something else, or if it is on a NTFS partition you can set the permissions so normal users cannot access it.
Q. How do I create a captive account?
A. It is not possible to create a captive account, however you can force a user to run a program, and if they close that program they can be logged out:
The file Logout.exe just logs out the user. It is also possible to restrict a Users applications using the Policy Editor. From the Policy Editor you can select which applications a User can run (make sure you give them Explorer!).
Microsoft have also created the zero administration kit which allows a user to be confined to a single application or a set of applications.
Q. Where should Login Scripts go?
A. Login scripts should be in the WINNT\SYSTEM32\REPL\IMPORT\SCRIPTS directory
Q. What should be in the Login Script?
A. This will vary from site to site, however
generally a login script will synchronize the time of the
workstations with the server (providing the servers time is
accurate!), and perhaps connect a home area (this is set using
User Manager). Net use x: /home will ask the domain server for
your home area location and connect to it. A login script may be
@echo off
net time \\johnserver /set /yes
net use p: /home
Q. Are there any utilities that help with login scripts?
A. With the NT resource kit you get KIX that enables you to write more advanced login scripts. There is also a freeware utility call KixTart.
Microsoft has released the Windows Scripting Host which is bound to be the next standard in all cases where scripting is necessary, including login scripts.WSH will be included in NT5 and can be downloaded at http://www.microsoft.com/management/wsh.htm.
Q. Is there a way of performing operations depending on a users group membership?
A. On the resource kit for NT you'll find a program called IFMEMBER, this is what you'll have to base your login script upon. Important safety tip, IFMEMBER works by checking for membership in a group and returning an ERRORLEVEL hence you'll have a bunch of IF THENS..
Q. How do I limit the disk space for a User?
A. NT server has no way to do this, however there is 3rd party software such as
Q. What variables are available for use with a User?
A. Below is a list of variables you can use in login scripts and other batch files. These may only be used on NT client/servers.
| %COMPUTERNAME% | Name of computer |
| %HOMEDRIVE% | Users local drive letter |
| %HOMEPATH% | The full path of the users home area |
| %HOMESHARE% | The share that contains the users home area |
| %LOGONSERVER% | This is the name of the machine that validates the user logon |
| %OS% | The operating the User is connected to |
| %PROCESSOR% | e.g. 486 (useful to put in a login script and ridicule if a 386 or below) |
| %USERDOMAIN% | Domain containing the Users Account |
| %USERNAME% | The name of the user |
Q. Can I add user accounts from a database?
A. There is a utility with the resource kit, ADDUSERS.EXE, that as an input excepts a database file (e.g. and Excel spreadsheet) and will add users and groups.
Q. Is there a utility that shows who is currently logged on?
A. The resource kit has a utility called WHOAMI.EXE. It displays the domain/workgroup and username.
Q. How can I change environment variables from the command line?
A. The resource kit has a utility called
SETX.EXE. It enables the user to change environment settings,
e.g.
setx johnvariable 1
setx johnvariable -k HKEY_LOCAL_MACHINE\...\DefaultDomainName
Q. How can I hide drive x from users?
A. This can be done using the TWEAKUI utility
from the "My Computer" tab, and just deselect the tick
next to drives you want to hide. All this does is change the
registry value
HKEY_CURRENT_USER\Software\Microsoft\Windows\CurrentVersion\Policies
\Explorer\NODRIVES which is a 32-bit word. The lower 26 bits of
the 32-bit word correspond to drive letters A through Z. Drives
are visible when set to 0 and hidden when set to 1.
Drive A is represented by the rightmost position of the bitmask when viewed in binary mode.
e.g. A bitmask of 00000000000000000000010101(0x7h)
The bitmask above hides local drives A, C, and E
Drives hidden using the NODRIVES setting are not available through Windows Explorer, under the My Computer icon, or in the File Open\Save dialog boxes of 32bit Windows applications. File Manager and the Windows NT command prompt are not affected by this registry setting.
Q. How do I make the shell start before the logon script finishes?
A. Change the registry value HKEY_CURRENT_USER\software\microsoft\windows nt\currentversion\winlogon\RunLogonScriptSync to 0, which means the shell starts before the logon script has finished. A value of 1 means the shell will not start until the logon script finished.
Q. How do I disable Window animation?
A. Using TWEAKUI on the General tab, you can unselect "Window Animation" which will stop the animation when a window is minimized/restored. This can also be accomplished using the registry:
Q. How do I reduce/increase the delay for cascading menus?
A. You can use TWEAKUI - Mouse tab and decrease/increase the menu time, however this can also be accomplished using the registry editor and changing the value HKEY_CURRENT_USER\Control Panel\Desktop\MenuShowDelay.
Q. How do I change the My Computer icon?
A. This can be changed using Themes for NT or the Plus Tab of Display settings, however it can also be changed using the registry editor
Q. How do I hide the "Network Neighborhood" icon?
A. You can use TWEAKUI and on the "Desktop" tab unselect "Network Neighborhood". This can also be done using the registry:
Q. Why can't I move any icons?
A. It is possible to configure NT to autoarrange the icons, which means you cannot manually move them. To turn off this feature, right click on the desktop (anywhere where there is not a window), Arrange Icons, and unselect auto-arrange.
Q. How can I find out which groups a user is in?
A. NT provides a means of getting information
about your domain account using the
net user <username> /domain
which includes information about group membership, however there
is a utility that ships with the NT resource kit called
SHOWGRPS.EXE that only shows the groups and the
usage is:
showgrps <domain>\<user>
e.g. showgrps savilltech\john
Q. I can no longer see items in the common groups from the Start Menu.
A. There is a registry flag that sets whether or not the common groups are displayed on the Start Menu. To disable this setting, set HKEY_CURRENT_USER\Software\Microsoft\Windows\CurrentVersion\Policies\Explorer\NoCommonGroups to 0 using the registry editor (regedit.exe). By default this value will not exist.
Q. How can I disable the Right mouse button?
A. For those systems running with Service Pack 2 or above, it is possible to disable the context menu as follows:
To remove this, just delete the value NoViewContextMenu and logout and login again (or set it to 0)
Q. How do I configure a user so they can change the system time?
A. The ability to change the time on an NT system is a Right that has to be granted through the User Rights Policy in User Manager.
Also see Q. Can I synchronize the time of a NT Workstation with a NT Server?
A. To add a new user to a domain you need to logon to the Server as an Administrator and run the User Manager for Domains Utility. Before adding a new user however, you should consider the different naming conventions that can be used, and there are really 4 main standards
It is important to stick to a standard, however unless this is a new installation, there will already be a standard to follow at your company. To add a user:
Q. How do I configure roaming profiles?
A. When you sit at a computer and change its attributes, such as the wallpaper, when someone else logs on they still have the environment that they last had when they logged on, and this is achieved using a profile for the user which is stored locally in the %systemroot%/profiles/<username>, e.g. d:\winnt\profiles\savillj.
If the user then sat at a different computer they would not have their setup, to achieve a profile that follows the user to different NT machines (a roaming profile) you need to store the users profile on a network share, that can be downloaded each time the user logs on. When the user logs off the network profile is updated, and a copy of the profile is saved locally. To configure roaming profiles perform the following
To make the profile mandatory, i.e. the user cannot change it, rename the file ntuser.dat to ntuser.man which is located at the base of the profile location.
As mentioned earlier, profiles are cached locally to machines, however this can be disabled by performing the following
Q. How can I configure each user to have a different screen resolution?
A. You cannot, the screen resolution is stored in the registry, in a non-user specific area and is therefore not configurable for individual users. The resolution would have to manually changed when the user logs on.
Q. How can I create a list of all User Accounts?
A. There a number of ways to produce a list of all user accounts in a domain (or accounts just on a machine):
It may be that none of these suit your exact needs, or you need to access the user list from within a program, you can use the NetUserEnum(), NetGroupEnum() and NetLocalGroupEnum() functions to get the required information. For each of these, the first argument is the computer name to perform the operation on, a null pointer will make it use the current system, or use NetGetDCName() to get the computer name of the Domain Controller. That's enough code for me, I'm starting to sweat :-)
Q. How do I change the colour used to display compressed files/directories?
A. The colour used is stored in the registry in hexadecimal format, therefore before you try and change the colour you need to work out what the value is in hex. Usually you know a colour as an RGB value like 255,0,0 for red and to convert this to Hex use the calculator supplied with Windows NT (calc.exe)
You will now have a hex value for the colour, e.g. 255,128,0 would be ff, 80, 0
If you would prefer to avoid the registry, you can make the same change using the TweakUI utility
Q. How can I add a user from the command line?
A. The simple answer is to use the net user <username> <password> /add (/domain) , however it is possable to automate not only the addition of the user, but also his/her addition to groups and the creation of a template user account directory structure. Many organisations have a basic structure with word, excel directories and some template files. This can be automated with a basic script. For example
addnew.bat
net user %1 password /add
/homedir:\\<server>\users\%1 /scriptpath:login.bat /domain
net localgroup "<local group>" %1 /add
repeat for local groups
net group "<groups>" %1 /add /domain
repeat for global groups
xcopy \\<server>\users\template
\\<server>\users\%1\ /e
cacls \\<server>\users\%1 /e /r Everyone
remove the everyone permission to the directory
cacls \\<server>\users\%1 /g %1:F /e
cacls \\<server>\users\%1 /g Administrators:F /e
Q. How can I configure the wallpaper to be displayed somewhere other than the center of the screen?
A. It is possible to configure NT to display a wallpaper anywhere on the screen, however you have to manually update the registry
Q. How can I move users from one machine to another?
A. If you just want to replace the PDC of a domain with a new machine, the easiest way is to install the new machine as a BDC and then promote to the PDC which removes the need of adding/removing users.
If you actually want to merge two domains or just move some accounts the procedure below should help. You will need the resource kit utility addusers.exe
Q. How can I stop the "Click her to begin" message?
A. There are 2 ways to accomplish this. If you have the TweakUI utility perform the following
If you don't have TweakUI you will need to edit the registry directly
Q. How can I configure a user to logoff at a certain time?
A. Basic user manager functionality allows the setting of working hours for a user, and using user account policies you can force NT to logout users who are logged on past their hours.
Q. How can I grant User Rights from the command line?
A. Usually user rights, such as Logon Locally, are grant by starting User Manager and selecting User Rights from the Policies menu. If you want to grant rights from the command line, for use with account generation scripts etc., the Windows NT Resource Kit Supplement Two includes a new utility called NTRIGHTS.EXE which grants user rights from the command line.
The program uses a series of codewords for each user right:
| Code Word | User Right |
| SeNetworkLogonRight | Access this computer from the network. |
| SeTcbPrivilege | Act as part of the operating system. |
| SeMachineAccountPrivilege | Add workstations to domain. |
| SeBackupPrivilege | Back up files and directories. |
| SeChangeNotifyPrivilege | Bypass traverse checking. |
| SeSystemtimePrivilege | Change the system time. |
| SeCreatePagefilePrivilege | Create a pagefile. |
| SeCreateTokenPrivilege | Create a token object. |
| SeCreatePermanentPrivilege | Create permanent shared objects. |
| SeDebugPrivilege | Debug programs. |
| SeRemoteShutdownPrivilege | Force shutdown from a remote system. |
| SeAuditPrivilege | Generate security audits. |
| SeIncreaseQuotaPrivilege | Increase quotas. |
| SeIncreaseBasePriorityPrivilege | Increase scheduling priority. |
| SeLoadDriverPrivilege | Load and unload device drivers. |
| SeLockMemoryPrivilege | Lock pages in memory. |
| SeBatchLogonRight | Logon as a batch job. |
| SeServiceLogonRight | Log on as a service. |
| SeInteractiveLogonRight | Log on locally. |
| SeSecurityPrivilege | Manage auditing and security log. |
| SeSystemEnvironmentPrivilege | Modify firmware environment values. |
| SeProfileSingleProcessPrivilege | Profile single process. |
| SeSystemProfilePrivilege | Profile system performance. |
| SeUnsolicitedInputPrivilege | Read unsolicited input from a terminal device. |
| SeAssignPrimaryTokenPrivilege | Replace a process level token. |
| SeRestorePrivilege | Restore files and directories. |
| SeShutdownPrivilege | Shut down the system. |
| SeTakeOwnershipPrivilege | Take ownership of files or other objects. |
To grant a user right perform the following
ntrights +r SeInteractiveLogonRight -u SavillTech\savillj
This would grant savillj of the SavillTech domain the right to log on locally. To grant the right on a remote machine use the -m switch
ntrights +r SeInteractiveLogonRight -u SavillTech\savillj -m \\<machine name>
Q. How can I get more room on the Task Bar?
A. If you move the cursor over the top of the task bar it will turn into a double headed arrow. When the cursor is the double arrow hold down the left hand button and drag upwards and the task bar's area will be increased one row at a time. Likewise you can shrink it by dragging downwards.
Q. How can I configure the system so all users share a common favourites folder?
A. It is possible to explicitly define the UNC for the favourites folder for each user by editing the registry. The steps would be as follows
Q. How can I change the local Administrator passwords on machines without going to them?
A. As you may be aware it is possible to change your password from the command line using the net user command, and if you combine this with the at command you can run the command on different machines, e.g.
at \\<machine name> <time> cmd /c net user
Administrator anythingyouwant
e.g. at \\savilljohn 18:00 cmd /c net user Administrator
password
The /c after cmd causes the command window to close after the command has been executed. An alternative to the at command would be the soon command
soon \\<machine name> cmd /c net user Administrator password
Q. How do I change my password?
A. Perform the following:
To change your password from the command line use the net user command, e.g.
net user <username> <password> (/domain)
To change from a program use the NetUserChangePassword() call.
Q. How can I configure default settings for new users?
A. When a new user logs in for the first time a copy of the default user profile (ntuser.dat) is copied into the users profile. To set default settings for a user you can edit the default ntuser.dat file. Anything you define under HKEY_CURRENT_USER can be changed by editing ntuser.dat.
To change default settings for a new user on a workstation perform the following:
Anyone logging onto the machine will now pick up these default settings.
To configure a default NTUSER.DAT for a domain perform the above and logon as a user to take these settings. You now need to export these out to the PDC.
If you have trouble exporting a profile see Q. I get an error when I try to export a profile other than Administrator. (I did :-) )
Q. How can I tell which User has which SID?
A. Perform the following:
If you knew the SID and just wanted to know the user name you could use the REG.EXE command (with Resource Kit Supplement 2), e.g.
reg query
"HKEY_LOCAL_MACHINE\SOFTWARE\Microsoft\Windows
NT\CurrentVersion\ProfileList\<SID>\ProfileImagePath"
e.g. reg query
"HKEY_LOCAL_MACHINE\SOFTWARE\Microsoft\Windows
NT\CurrentVersion\ProfileList\S-1-5-21-1843332746-572796286-2118856591-1000\ProfileImagePath"
And again this will show the ProfileImagePath giving you the user.
A. This was the standard behavior under NT 3.51, but for this to work under NT 4.0 as well as the user profile being ntuser.man instead of ntuser.dat the users profile folder also has to be .man so rename the users profile folder to <name>.man.
Q. How do I decrease the boot delay?
A. Logon as Administrator. In Control Panel double-click System. Click the Startup/Shutdown tab, and in the "Show list for" box set the number of seconds to the delay required. It is also possible to directly edit the boot.ini file (first set the file attrib -r -s, and then make sure you set it back attrib +r +s)
A. There is a file in your system32
directory, CONFIG.NT, that tells NT how to run DOS 5 sessions.
Add the line
device=c:\winnt\system32\ansi.sys
or
device=%systemroot%\system32\ansi.sys.
You will then have to start a command line using the COMMAND.COM that came with DOS 5.0 (dig out those old disks!).
Q. How can I configure the local machine to perform a task at a set time?
A. Use the at command, e.g. for a job to run
every weekday (like a backup)
c:\ at 20:00 /every:M,T,W,Th,F "<command string
e.g. backup>"
Q. How do I change the Organization name on NT?
A. Your company changed names again? To change the company name in NT is easy,
Q. How do I change the default location NT expects to find NT software for installation(i.e. CD)
A. Start the Registry editor, and change KHEY_LOCAL_MACHINE\SOFTWARE\Microsoft\Windows NT\CurrentVersion\SourcePath to the desired path (double click on the value to change it then press OK)
Q. How can I remove the Shut Down button from the login screen?
A. To remove the Shut Down button, start the registry editor, and change KHEY_LOCAL_MACHINE\SOFTWARE\Microsoft\Windows NT\CurrentVersion\Winlogon and change ShutdownWithoutLogon from 1 to 0.
This can also be accomplished using the policy editor (poledit.exe). Expand the Windows NT System - Logon tree and blank out "Enable shutdown from Authentication dialog box".
Q. How can I disable the Printer PopUp message?
A. Start the Registry editor, and change KHEY_LOCAL_MACHINE\SYSTEM\CurrentControlSet\Control\Print\Providers and set the entry NetPopup to 0. You should then reboot Windows (however stopping and restarting the print spooler will suffice). If the printer is on an NT server, than this setting needs to be set on the Server which controls the print queue.
Q. How can I Parse/Not Parse autoexec.bat?
A. The value HKEY_CURRENT_USER\Software\Microsoft\Windows NT\CurrentVersion\Winlogon\ParseAutoexec should be set to 1 for autoexec.bat to be parsed, or 0 for autoexec.bat not to be parsed.
Q. How do I add the Control Panel to the Start Menu?
A. Create a New folder under the start menu you wish to have it on. (administrator or All users) Name the New folder
Control Panel.{21EC2020-3AEA-1069-A2DD-08002B30309D}
Complete with the period, brackets and dashes.
Reboot the machine and there it is.
Q. How can I remove a program from the "Open With" when right clicking?
A. Each entry in the "Open With" has an entry in the registry HKEY_CLASSES_ROOT called <extension>_auto_file, e.g. doc_auto_file for work. To remove the entry just delete the base <extension>_auto_file tree in the registry. If you were unsure you could use the following:
Q. How do I add a path statement in NT?
A. Start Control Panel, double click the System icon, and goto the Environment Tab. Choose if it should be a user or system path defined, and click on the path variable, and then add the statement to the end of the current string (including a ;), then click set.
Q. Can I change the default Windows Background?
A. Using the Registry Editor (regedt32), edit the key HKEY_USERS\.DEFAULT\Control Panel\Desktop and double click the Wallpaper Key, and enter the value including directory (e.g. c:\winnt\savlogo.bmp).You can also change the background colour HKEY_USERS\DEFAULT\Control Panel\Colors, double click Background, and change value (e.g. 0 0 0 for black).
Q. How do I change the Start menu items under the line?
A. Items above the line are part of the logged in users profile (winnt/profiles/<user name>/Start Menu/Programs). Items under the line are part of the all user group (winnt/profiles/All Users/Start Menu/Programs). To change these click on Start - Settings - Taskbar & Start Menu - Start Menu - Advanced and then move directory to the All Users and then make changes. You can only set the All Users Folder if you are logged on as a member with Administrative Privs.
Q. How can I restore the old Program Manager?
A. NT 4.0 by default uses the "Explorer" shell (explorer.exe), however the old Program Manager (progman.exe) is still delivered with NT 4.0, and be configured to be the default shell using the registry:
Q. Is there a way to start NT in "Dos" mode?
A. The command shell is command.com, and NT can be started in this mode with command.com as the default shell. Just perform the steps in previous FAQ, but instead of changing the shell value to progman.exe, change it to command.com.
Q. How can I disable "Lock Workstation" when I press Ctrl-Alt-Del?
A. This cannot be done with a setting in the registry, however it is possible if you don't mind hacking one of the system dll files. The file that the ctrl-alt-del dialog is stored in is msgina.dll. Using any 32bit resource editor (such as one with a Win32 C++ compiler, Visual C++, Borland C++) you can edit this dll and remove the "Lock Workstation" button. Below are instructions for performing this with Visual C++ however for another resource editor find dialog #1650 and edit the attributes of the "Lock Workstation" to "inactive" or "invisible".
There is now a utility written by Alaxander Frink which automates the above process available at http://wwwthep.physik.uni-mainz.de/~frink/nt.html .
Q. How can I make NT powerdown on shutdown?
A. Follow the procedures below:
Q. How do I enable Ctrl-Esc to start Task Manager?
A. This was removed in release 4.0 of NT, however it can be restored by editing the registry:
Q. How can I allow non-Administrators to issue AT commands?
A. By default only Administrators can issue AT commands (which use the schedule service). It is possible to allow Server Operators to also submit AT commands:
You may want to recreate your emergency repair disk after making this change.
Q. How do I control Access to Floppy Drives/CD-ROM drives?
A. By default Windows NT allows any program to access the floppy and CD-ROM drives. In a secure environment you may only want the interactive user to be able to access the drives and this is accomplished using the registry:
Q. I have DOS, Windows95 and NT installed, and want them all to show on the boot menu.
A. You need a handy utility called bootpart, which creates multiple operating .sys files enabling DOS and Windows 95 to be shown on the boot menu:
Q. How do I change the Print Spool location?
A. Using the registry editor change the value HKEY_LOCAL_MACHINE\SYSTEM\CurrentControlSet\Control\Print\Printers\DefaultSpoolDirectory by double clicking on it and set it to the required area. This will change the print spool area for all printers, to change the print spool for only one printer move down to a printer key and create a value of type REG_SZ called SpoolDirectory and set this as where the spool files should be.
Q. How do I remove an App from Control Panel?
A. Each item in the Control Panel corresponds to a .cpl file. When Control Panel starts it search's %systemroot%/system32 for all .cpl files. To remove an item from Control Panel rename the .cpl file (e.g. to .nocpl).
An alternative to this if you only want certain users not to be able run a particular applet is to have the boot partition on NTFS, and remove the READ permission for these users/groups.
Have a look at Q. What are the .cpl files in the system32 directory? for more information on the .CPL files.
Q. How do I assign a drive letter to a removable drive?
A. It is not possible to assign a drive letter to a removable device using Disk Administrator, however you can assign drive letters to the other partitions leaving the letter unused that you want the removable drive to use. NT assigns drive letters to physical devices first (first partition) then to removable drives and then to other partitions (e.g. secondary partitions). For example if you had one harddisk with two partitions and a removable drive the letter assignments would be
To ensure that a removable drive receives a certain drive letter follow the instructions below:
Q. How do I configure a default Screen Saver if no one logs on?
A. This is accomplished using the registry editor:
Q. How do I change the Internet Explorer icon?
A. For Internet Explorer version prior to 4.0 follow the procedure below:
There is a program called MicroAngelo available from http://www.impactsoft.com which automates this procedure.
The solution above does not work for Internet Explorer 4.0 and above, the method is as follows:
There are some really nice IE icons at http://www.blably.com/iconstructions/ .
Q. How do I configure the default screen saver to be the Open GL Text Saver?
A. Follow the procedure below:
A word of caution, the Open GL screen savers use a lot of system resources, so I would not advise to use this, however I was asked :-)
Q. How do I enable Print Auditing?
A. If you need to check what is being printed, then you can enable Print Auditing:
Print events will now be sent to the Security log which can be read from the Event Viewer (Start - Programs - Administrative Tools).
Q. How can I create a new hardware profile?
A. If you are about to change hardware, you may want to create a copy of your current hardware config before starting which will enable you to revert to your old configuration:
Q. How do I add an item to the Right Click menu?
A. Follow the procedures below:
When you right click on a file the new entry will be displayed.
Q. I have entries on the Remove software list that don't work, how can I remove them?
A. Each entry on this list (Start - Settings - Control Panel - Add/Remove Programs) is an entry in the regisry under HKEY_LOCAL_MACHINE\SOFTWARE\Microsoft\Windows\CurrentVersion\Uninstall. Just remove the key for any entries you don't want.
Q. How can I disable Dr. Watson?
A. Dr. Watson can be disabled using the registry editor:
To re-enable Dr. Watson type drwtsn -i
Q. How do I create a network share?
A. It is possible to create a share from the command prompt by typing:
net share <share name>=<drive>:<dir>
/remark="<description>"
e.g. net share john=c:\data\johndrv /remark="Johns
drive"
A share can also be created using explorer:
It is possible to add a $ to the end of the share so it will appear hidden, and not visible from a network browse.
Q. How do I connect to a network share?
A. You can connect to a network share using the command prompt:
net use <drive letter>: <UNC>
e.g. net use f: \\johnpc\john
A share can also be connected to using explorer:
The advantage of using the "net use" command is you can connect to hidden shares, i.e. john$ (although you can also connect by manually typing the address in explorer), and also this can be used from within command files.
Q. How do I configure the boot menu to show forever?
A. The timeout is changed by editing the boot.ini file which is on the boot partition and changing the timeout parameter:
Q. How can I configure the machine to reboot at a certain time?
A. There is a command line utility shipped with the resource kit called SHUTDOWN.EXE that can be used to reboot the local machine
shutdown /l /r /y /c
Where /l tells it to shutdown the local machine, /r to reboot, /c to close all programs and /y to avoid having to say yes to questions. You can then combine this with the AT command (don't forget you need the Schedule service to be running (Start - Settings - Control Panel - Services) to use the AT command) to make this happen at a certain time:
AT <time> shutdown /l /r /y /c, e.g.
AT 20:00 shutdown /l /r /y /c
Additions to the at command could be /every:M,T,W,Th,F so it happens every day, e.g. AT 20:00 /every:M,T,W,Th,F shutdown /l /r /y /c
You will then be given 20 seconds before the machine is shutdown, to abort the shutdown type
shutdown /l /a /y
Q. How can I configure Explorer to start with drive x: ?
A. The procedure below is used to change the shortcut for Explorer in the start menu, however you could just as easily create a new shortcut on the desktop and then edit the properties of it and change the target.
Q. How can I decrease the time my machine takes to shutdown/reboot?
A. It is possible to manually shutdown each service (well some of them) and then shutdown the machine. To identify which services are running enter the command
net start
(you can add > [filename] to the end to make it output to a file, i.e. net start > services.lst). You can then try to shutdown each of them by entering the command
net stop "<service name>" ,e.g. net stop "spooler". Some services will ask you to enter a y to confirm, and for these just add /y to the end. You will be able to build up a list of all the services that can be manually stopped, and you should put these in a .bat file, e.g.
net stop "Computer Browser""
net stop "Messenger"
.
.
net stop "Workstation"
To the end of the file add the command
shutdown /r /y /l /t:0
to reboot the machine (leave of the /r to just shutdown the machine). You may also want to add @echo off to the start of the file. You could add a check to accept an input parameter to reboot or shutdown, e.g. save this file as shutfast.bat, and call using shutfast reboot, or shutfast shutdown
@echo off
net stop "Computer Browser""
net stop "Messenger"
net stop "Net Logon"
net stop "NT LM Security Support Provider"
net stop "Plug and Play"
net stop "Protected Storage"
net stop "Remote Access Autodial Manager"
net stop "Server"
net stop "Spooler"
net stop "TCP/IP NetBIOS Helper" /y
net stop "Workstation"
if %1==reboot goto reboot
shutdown /l /y /t:0
exit
:reboot
shutdown /l /y /r /t:0
exit
You could add a shortcut on the desktop for this batch file with the relevant parameter.
You can also decrease the time NT waits for a service to stop before terminating it by performing the following:
Q. How can I change the startup order of the services?
A. Each service belongs to a Service Group, and it is possible to modify the order that the groups start:
See Knowledge Base Article Q102987 at http://www.microsoft.com/kb/articles/q102/9/87.htm for more information
Q. How can I configure the system so that certain commands run at boot up time?
A. There is a utility called AUTOEXNT which is supplied in a zip file. You use perform the following:
When the system boots in future the AutoExNT service will check for the existence of the file autoexnt.bat and execute any commands in it.
A version of this is also shipped with the resource kit,
however it is better to use the downloadable version. To install
the Resource kit version you have to type
instexnt install
Q. What are the .cpl files in the system32 directory?
A. Each .cpl file represents one or more control panel applets (Start - Settings - Control Panel). Below is a list of common .cpl files and what Control Panel Applets they represent
| .cpl file name | Control Panel Applets |
| ACCESS.CPL | Accessibility options |
| APPWIZ.CPL | Add/remove programs |
| CONSOLE.CPL | Console |
| DESK.CPL | Display |
| DEVAPPS.CPL | PCMCIA, SCSI adapters and tape drives |
| INETCPL.CPL | Internet |
| INTL.CPL | Regional Settings |
| JOY.CPL | Joystick |
| MAIN.CPL | Fonts, keyboard, mouse and printers |
| MLCFG32.CPL | |
| MMSYS.CPL | Sounds and multimedia |
| MODEM.CPL | Modems |
| NCPA.CPL | Network |
| NTGUARD.CPL | Dr Solomons |
| ODBCCP32.CPL | ODBC |
| PORTS.CPL | Ports |
| RASCPL.CPL | Dial up monitor |
| SRVMGR.CPL | Server, services and devices |
| SYSDM.CPL | System |
| TELEPHON.CPL | Telephony |
| TIMEDATE.CPL | Date/time |
| TWEAKUI.CPL | TWEAKUI |
| UPS.CPL | UPS |
If you renames any of these files then the items they
represent in the Control Panel would not be shown, e.g.
rename timedate.cpl timedate.non
would remove the date/time control panel applet.
Also, setting HKEY_CURRENT_USER\Software\Microsoft\Windows\CurrentVersion\Policies\Explorer\NoSetFolders (REG_DWORD) to 1 will hide the Control Panel, Printers and My Computer in Explorer and Start Menu. You would normally need to create this value as it does not exist by default.
Q. How can I create a non-network hardware configuration?
A. You may have some machines that are not always connected to the network, and a solution is to create an alternate hardware profile which has all network devices and services disabled.
To actually use this configuration when you boot up the machine, after you select the operating system to load, e.g. "Windows NT Workstation 4.0" you will receive another menu with your hardware profile choices. Select the required and click enter.
Q. Can I administer my domain from an NT Workstation?
A. Yes, if you install the NT Server client based Administration tools:
Q. How can I remove the option "Press Spacebar for last known good config"?
A. The choice is hard coded into NT and therefore cannot be removed, however you can remove the functionality of what it does.
Several sets of configuration information are stored in NT, the current configuration and one or more sets of old configuration that are known to work. What NT does in the registry is to point to the current configuration and also a link to one of the other sets. It is possible to change the link to the last known good config, thus pressing space at bootup will have no effect.
Q. How do I enable drag and drop printing?
A. To enable drag and drop printing, all you have to do is create a shortcut to the printer on your desktop
You can then just drag files over the printer and they will be printed (providing they are registered file types that NT knows how to print)
Q. How can I configure the command prompt?
A. When you are in a cmd.exe session, it is possible to change the prompt to display other information, such as time, date, OS version etc. To change the prompt just use
prompt <text>
e.g. prompt johns prompt
While basic text will work it is not very helpful, and below is a list of all the codes you can use
$A & Ampersand
$B | Pipe
$C ( Open parenthesis
$D Current date
$E Escape code (ASCII code 27)
$F ) Close parenthesis
$G > greater-than sign
$H Backspace (erases previous character)
$L < Less-than sign
$N Current drive
$P Current drive with path
$Q = Equal sign
$S Space
$T Current time
$V Windows NT version number
$_ Carriage return and linefeed
If you have command extensions, you can also use
$+ Zero or more + characters depending on the depth of the
PUSHD directory stack
$M Displays the remote name associated with the current drive
letter
Q. How do I enable/disable command extensions?
A. When you use CMD.EXE, there are various extensions which are enabled by default. To enable/disable perform the following
Q. How can I disable the OS2/POSIX subsystems?
A. It is possible to disable one or both of these
Q. How can I configure NT to display a thumbnail of bitmaps as the icon instead of the Paint icon?
A. Perform the following, for best effect make explorer use large icons
Q. How can I configure NT to automatically refresh the screen?
A. Usually when you delete a file, create a new folder etc the screen does not update until you press F5 (for refresh), however you can automate this
This change is immediate and the next time you start Explorer the new auto update will be in effect.
Q. How can I run a control panel applet from the command line?
A. It is possible to run Control Panel applets from the command line by just typing
control <applet name>
There are some instances when the .cpl file represents more than one control panel applet when you need to pass a parameter of which applet to run, below is a list
e.g. control main.cpl printers
will run the printer control panel applet
However it is better to associate the .cpl extension with control.exe, which means you only need to type the applet name. This is accomplished using the assoc and ftype commands
assoc .cpl=ControlFile
ftype ControlFile=control.exe %1 %*
You can now just enter the command and it will run (be sure to include the .cpl extension).
For a full list of control panel applets to .cpl files see Q. What are the .cpl files in the system32 directory?
Q. How can I configure a program/batch file to run every x minutes?
A. NT comes with a powerful built in scheduling tool, the at command, however it is not really suitable for running a command every 5 minutes, to do this you would have to submit hundreds of at jobs to run at certain times of the day. There are a number of tools supplied with the Windows NT Resource Kit which will help.
The first is called sleep.exe, and is user to set a command
file to wait for n seconds (like the timeout command), and its
usage is simply
sleep 300
which would make the batch file pause for 5 minutes, so if you
wanted a command file/program to run every 5 minutes you could
write a batch file with the following (name run5.bat)
<program name>
sleep 300
run5
There are a number of problems with this approach, the command session has to stay open, and the 5 minutes does not start until the program has closed (however this can be solved by running the program in a separate thread by putting the word "start" in front of the program, e.g. start <program>).
Another program is called SOON.EXE and this schedules a task
to run in n seconds from now, to use soon the scheduler service
has to be running (start - settings - control panel - services).
Again you could create a batch file to use it (runsoon.cmd)
soon 300 runsoon.cmd
notepad.exe
Run the command file using the at command or soon, e.g. from the
command line
soon 300 runsoon.cmd
to get it started
Q. What registry keys do the Control Panel applets update?
A. The table below shows the control panel applet and the corresponding registry area, those not shown are stored in multiple areas.
| Accessibility Options | HKEY_CURRENT_USER\Control Panel\Accessibility |
| Date/Time | HKEY_LOCAL_MACHINE\SYSTEM\CurrentControlSet\Control\TimeZoneInformation |
| Devices | HKEY_LOCAL_MACHINE\SYSTEM\CurrentControlSet\Services |
| Display | HKEY_CURRENT_USER\Control Panel\Desktop and HKEY_LOCAL_MACHINE\HARDWARE\RESOURCEMAP\VIDEO |
| Fonts | HKEY_LOCAL_MACHINE\SOFTWARE\Microsoft\Windows NT\CurrentVersion\Fonts |
| Internet | HKEY_LOCAL_MACHINE\SOFTWARE\Microsoft\Windows\CurrentVersion\Internet Settings |
| Keyboard | HKEY_CURRENT_USER\Control Panel\Desktop |
| Modems | HKEY_LOCAL_MACHINE\SOFTWARE\Microsoft\Windows\CurrentVersion\Unimodem |
| Mouse | HKEY_CURRENT_USER\Control Panel\Mouse |
| Multimedia | HKEY_LOCAL_MACHINE\SOFTWARE\Microsoft\Multimedia |
| Ports | HKEY_LOCAL_MACHINE\HARDWARE\RESOURCEMAP |
| Printers | HKEY_CURRENT_USER\Printers |
| Regional Settins | HKEY_CURRENT_USER\Control Panel\International |
| SCSI Adapters | HKEY_LOCAL_MACHINE\HARDWARE\RESOURCEMAP\ScsiAdapter |
| Services | HKEY_LOCAL_MACHINE\SYSTEM\CurrentControlSet\Services |
| Sounds | HKEY_CURRENT_USER\AppEvents\Schemes\Apps\.Default |
| Tape devices | HKEY_LOCAL_MACHINE\HARDWARE\RESOURCEMAP\OtherDrivers\TapeDevices |
| Telephony | HKEY_LOCAL_MACHINE\SOFTWARE\Microsoft\Windows\CurrentVersion\Telephony |
| UPS | HKEY_LOCAL_MACHINE\SYSTEM\CurrentControlSet\Services\UPS |
Q. How can I run a script at shutdown time?
A. There is no direct way to accomplish this, however it is possable to write a script and then call the shutdown.exe utility that is shipped with the NT Resource kit
shutdown /l /y
You could then add a shortcut to this script on the desktop. An alternative is to use a utility called ShutUp which can be downloaded from http://www.zdnet.com/pcmag/download/utils/shutup-a.htm .
Q. How can I create my own tips to be shown when NT starts?
A. The tips that NT displays are stored in key HKEY_LOCAL_MACHINE\SOFTWARE\Microsoft\Windows\CurrentVersion\Explorer\Tips, and can easily be edited using the registry editor. You will notice that the names of the values are incremented by one so to add a new tip just either edit an existing one or create a new value (of type string) and set its name to the next available number.
The tips are displayed sequentially and the counter is stored in HKEY_CURRENT_USER\Software\Microsoft\Windows\CurrentVersion\Explorer\Tips\Next and can be changed if you want. The values are stored in hexadecimal.
To control if tips are shown set the value HKEY_CURRENT_USER\Software\Microsoft\Windows\CurrentVersion\Explorer\Tips\show to 01000000 to display and 00000000 to not display.
Q. How can I change the location of the event logs?
A. In event viewer you will notice that there are 3 different logs, Application, System and Security and each of these are mapped to a .EVT file in the %systemroot%/system32/config directory, however for performance/disk space reasons you may wish to move them and this can be done by performing the following
Q. How can I configure the default Internet Browser?
A. When you start an Internet Browser they usually perform a check to see if they are the default browser, however you may have turned this check off and want to change the default browser
Q. I receive a RDISK error, disk is full.
A. When you run the rdisk.exe it updates the directory %systemroot%\repair with the following files
| File | Registry Hive |
| AUTOEXEC.NT | This is not a registry hive but rather a copy of the autoexec.nt file located in the %systemroot%\system32 directory |
| CONFIG.NT | As above |
| DEFAULT._ | HKEY_USERS\.Default |
| NTUSER.DA_ | New user profile |
| SAM._ | Parts of HKEY_LOCAL_MACHINE\Security |
| SECURITY._ | HKEY_LOCAL_MACHINE\Security |
| SETUP.LOG | Details of location of system and application files along with cyclic redundancy check information for use with a repair |
| software._ | HKEY_LOCAL_MACHINE\Software |
| system._ | HKEY_LOCAL_MACHINE\System |
As the system is used the files setup.log, sam._ and security._ will grow. The sam._ and security._ files are only updated if rdisk.exe is run with /s qualifier, e.g. rdisk /s.
If the contents of the %systemroot%\repair directory exceeds 1.44 MB then you will receive the error "The Emergency Repair disk is full. The configuration files were saved in your hard disk". You should look at the contents of the repair directory and ascertain which file is the problem, i.e. setup.log is 1MB!
If setup.log if the problem then you can perform the following.
If the problem is not setup.log and is that the sam._ and security._ files are too large then the problem is there are too many accounts on the system so you need to delete some of your user accounts :-) Only joking!
What you can do is locate an ERD that was created early in the computers life where the sam._ and security._ files are small and copy these to the %systemroot%\repair directory and in future do not run rdisk.exe with /s option. This does mean that account information will not be recoverable and you will need to know what the Administrator password was when the original ERD was created (as if it was used accounts would be set back to this state).
Obviously you will still want to be able to restore accounts in the event of a disaster so I would suggest one of the following
For more information see Knowledge base article Q130029 at http://premium.microsoft.com/support/kb/articles/q130/0/29.asp
Q. How can I change the alert for low disk space on a partition?
A. By default when a partition has less than 10% free disk space an event ID 2013 is created with the following text
"The disk is at or near capacity. You may need to delete some files".
To view these events use Event Viewer, however it is possible to change the percentage that the alert is created
Q. Is it possible to delete/rename the Administrator account?
A. It is not possible to delete the Administrator account, if you try and delete it an error "Cannot delete built in accounts" will be displayed. You can however rename it, in fact it is recommended that the account be renamed to avoid the possibility of hacking, most hackers try to enter a system using an admin account. To rename the Administrator account perform the following
Q. How can I tell NT how much secondary cache (L2) is installed?
A. NT will try and detect how much L2 cache is installed at startup time however it cannot always tell and will use a default of 256. If you have more you can manually configure NT with your exact amount
Q. What commands can be used to configure the command window?
A. The commands below may be useful:
mode con lines=n - Where n is the number of
lines to keep (if n is larger than can fit on the screen a scroll
bar will be added)
mode con cols=n - Where n is the number of
columns to show (again a scroll bar will be added)
Q. What switches can be used in boot.ini?
A. The boot.ini file has a number of lines and some of these relate to the Windows NT Operating system, e.g.
multi(0)disk(0)rdisk(0)partition(2)\WINNT="Windows NT Workstation Version 4.00"
There are a number of switches that can be appended to the Windows NT startup line to perform certain functions. To edit the file perform the following
The switches that can be added are as follows
| /BASEVIDEO | The computer starts up using the standard VGA video driver. Use this if you have installed a graphics driver that is not working. |
| /BAUDRATE | Specifies the baud rate to be used for debugging. If you do not set the baud rate, the default baud rate is 9600 if a modem is attached, and 19200 for a null-modem cable. |
| /CRASHDEBUG | The debugger is loaded when you start Windows NT, but remains inactive unless a Kernel error occurs. This mode is useful if you are experiencing random, unpredictable Kernel errors. |
| /DEBUG | The debugger is loaded when you start Windows NT, and can be activated at any time by a host debugger connected to the computer. This is the mode to use when you are debugging problems that are regularly reproducible. |
| /DEBUGPORT= comx | Specifies the com port to use for debugging, where x is the communications port that you want to use. |
| /HAL=<hal> | Allows you to override the HAL used, for example using a checked version |
| /KERNEL=<kernel> | Same as above but for the kernel |
| /MAXMEM:n | Specifies the maximum amount of RAM that Windows NT can use. This switch is useful if you suspect a memory chip is bad. |
| /NODEBUG | No debugging information is being used. |
| /NOSERIALMICE=[COMx | COMx,y,z...] | Disables serial mouse detection of the specified COM port(s). Use this switch if you have a component other than a mouse attached to a serial port during the startup sequence. If you use /NOSERIALMICE without specifying a COM port, serial mouse detection is disabled on all COM ports. |
| /ONECPU | Disables the second (third, fourth) processor(s) in a multiple cpu machine. |
| /PCILOCK | Stops Windows NT from dynamically assigning IO/IRQ resources to PCI devices and leaves the devices configured by the BIOS. |
| /SOS | Displays the driver names while they are being loaded. Use this switch if Windows NT won't start up and you think a driver is missing. This option is configured by default on the [VGA] option on the boot menu. |
You can then edit the boot.ini file and either add Windows NT startup entries or modify existing entries, for example you could add a debug entry in the file as follows
multi(0)disk(0)rdisk(0)partition(2)\WINNT="Windows NT Workstation Version 4.00 [debug]" /debug /debugport=com2
Q. How can I change the Volume ID of a disk?
A. Windows NT provides functionality to change the volume name of a disk by using the command
label <drive>: <label name>
Windows NT does not provide built in functionality to change Volume ID's, however NT Internals has produced a free utility that can be downloaded from http://www.ntinternals.com/misc.htm called VolumeID which can change the volume ID of a FAT or NTFS volume. To view a drives current Volume ID you can just perform a dir <drive>: and the volume serial number is shown on the second line down, e.g.
Volume in drive E is system
Volume Serial Number is BC09-8AE4
To change enter the command
volumeid <drive letter>: xxxx-xxxx
Q. Is it possible to move the Task bar?
A. The Task bar can be moved any of the 4 sides, left, right, top and bottom. To move just single click on the task bar and drag to the side you wish the task bar to reside on.
If you have lost the task bar just press Ctrl-Esc to redisplay.
Q. How can I change the default editor used for editing batch files?
A. By default if you right click on a batch file and select Edit then the batch file will be opened in Notepad, however the application used can be changed as follows:
There is no need to reboot, the change take immediate affect. To reset back to notepad change the entry to
%SystemRoot%\System32\NOTEPAD.EXE %1
Q. What are the default protections on an NTFS boot partition?
A. Below is a list from Knowledge base article Q172008 at http://support.microsoft.com/support/kb/articles/q172/0/08.asp
<root>:\-
   Administrators - Full Control
   Creator/Owner - Full Control
   Everyone - Change
   System - Full Control
<boot partition>:\Msapps and <subdirectories>-
   Administrators - Full Control
   Creator/Owner - Full Control
   Everyone - Change
   Server Operators - Change
   System - Full Control
<boot partition>:\Program Files and <subdirectories>-
   Administrators - Full Control
   Creator/Owner - Full Control
   Everyone - Change
   Server Operators - Change
   System - Full Control
<boot partition>:\Temp-
   Administrators - Full Control
   Creator/Owner - Full Control
   Everyone - Change
   System - Full Control
<boot partition>:\Users-
   Administrators - Special (RWXD)
   Everyone - List (RX)
   System - Full Control
<boot partition>:\Users\Default-
   Creator/Owner - Full Control
   Everyone - Special (RWX)
   System - Full Control
<boot partition>:\Win32app-
   Administrators - Full Control
   Creator/Owner - Full Control
   Everyone - Read (RX)
   Server Operators - Full Control
   System - Full Control
<boot partition>:\%SystemRoot%-
   Administrators- Full Control
   Creator/Owner - Full Control
   Everyone - Change
   Server Operators - Change
   System - Full Control
<boot partition>:\%SystemRoot%\Config-
   Administrators - Full Control
   Creator/Owner - Full Control
   Everyone - Change
   Server Operators - Change
   System - Full Control
<boot partition>:\%SystemRoot%\Cookies-
   Administrators - Full Control
   Creator/Owner - Full Control
   Everyone - Change
   Server Operators - Change
   System - Full Control
<boot partition>:\%SystemRoot%\Cursors-
   Administrators - Full Control
   Creator/Owner - Full Control
   Everyone - Change
   Server Operators - Change
   System - Full Control
<boot partition>:\%SystemRoot%\Desktop-
   Administrators - Full Control
   Creator/Owner - Full Control
   Everyone - Change
   Server Operators - Change
   System - Full Control
<boot partition>:\%SystemRoot%\Fonts-
   Administrators - Full Control
   Creator/Owner - Full Control
   Everyone - Change
   Server Operators - Change
   System - Full Control
<boot partition>:\%SystemRoot%\Help-
   Administrators - Full Control
   Creator/Owner - Full Control
   Everyone - Change
   Server Operators - Change
   System - Full Control
<boot partition>:\%SystemRoot%\History-
   Administrators - Full Control
   Creator/Owner - Full Control
   Everyone - Change
   Server Operators - Change
   System - Full Control
<boot partition>:\%SystemRoot%\Inf-
   Administrators - Full Control
   Creator/Owner - Full Control
   Everyone - Change
   Server Operators - Change
   System - Full Control
<boot partition>:\%SystemRoot%\Java and <subdirectories>-
   Administrators - Full Control
   Creator/Owner - Full Control
   Everyone - Change
   Server Operators - Change
   System - Full Control
<boot partition>:\%SystemRoot%\Media-
   Administrators - Full Control
   Creator/Owner - Full Control
   Everyone - Change
   Server Operators - Change
   System - Full Control
<boot partition>:\%SystemRoot%\Nwspool-
   Administrators - Full Control
   Creator/Owner - Full Control
   Everyone - Change
   Server Operators - Change
   System - Full Control
<boot partition>:\%SystemRoot%\Profiles-
   Administrators - Full Control
   Creator/Owner - Full Control
   Everyone - Change
   Server Operators - Change
   System - Full Control
<boot partition>:\%SystemRoot%\profiles\Administrators
   Administrators - Full Control
   System - Full Control
<boot partition>:\%SystemRoot%\profiles\All Users and <subdirectories>-
   Administrators - Full Control
   Everyone - Read
   System - Full Control
<boot partition>:\%SystemRoot%\profiles\Default User and <subdirectories>-
   Administrators - Full Control
   Everyone - Read
   System - Full Control
<boot partition>:\%SystemRoot%\Profiles\<username> and <subdirectories>-
   Administrators - Full Control
   <username> - Full Control
   System - Full Control
<boot partition>:\%SystemRoot%\Repair-
   Administrators - Full Control
   Creator/Owner - Full Control
   Everyone - Read
   Server Operators - Full Control
   System - Full Control
<boot partition>:\%SystemRoot%\Shellnew-
   Administrators - Full Control
   Creator/Owner - Full Control
   Everyone - Change
   Server Operators - Change
   System - Full Control
<boot partition>:\%SystemRoot%\System-
   Administrators - Full Control
   Creator/Owner - Full Control
   Everyone - Change
   Server Operators - Change
   System - Full Control
<boot partition>:\%SystemRoot%\System32-
   Administrators - Full Control
   Creator/Owner - Full Control
   Everyone - Change
   Server Operators - Change
   System - Full Control
<boot partition>:\%SystemRoot%\System32\Cache-
   Administrators - Full Control
   Creator/Owner - Full Control
   Everyone - Change
   Server Operators - Change
   System - Full Control
<boot partition>:\%SystemRoot%\System32\Dhcp-
   Administrators - Full Control
   Creator/Owner - Full Control
   Everyone - Read (RX)
   Server Operators - Full Control
   System - Full Control
<boot partition>:\%SystemRoot%\System32\Drivers and <subdirectories>-
   Administrators - Full Control
   Creator/Owner - Full Control
   Everyone - Read (RX)
   Server Operators - Full Control
   System - Full Control
<boot partition>:\%SystemRoot%\System32\Inetsrv and <subdirectories>-
   Administrators - Full Control
   Creator/Owner - Full Control
   Everyone - Change
   Server Operators - Change
   System - Full Control
<boot partition>:\%SystemRoot%\System32\Lls-
   Administrators - Full Control
   Creator/Owner - Full Control
   Everyone - Change
   Server Operators - Change
   System - Full Control
<boot partition>:\%SystemRoot%\System32\Logfiles-
   Administrators - Full Control
   Creator/Owner - Full Control
   Everyone - Change
   Server Operators - Change
   System - Full Control
<boot partition>:\%SystemRoot%\System32\Netmon and <subdirectories>-
   Administrators - Full Control
   Creator/Owner - Full Control
   Everyone - Change
   Server Operators - Change
   System - Full Control
<boot partition>:\%SystemRoot%\System32\Os2 and <subdirectories>-
   Administrators - Full Control
   Creator/Owner - Full Control
   Everyone - Change
   Server Operators - Change
   System - Full Control
<boot partition>:\%SystemRoot%\System32\Ras
   Administrators - Full Control
   Creator/Owner - Full Control
   Everyone - Change (RWXD)
   Server Operators - Full Control
   System - Full Control
<boot partition>:\%SystemRoot%\System32\Repl
   Administrators - Full Control
   Creator/Owner - Full Control
   Everyone - Read (RX)
   Server Operators - Full Control
   System - Full Control
<boot partition>:\%SystemRoot%\System32\Repl\Export and <subdirectories>-
   Administrators - Full Control
   Creator/Owner - Full Control
   Everyone - Read (RX)
   Replicator- Change (RWXD)
   Server Operators - Change (RWXD)
   System - Full Control
<boot partition>:\%SystemRoot%\System32\repl\import and <subdirectories>-
   Administrators - Full Control
   Creator/Owner - Full Control
   Everyone - Read (RX)
   Replicator- Change (RWXD)
   Server Operators - Change (RWXD)
   System - Full Control
<boot partition>:\%SystemRoot%\System32\Spool and <subdirectories>-
   Administrators - Full Control
   Creator/Owner - Full Control
   Everyone - Read (RX)
   Print Operators- Full Control
   Server Operators - Full Control
   System - Full Control
<boot partition>:\%SystemRoot%\System32\Viewers-
   Administrators - Full Control
   Creator/Owner - Full Control
   Everyone - Change
   Server Operators - Change
   System - Full Control
<boot partition>:\%SystemRoot%\System32\Spool\Wins-
   Administrators - Full Control
   Creator/Owner - Full Control
   Everyone - Change (RWXD)
   Server Operators - Change (RWXD)
   System - Full Control
<boot partition>:\%SystemRoot%\Temporary Internet Files and <subdirectories>
   Administrators- Full Control
   Creator/Owner - Full Control
   Everyone - Change
   Server Operators - Change
   System - Full Control
Any other directories-
   Administrators - Full Control
   Creator/Owner - Full Control
   Everyone - Change
   Server Operators - Change
   System - Full Control
These permissions do not apply to a drive that is converted to NTFS using the CONVERT utility. A converted NTFS drive consists of all files and directories with Everyone - Full Control as the default permission. To reset to the normal protections see Q. How can I restore the default permissions to the NT structure?
Q. How do I configure the default keyboard layout during login?
A. You can change the keyboard layout using the keyboard control panel applet (start - settings - control panel - keyboard - Input Locales) however this does not affect the layout used during logon (which is by default English (United States)). To change this perform the following:
A table of the codes to the countries is given below:
| 00000402 | Bulgarian |
| 0000041a | Croatian |
| 00000405 | Czech |
| 00000406 | Danish |
| 00000413 | Dutch (Standard) |
| 00000813 | Dutch (Belgian) |
| 00000409 | English (United States) |
| 00000809 | English (United Kingdom) |
| 00001009 | English (Canadian) |
| 00001409 | English (New Zealand) |
| 00000c09 | English (Australian) |
| 0000040b | Finnish |
| 0000040c | French (Standard) |
| 0000080c | French (Belgian) |
| 0000100c | French (Swiss) |
| 00000c0c | French (Canadian) |
| 00000407 | German (Standard) |
| 00000807 | German (Swiss) |
| 00000c07 | German (Austrian) |
| 00000408 | Greek |
| 0000040e | Hungarian |
| 0000040f | Icelandic |
| 00001809 | English (Irish) |
| 00000410 | Italian (Standard) |
| 00000810 | Italian (Swiss) |
| 00000414 | Norwegian (Bokmal) |
| 00000814 | Norwegian (Nynorsk) |
| 00000415 | Polish |
| 00000816 | Portuguese (Standard) |
| 00000416 | Portuguese (Brazilian) |
| 00000418 | Romanian |
| 00000419 | Russian |
| 0000041b | Slovak |
| 00000424 | Slovenian |
| 0000080a | Spanish (Mexican) |
| 0000040a | Spanish (Traditional Sort) |
| 00000c0a | Spanish (Modern Sort) |
| 0000041d | Swedish |
| 0000041f | Turkish |
These can also be seen in the registry at HKEY_LOCAL_MACHINE\SYSTEM\CurrentControlSet\Control\Keyboard Layout\DosKeybCodes
Q. How can I add my own information to General tab of the System Control Panel applet?
A. When you receive a PC from a manufacturer you may see extra lines of description text and a company logo in the General tab of a System Control Panel applet, and this can be changed or added as follows:
You do not need to reboot the machine, the system control panel applet will pick up the files when started. The information above would give the following:
Q. How can I change the program associated with a file extension?
A. The easiest way is to:
An alternative method is to:
Q. Can I remove one of the startup folders on the Start Menu?
A. Unfortunately no, one is your own user startup folder (%system root%\Profiles\<Username>\Start Menu\Programs\Startup) and the other is the All Users (%system root%\Profiles\All Users\Start Menu\Programs\Startup). Both are system files and therefore undeletable.
Q. How do System Policies work?
A. You have a different System Policy for Windows 95 machines, and Windows NT machines. The Windows NT Policy editor is shipped with Windows NT server, and the Windows 95 System Policy editor is on the Windows 95 CD-ROM in the \ADMIN\APPTOOLS\POLEDIT directory. Policies alter registry settings on the target machine, and once the registry settings have been changed, the changes remain until changed by something else, therefore if you implement restrictions they will remain even if the policy file is deleted. By default, Windows clients look for policy files in the NETLOGON share on the domain controller (for NT, the machine that validates the logon, for Windows 95 the PDC unless you implement load balancing). Windows NT looks for the policy file NTCONFIG.POL and Windows 95 machines CONFIG.POL.
An important thing to note, is that NTCONFIG.POL/CONFIG.POL are not copied to BDC's by default and you have to setup directory replication.
A. In this example we will modify the Logon Banner:
Q. How do I create my own Policy template?
A. When system policy editor is run you can select which templates to include. There are 3 which are supplied with NT, and are stored in the %systemroot%/inf directory
The only ones you will use normally are common.adm and winnt.adm. Windows.adm was supplied for compatibility with windows95 machines, however policies created with Windows NT will not work on Windows 95 so this template is not used.
To select which templates to use, select "Policy template" from the options menu.
The structure of an adm file is simple and follows the structure shown below
CLASS MACHINE or USER
CATEGORY !!<string for first level>
____CATEGORY
!!<string for second level> this is optional
________POLICY !!<string
for name to be displayed next to check box>
________KEYNAME
!!<string for the keyname where the value is, do not include
the first \>
____________VALUENAME
!!<actual value name>
____________VALUEON
"1" VALUEOFF "0"
____________PART
!!<displayed in the bottom of the system policy screen>
TEXT
____________END
PART
________END
POLICY
____END CATEGORY
END CATEGORY
[strings]
<strings defined>="Windows NT Network"
Simple! The !! means what's after is a string and has to then be defined in the [strings] section. You don't have to use strings and can just put the entries directly be enclosing in quotes if it contains a space, it just might help for long key names if used repeatedly. For every keyword (except for class) there must be a end keyword, e.g. for category there must be a end category, same as an if and endif etc.
For examples, look at the common.adm and winnt.adm files and then compare to how they look in the system policy editor to get the display and effect you want. There are many other combinations and effects such as a drop down box which can be accomplished using the following
____PART
!!<string> ____DROPDOWNLIST
____VALUENAME
""<actual value>
________ITEMLIST
____________NAME
"<string>" VALUE NUMERIC n
____________NAME
"<string>" VALUE NUMERIC n
____________NAME
"<string>" VALUE NUMERIC n
________END
ITEMLIST
____END
PART
Q. Where can I get information on Profiles and Policies?
A. There is an excellent page at http://www.usyd.edu.au/su/is/dts/DTSwinNTProfiles.html which covers the subject well.
A. Logon as the Administrator (or a member of the Administrators group) and perform the following
It is also possible to configure auditing on a file/directory. Right click on the file/directory, select properties, and select the security tab and then select auditing.
Q. How do I view/clear the security log?
A. Logon as the Administrator (or a member of the Administrators group) and perform the following
Q. Where can I get more information on the Event Viewer?
A. See Frank Heyne: Windows NT Eventlog (English) for more information
Q. Where can I get information on NT security problems?
A. There are various sites:
Q. How can I restore the default permissions to the NT structure?
A. Follow the procedure below:
The procedure above will only work on an NT 3.51 system. To perform the above on an NT 4.0 system you require the Windows NT Resource Kit SUpplement 2 and should perform the following
FIXACLS sets the permissions to the values defined in %SYSTEMROOT%\INF\PERMS.INF. Therefore, access to this file is also required to run FIXACLS.
Q. How can I copy files and keep their security and permissions?
A. By default when you copy files from one
NTFS partition to another, the files inherit their protections
from the parent directory. It is possible to copy the files and
keep their settings using the SCOPY program that
comes with the NT resource kit. SCOPY can copy owner and security
audit information:
SCOPY c:\savilltech\secure.dat d:\temp\ /o /a
would copy the owner and auditing information. You can also use
/s to copy information in subdirectories.
The restriction for this command is that both the origin and target drives must be NTFS or the command will fail.
Q. How do I enable auditing on certain files/directories?
A. Auditing is only available on NTFS volumes. Follow the instructions below:
You must ensure that File access auditing is enabled (Start - Programs - Administrative Tools - User Manager - Policies - Audit).
These events can then be viewed using the Event Viewer (Start - Programs - Administrative Tools - Event Viewer - Log - Security)
Q. How do I use the System Key functionality of Service Pack 3?
A. Service Pack 3 introduced a new feature in NT with the ability of increasing security on the SAM database. This is performed by introducing a new key in one of 3 modes
To generate the system key you use the syskey.exe, however be warned, once you activate the encryption you cannot turn it off without performing a system recovery using an ERD produced before syskey was enabled. To enable encryption perform the following
Once rebooted if you choose a password once the GUI phase of NT starts a dialog box will be displayed and you should enter the password you gave and click OK, after that you may log on as normal. If you choose floppy disk you will be prompted to insert the disk and then click OK
Although you cannot remove the system key, you can change the mode by running syskey.exe and click Update. You will be asked to either enter the existing password or insert the system key floppy if changing from one of these modes.
For more information see Q143475 at http://www.microsoft.com/kb/articles/q143/4/75.htm
Q. How do I remove the System Key functionality of Service Pack 3?
A. As stated in the previous FAQ there is not a simple remove function however if you restore the SAM from an ERD that was taken before the system key was enabled, it will remove this feature from the system.
Q. How can I configure the system to stop when the security log is full?
A. To avoid security logs being lost you can configure the system to halt if the security log becomes full so that only Administrators can logon, they can then archive the log and purge
When this happens the OS will display a BSOD.
Q. What backup software is available for Windows NT?
A. Windows NT ships with NTBACKUP.EXE which is suitable for backing up most installations however its features are quite basic, for the larger more complex installations one of the following may be worth a look
A. Before you can add a tape drive you should first ensure that the correct SCSI driver is loaded for the card the tape drive is connected to. Once the SCSI driver is loaded you should perform the following
Q. What types of backup does NTBACKUP.EXE support?
A. NTBACKUP.EXE supports 5 different types of backups
Q. What backup strategies are available?
A. The main backup strategy is on a weekly plan as follows
As you know an incremental backup only backs up those files that have changed since the last backup and then sets them as backed up so this type of backup should be quite fast. In the event of a failure you would have to first restore the normal backup and then any subsequent incremental backups.
An alternative would be as follows
Differential backups and incremental backups are the same except that differential does not mark the files as backed up, therefore files backed up on Monday will still be backed up on Tuesday etc. Therefore to restore the backup you would only need to restore the normal backup and the latest differential backup.
It is important to not just have on week's worth of tapes, you should have a tape rotation and have maybe 10 tapes and rotate on a fortnightly basis.
If you wanted an extra backup as a one off you would use a copy backup as this does a full backup but does not mark files as backed up and therefore would not interfere with other backup schemes in use.
Q. What options are available when using NTBACKUP.EXE?
A. Once you start NTBACKUP a list of all drives on the machine will be shown. You can either select a whole drive or double click on the drive and then select directories. Once you have selected the drives/directories click the Backup button.
When performing a backup there are a number of fields that should be completed.
Q. Can I run NTBACKUP from the command line?
A. NTBACKUP is fully usable from the command line using the format below
ntbackup <operation> <path> /a /b /d "text" /e /hc:<on/off> /l "<filename>" /r /t <backup type> /tape:n /v
The parameters have the following meanings
| <operation> | This will be backup . If you wanted to eject a tape you could enter eject (but must also include the /tape parameter) |
| <path> | The list of drives and directories to be backed up. You may not enter file names or use the wildcard character |
| /a | Append backup sets to the end of the tape. If /a is omitted then the tape will be erased |
| /b | Backup the local registry |
| /d "text" | A description of the tape |
| /e | Logs only exceptions |
| /hc:<on/off> | If set /hc:on then hardware compression will be used, if /hc:off then no hardware compression will be used. |
| /l "<filename>" | Location and name for the logfile |
| /r | Restricts access (ignored if /a is set) |
| /t <backup type> | The type of backup, normal, Incremental, Differential, Copy or Daily |
| /tape:n | Which tape drive to use (from 0 to 9). If omitted tape drive 0 is used |
| /v | Performs verification |
Q. How do I schedule a backup?
A. Before a backup can be scheduled, you must ensure the scheduler service is running on the target machine, it does not have to be running on the issuing machine. For information on the schedule service see Q. How do I schedule commands?
Once the scheduler service has been started it is possible to submit a backup command using the ntbackup.exe image (image is a name for an executable)
at 22:00/every:M,T,W,Th,F ntbackup backup d: /v /b
The command above would schedule a backup at 10:00 p.m. on weekdays of drive D: and the local registry with verification.
A. To restore a backup saveset is simple and will depend on what was backed up, however the basics are
Q. How do I backup open files?
A. Sometimes fills can be corrupted as a backup program will try to backup an open file and when restored the file is corrupt. To stop NTBACKUP from backing up open files perform the following
If you do have "Backup files in use" set to 1 then you should also set the following parameter
HKEY_CURRENT_USER\Software\Microsoft\Ntbackup\User Interface\Skip open files
The values for this are
0 - Do not skip the file, wait till it can be backed up
1 - Skip files that are open/unreadable
2 - Wait for open files to close for Wait time (which
is another registry value in seconds)
For more information have a look at Q159218 (http://premium.microsoft.com/support/kb/articles/q159/2/18.asp)
To backup open files without corruption you should look at Open File Manager software from http://www.stbernard.com (yeah the advert with the cute dog!). You can download a 15 day free trial.
Q. What permissions do I need to perform a backup?
A. The operator performing the backup requires the "back up files and directories" user right. This can be given directly using user manager, or the preferred way is to make the user a member of either the Administrators group or the backup operators group.
Q. How do I backup the registry?
A. Most of the registry hives are open, making them unable to be copied in the normal way, however there are several methods available to you
Q. How do I create an Emergency Repair Disk?
A. From the Start Menu, select Run, and type RDISK. Click on Update Repair Info. It will then recreate the repair information stored in the winnt\repair directory. It will ask if you want to create a repair disk, insert a blank formatted disk and select Yes. RDISK /S updates the information in the %systemroot%/repair and also the SAM and SECURITY keys. Permissions on the repair should be strict as a user with access to the files could create a repair disk and use it to crack the system passwords.
Q. How do I create an NT Boot Disk?
A. Follow the steps below
Q. I get the error "Can't find NTLDR"
A. This is a core file which must be in the root directory, and that fact that it cannot find it may mean other files are also missing, however to fix this problem perform the following:
Q. How do I recover a lost administrator password?
A. If there are no other accounts in the administrator group then the only way is to reinstall NT into a new directory (not the same, as it will upgrade and see the old password) and it will let you enter a new Admin password. Also if you have an old ERD that you knew the password at time of making, you could use this and restore the SAM and security portions of the registry.
There is also a piece of software from http://www.winternals.com that can break into an NT system (LockSmith) that will change any password. The software is not free, and will cost around US$100.
A similar piece of software is also available from http://www.mirider.com that allows you to boot off of a set of disks and change the Administrator password.
Q. I have set a drive to no access, now no-one can access it.
A. Logon as an Administrator and then perform the following
Q. If I copy a file with Explorer or from the command line, the permissions get lost.
A. The only time a file keeps it permissions if is it is moved on the same partition. If it is copied it inherits the protection of the owning directory (a move across drives is a copy and delete). Also FAT does not support permissions so anything copied to FAT will lose protections.
Q. How can I get my taskbar back?
A. Press Ctrl-Alt-Del, then select Task Manager, click the applications tab, select New Task, and type Explorer.
Q. I get the error "NTOSKRNL.EXE missing or corrupt" on bootup.
A. This is usually due to an error in the
boot.ini file. The entry for NT is either missing or incorrect.
Edit the boot.ini file and check the entry for NT is correct, for
example for an IDE disk the entry should look something like
multi(0)disk(0)rdisk(0)partition(2)\winnt="Windows
NT workstation"
Check that disk and partition are correct. If you have recently
added a new disk or altered the partitions try changing the
disk() and partition() values. If you are sure everything is OK,
then the actual file may be corrupt so copy NTOSKRNL.EXE off of
the installation CD onto the %systemroot%/system32 directory.
Q. How do I configure Directory Replication?
A. Directory Replication is the process of replicating directories and their contents from one machine to one or more machines. The only machines that can be export servers are Windows NT Server machines. Import servers can be an NT server, NT workstation or OS/2 LAN Manager machine.
The main usage for Directory Replication is for the export of login scripts from the PDC to the BDC(s), where the PDC is the export server and the BDC the import server. This means when you login the BDC can also supply the login script as well as the authentication of the user, leaving the PDC free. This is the case that will be explained below.
The user has now been added to the domain, and the export server now needs to be configured
You may be wondering why you should keep your login scripts in the export area, when your NETLOGON share is import/scripts, well it will actually replicate to itself from the export/scripts to import/scripts so they will be the same.
Some people have problems with replication and adding Repuser to the Domain Administrators group may fix the problem. Also only directories directly under the /export directory will be replicated, files will not be, they have to be in a subdirectory of export.
Q. What tuning can I perform on Replication?
A. There are several registry settings that can be configured for Replication:
Q. How do I remotely create an Emergency Repair Disk?
A. You can schedule an ERD creation using
at \\<machine name> <time> /interactive
/every:M,T,W,Th,F %windir%\system32\rdisk /s-
It may be preferable to store the contents of this disk on a location at the server, so the following batch script could be used:
%windir%\system32\rdisk /s-
net use z: \\<server name>\temp /persistent:no
if not exist z:\%computername% md z:\%computername%
copy %windir%\repair\*.* z:\%computername%\
net use z: /delete
exit
This would then be submitted as
at \\<machine name> <time> /interactive
/every:M,T,W,Th,F \\<server>\<share>\ERD.BAT
You could also just put the call to ERD.BAT in the login script so the contents of the repair disk will be updated every time the user logs on.
Q. How do I promote a Backup Domain Controller to the Primary Domain Controller?
A. When possible you should always promote a BDC to the PDC while the main PDC is still active, in this way the original PDC will be demoted to a BDC and no information will be lost, however sometimes the PDC will not be available (i.e. its crashed) and a BDC needs to be promoted, as in the absence of a PDC, a BDC does not automatically promote itself.
Q. How do I reinstate my old PDC back into the Domain as the PDC?
A. It is not possible to have 2 PDC's in a domain so assuming the machine crashed, i.e. has not been demoted to a BDC before being shutdown, then when it starts it will still be configured to be a PDC
Q. I have installed Office 97 now I can no longer use Desktop Themes.
A. There was a bug with Office97 that corrupted the JPEG loader. Download the patch (ThemeFix.exe)
Q. I cannot delete a file called AUX.BAT or COM1!
A. A file of which the name (or a part of it) is equal to a DOS devices (NUL, COMx, AUX, LPTx, PRN...) cannot be deleted with Explorer or the usual DEL syntax. Use DEL \\.\drive:\path\AUX.BAT instead (replace drive and path with appropriate values). (The files may be the remains of a failed installation, you can create them e.g. with COPY some existing file \\.\drive:\path\COM1)
Q. The AT command does not work!
A. A sine qua non to use AT is a running Schedule service. To start it, type 'net start schedule' on the command line or use Control Panel/Services (if you want to use it regularly, set the Startup Type to Automatic). A common problem is that people try to use the example given in the online help: AT sometime CMD /C DIR > TEST.OUT.
Unfortunately, in NT 4.0, this does not work anymore. You must use AT sometime CMD /C "DIR > TEST.OUT" instead. The execution of the command starts by default in %systemroot%\system32, as can be seen from the output of the above example. You should specify the complete path if the command is in a different directory, e.g. AT sometime C:\TEMP\TEST.BAT. A further problem is that the command is executed in the security context of the LOCAL SYSTEM account, not the caller. However, the SYSTEM account does not have access to network resources, so your program cannot reside or access files on mapped drives (even if they are mapped from the local machine!). Also, environment variables (e.g. PATH) may be set differently. You can test the environment interactively with AT sometime /INTERACTIVE CMD.
Q. I can't format a disk/ create an Emergency Repair disk?
A. There are a number of possible problems. Firstly if using Service Pack 2 ensure you have the kernel fix applied. Also some virus killers (such as Dr Solomons) lock up drives making a format impossible as NT thinks the drive is locked (this is why you can't create an Emergency Repair disk). Stop the virus process using control panel - services and click on the Virus Killer process and press stop. Once the disk is formatted or the Emergency Repair disk go back to control panel and start the virus killer process again.
Q. When I change CD's/access the floppy drive NT crashes.
A. This is probably the bug in Service Pack 2. If you have service pack 2 then apply the KERNEL Fix.
Q. After a new installation of NT, I can logon but no shell starts.
A. Usually a normal user will have this problem, not an Administrator, as the problem is security on files. To cure this problem the security on the %systemroot% needs to be set so the Everyone group has RX access (Read, Execute)
If the shell does not start from any account you will need to:
For more information see http://www.microsoft.com/kb/articles/q155/5/79.htm
Q. I have a Matrox Millenium graphics card and the windows blink and flash when moved.
A. If you are using the graphics card at 1600 x 1200 resolution in True Color (24-bit) or True Color (32-bit) mode, a window's frame may blink or flash when you drag the window across the screen. This is a known problem, and resolve, enable the Show Window Contents While Dragging option from the Plus tab on the Display control dialog (Start - Settings - Control Panel - Display)
Q. When I start NT I get NTDETECT twice.
A. This is caused by a missing or corrupt NTDETECT.COM. To resolve, copy the latest NTDETECT.COM from either the latest service pack, or if no service packs have been applied, from NT installation disk 1.
Q. My desktop disappears after a crash.
A. By default, if Explorer crashes it automatically restarts, however this may have been corrupted or changed so using the registry editor change the value HKEY_LOCAL_MACHINE\SOFTWARE\Microsoft\Windows NT\CurrentVersion\Winlogon\AutoRestartShell to 1.
Q. I have installed a second CPU, however NT will not recognize it.
A. When moving from a single CPU to dual-CPU,
multiprocessor versions of a number of NT files, including the
HAL and the OS kernel, must be installed. The UPTOMP.EXE
utility, contained in the NT Resource Kits, installs the
multiprocessor files. The files can be installed manually
(see the MS Knowledge Base articles Q156358 "How to Manually
Add Support for a Second Processor" and Q168132 "After
Applying Service Pack NT Reports Single Processor").
The MS Knowledge Base article Q142660
(http://www.eu.microsoft.com/kb/articles/q142/6/60.htm
) "Upgrade from Uni- to Multiprocessor (Uptomp.exe) and
Win32k.sys" describes a known problem when using UPTOMP.EXE
on a version 4.0 NT system. The fix, described in the
article, adding the following line to the file uptomp.inf,
located at the base directory of the Resource Kit installation,
e.g., reskit.
win32k.sys = 0, 2, win32k.sys
Finally, if you install the multiprocessor files on a system to which a Service Pack has been applied, you probably need to reapply the Service Pack after running UPTOMP.EXE and before rebooting. Until you reapply the Service Pack your disk contains a mix of file versions, with the multiprocessor files at the revision level of the distribution media and files already present at the Service Pack revision level. Such a mix of versions can cause your reboot to fail.
Q. I reinstalled NT, now I cannot logon.
A. When you reinstall NT, a new SID is created. It is therefore necessary to remove the computer account for the machine from the NT server, and then add a new entry.
Q. I have Windows 95 installed, and I am trying to start the NT installation but it fails.
A. If you want to install NT with 95
installed, start a DOS session (command.com) and first type
lock
which enables direct disk access for the NT installation program.
Remember also to use winnt.exe (not winnt32.exe)
Q. An Application keeps starting every time I start NT.
A. Applications can be started from a number of places
The easiest way would be to search the registry using REGEDIT on the application name
Q. Each time I start NT I get a file delete sharing violation?
A. There is a problem with TweakUI and the clear document history at startup option which can result in an error "Cannot delete <filename>, there has been a sharing violation". Disable the TweakUI Document History clear option or live with pressing OK each time.
Q. Sometimes when I run a program or Control Panel applet it says "no disk in drive a:".
A. It is possible the NT path statement has an "a:" included. Check the following
A. Run the "RDISK /S" a few times and this error will fix itself.
Q. I have installed Service Pack 3, now I cannot run Java programs.
A. Download the latest version of Internet Explorer which includes the latest virtual machines. There is also a hotfix for Service Pack 3 available from Microsoft ftp://ftp.microsoft.com/bussys/winnt/winnt-public/fixes/usa/nt40/hotfixes-postSP3/archive/java-fix/JAVAFIXI.EXE .
Q. Every time I start NT, explorer is started showing the system32 directory.
A. This is caused by an incorrect program call at startup, search the areas a program can be started from for an incorrect entry, these are listed at An Application keeps starting every time I start NT.
Q. I have removed my IDE CD-ROM drive, now NT will not boot.
A. Unless it is hardware related, such as you have not connected the cable correctly or you have not set the master/slave correctly you need to perform the actions below before disconnection the CD-ROM drive. Therefore if you have already disconnected the CD-ROM you should reconnect it temporarily.
You should not be able to boot normally. See Knowledge base article Q125933 for more information.
A. This is usually caused by an incorrect mapi32.dll, sometimes software installs the Windows95 version. Copy mapi32.dll from your NT installation CD-ROM to %systemroot%/system32.
Q. What information is shown in the Blue Screen of Death (BSOD) ?
A. The NT operating system has 2 basic layers, the user mode and kernel mode. The user mode cannot directly access hardware, is limited to an assigned address space and operates at Ring 3 (lower priority). If a user mode program has an error, then NT just halts the programs process and generates an Operation error, and as the application runs in its own virtual address it cannot affect any other program. Common components that run in user mode are
NT 4.0 introduced a change in the NT architecture as Kernel mode process run much faster (Ring 0) they moved Video and Printer drivers from User mode to Kernel mode. Kernel mode is a privileged processor mode, allowing direct access to the memory and hardware. Kernel mode errors are not usually recoverable and a reboot of the system will be required. The BSOD is a built in error trapping mechanism which is used to halt any further processing to avoid system/data corruption. This means a faulty graphics/print driver could now crash NT. Components in kernel mode are
But what does the BSOD (or STOP message screen) show? Below is the basic structure of the BSOD, however what you see will differ and you may not have some of the sections as I'll explain below
--------------------------------------------------
Section 1: Debug Port Status Indicators
DSR CTS SND
--------------------------------------------------
Section 2: BugCheck Information
*** STOP: 0x0000000A (0x00000002,0x00000000,0xDB30442D)
IRQL_NOT_LESS_OR_EQUAL *** Address db30442d has base at db300000
- matrxmil.SYS
CPUID: GenuineIntel 5.2.4 irql:1f SYSVER 0xF0000565
--------------------------------------------------
Section 3: Driver Information
| Dll Base | DateStmp - Name | Dll Base | DateStmp - Name |
| 80100000 | 2cd348a4 - ntoskrnl.exe | 80400000 | 2cd348b2 - hal.dll |
| 80010000 | 2cd348b5 - ncrc810.sys | 80013000 | 2cda574d - SCSIPORT.SYS |
etc..
--------------------------------------------------
Section 4: Kernel Build and Stack Dump
Address dword dump Build [1381] -Name
xxxxxxxx xxxxxxxx xxxxxxxx xxxxxxxx xxxxxxxx xxxxxxxx xxxxxxxx -
matrxmil.SYS
xxxxxxxx xxxxxxxx xxxxxxxx xxxxxxxx xxxxxxxx xxxxxxxx xxxxxxxx -
ntoskrnl.exe
xxxxxxxx xxxxxxxx xxxxxxxx xxxxxxxx xxxxxxxx xxxxxxxx xxxxxxxx -
ntoskrnl.exe
etc..
--------------------------------------------------
Section 5: Debug Port Information
Restart and set the recovery options in the system control panel
or the /CRASHDEBUG system start option if this message reappears,
contact your system administrator or technical support group
OR if you system is started with /debug or /crashdebug
Kernel Debugger Using : Com2 (Port 0x2f8, Baud Rate 9600)
Beginning Dump of physical memory
Physical memory dump complete. Contact your system administrator
or
technical support group
Section 1: This section will only be shown if the system was start /debug or /crashdebug. To tell if your system is debugger enabled, just look at the boot menu when you start the machine and the words [debugger enabled] will be shown next to the Windows NT menu choice. To enable /debug follow the instructions below:
The 3 letter words are signals, e.g. RTS is Ready to Send, DSR Data Send Ready, CTS Clear to Send, and SND means data is being sent to the COM port
Section 2: This sections contains the error (or BugCheck) code with up to four developer-defined parameters (defined in the KeBugCheckEx() function call). In this case the BugCheck was 0x0000000A IRQL_NOT_LESS_OR_EQUAL which means a process attempted to access pageable memory at a process level that was to high and is usually caused by a device driver.
For a full list of what the codes mean see knowledge base article Q103059 at http://www.microsoft.com/kb/articles/q103/0/59.htm .
Section 3: This lists out all drivers that were loaded at the time of the crash. It is split into 2 sides, with 3 columns to each site. The first column is the link time stamp (in seconds since the year 1970) and can be converted into real time using the cvtime.exe application (f$cvtime on VMS :-) ).
Section 4: This shows the build number of the Operating System and a stack dump that shows the addresses that were used by the failed module. The top lines may show the offending code/driver, however not always as kernel trap handlers may execute last to preserve error information.
Section 5: This will depend on if you have the /debug setup, but it basically just shows the communication settings and if a .dmp file has been created.
Q. I have created my own application service, however when the user logs off the application stops.
A. When a user logs off, a number of messages are sent. For graphical applications the messages WM_QUERYENDSESSION and WM_ENDSESSION are sent, and to console (character mode) applications the message CTRL_LOGOFF_EVENT is sent. If your application responds to these messages then it may cause it to stop. You will need to modify your program to either ignore or handle the messages differently. There is more information on this in the resource kit.
Q. I can't install any software.
A. Sometimes the file config.nt can become corrupted, specifically the files= line, therefore:
Q. I get an error "This application is not supported by Windows NT".
A. This can sometimes be caused by the files
%SystemRoot%\system32\config.nt
%SystemRoot%\system32\autoexec.nt
not having everyone:full access protection if the boot partition is NTFS. To check/change this protection
Q. I have installed IE 4.0 now my shortcut icons are corrupt.
A. This is caused my an incompatibility between the final version of Internet Explorer 4.0 and TweakUI. To fix this you will need to uninstall TweakUI.
If you get an error saying it was unable to be removed you can manually remove it by entering the following command
rundll32 syssetup.dll,SetupInfObjectInstallAction DefaultUninstall 4 e:\winnt\inf\tweakui.inf
You should then reboot the computer.
If you find after the reboot the icons are still corrupt, install TweakUI again and then remove. TweakUI can be downloaded from http://www.microsoft.com/windows95/info/powertoys.htm
Q. I have lost access to the root of the boot partition, now I can't logon.
A. If you set the root of the boot partition to no access then you will be unable to logon. To get round this perform the following
A. This problem is caused by the file mapi32.dll being replaced by an application installation, usually with the Windows 95 version. To correct the problem reinstall the mapi32.dll file from the NT installation CD-ROM
Be aware that if you have applied service packs, mapi32.dll was redelivered in some of the service packs so you should take mapi32.dll from the service pack delivery (expand the service pack and then copy the file over).
Q. How can I perform a kernel debug?
A. To perform a kernel debug, the computer should be connected via a null modem cable or a modem connection for dial in purposes. The computers will be referred to as "Host" for the machine that will perform the debug, and "Target" for the machine that has the problem and is being debugged.
The computers should both be running the same version of Windows NT and the symbol files for the Target machine should be installed on the Host computer. The symbol files are supplied on the Windows NT installation CD-ROM in the Support\Debug directory.
The Target computer's boot.ini entry needs to be modified to allow debugging as follows:
In the example above the Target machine will allow debug connection using Com2: at a speed of 9600 bps.
The host computer needs to be configured with the information it needs to perform the debug and the installation of the symbol files.
To install the symbol files move to the \support\debug directory on the CD-ROM and enter the command
expndsym <CD-ROM>: <target drive and
directory>
e.g. expndsym f: d:\symbols
This may take some time. Remember if you have installed service packs on the target machine the symbol files for these will also need to be installed on the host computer. The symbol files for service packs need to be download from Microsoft separately.
The next stage is to configure the environment variables needed for the debugging, such as the symbol file location etc., these are outlined below.
| _NT_DEBUG_PORT | COM port to be used, e.g. COM2: |
| _NT_DEBUG_BAUD_RATE | Speed for the connection, e.g. 9600, make sure this matches the /baudrate specified on the target machine |
| _NT_SYMBOL_PATH | Location of the symbols files (where you expanded them to using the expndsym utility) |
| _NT_LOG_FILE_OPEN | Name of the file used for the log of the debug session (optional) |
It may be worth putting the definition of the above into a command file to avoid having to type in the commands every time, e.g.
echo off
set _nt_debug_port=com2
set _nt_debug_baud_rate=9600
set _nt_symbol_path=d:\symbols\i386
set _nt_log_file_open=d:\debug\logs\debug.log
Next you should copy over the kernel debug software which is located in the support\debug\<processor> directory on the NT installation CD-ROM, e.g. support\debug\I386. It is easier just to copy over the entire directory as it is not very large (around 2.5MB). The actual debugger for the I386 platform is I386KD.EXE and you would just enter I386KD to start the debugger. To enter a command press CTRL+C and wait for the kd> prompt.
Q. How do I configure remote debugging?
A. If you find you do not have the knowledge to debug a Windows NT problem you may need to get Microsoft to perform the debug for you, and in this scenario 3 computers will be involved, the computer at Microsoft, the host machine and the target.
The Microsoft machine will need to connect via RAS to either the host machine, or a computer on the same network, so one machine will need to run the RAS server service.
The configuration is the same as in the previous FAQ, except that on the host machine instead of entering the command I386KD.EXE the command
remote /s "I386KD -v" debug
where debug is the name of the session (this can be anything). At the Microsoft end once they had connected to the network they would enter the command
remote /c <computer name of the host> debug
again debug is the name of the session and must match that configured at the host machine.
Q. I get the error "Not enough server storage is available to process this command".
A. This problem may be due to the machines having a non-zero PagedPoolSize in the registry. This can be set by performing the following:
If PagedPoolSize is 0 then it allows NT to dynamically allocate memory, the installation of software such as ARCServe is known to cause this problem.
Another cause for this error is if you installed Service Pack 3 before installing any network components. If this is the case then re-apply Service Pack 3 and any subsequent hotfixes.
Q. I can't delete a directory called con.
A. CON is a reserved name, so to delete you must use the UNC,
rd \\.\<drive letter>:\<dir>
e.g. rd \\.\c:\john\con
Q. I get an error when I try to export a profile other than Administrator.
A. This is usually due insufficient privilege on the Protected Storage System Provider\<SID> key. To be able to export your profile perform the following:
You should now be able to export this profile. To be able to export someone else's profile perform the following:
You will now be able to export this users profile.
Q. What Newsgroups are good for NT information?
A. The ones I subscribe to are:
Q. Where can I get more information?
A. There are various sites on the web that have extra information
Q. Where can I go for Training in Microsoft Products?
A. To find a training center in you area goto http://www.microsoft.com/isapi/train_cert/locator/locator0.idc.
Mountain Micro at http://www.mountainmicro.com provide a self study set for gaining your MCSE
Q. Where is information about becoming a MCSE?
A. Goto http://www.microsoft.com/train_cert
Q. Where can I find the resource kit?
A. It is available from most large book shops. Workstation is around US$50, Server US$150. You can purchase it online from http://www.jsiinc.com .
Q. Where is a replacement for WinPopUp?
A. Have a look at http://www.snowcrest.net/ps
Q. How do I run an application as a service?
A. The NT Resource Kit includes a utility called SRVANY.EXE which runs an applications as a service. There is more information on this at http://www.microsoft.com/kb/articles/q137/8/90.htm, also read the file that comes with the resource kit (Start - Resource Kit - Configuration - Running an application as a service).
Q. How can I shutdown a computer remotely?
A. Use the Shut Down workstation utility supplied with the NT Resource Kit.
Q. Where can I find a Unix su (substitute user) like utility?
A. Background for those unfamiliar with Unix: It is a good idea for system administrators to do everyday's work with a low privileged account and only change to an account which is a member of the Administrators group if you really have to do administrative work. To avoid closing all open applications and log off, it is useful to have a utility that allows you to temporarily start applications running in the security context of a different account.
The Resource Kits ships SU.EXE, a free equivalent is SU.ZIP (on Cica in /admin <LINK>). Both require setting system privileges for the caller. An alternative is SUSRV.ZIP (also from Cica), which has to be installed as a service, but does not require privileges. There is no equivalence to Unix suid programs (i.e. a file attribute which achieves that the file is run in the security context of the owner instead of the caller, without specifying a password).
Q. I'm running NT on Alpha - Can I run INTEL programs?
A. Digital have produced a special on-the-fly binary translator available at http://www.service.digital.com/fx32/.
A. TWEAKUI is part of the Power Toys set released for Windows95, however TWEAKUI (and a number of the other utilities) also runs on NT4.0. The utility basically puts a graphical front end to some of the more useful Registry settings and allows the user to remove icons from the desktop (such as Rubbish Bin), automatically login and many other useful config options. Download it from http://www.microsoft.com/windows95/info/powertoys.htm , then run the file and a number of files will be created. Right click on the TWEAKUI.INF and select install, and a TWEAKUI option will be in the control panel.
A. Below are some sites that are worth a look
Q. Do Windows 95 Powertoys work in NT?
A. Some of them do, and I suspect as time goes on they all will. The ones that currently work on NT 4.0 are
As part of the Powertoys for Windows 95 there is also a QUICKRES utility that allows a change of resolution without a reboot, however this does not work in NT, but the NT resource kit includes an identical utility (called QUICKRES.EXE).
Q. Is there a X-terminal for NT?
A. There is a very good free X-server called MIX at http://www.microimages.com
A. It is still shipped with NT 4.0, just run WINFILE.EXE
Q. Where do I get Themes for NT?
A. Desktop Themes are supplied on the NT Resource kit, however if you have Windows95 installed with the plus pack you can copy the files themes.cpl and themes.exe to the %systemroot$/system32 directory and reboot your machine. These files are contained in Plus_3.cab on the Windows 95 CD-ROM.
Q. Where can I get UNIX tools for NT?
A. There is an excellent selection of utilities available for download from http://www.cygnus.com/misc/gnu-win32/ .
Q. Does application x work with NT 4.0?
A. See the list below
Q. Does game x work with NT 4.0?
A. See http://www.cris.com/~dstaines/nt40games for an extensive lists of games that work with NT4.0, and tips to make them work.
Q. Does NT run 16bit applications?
A. There is no definitive answer. NT does not allow an application to directly access hardware, so any application that directly tried to access hardware would cause a violation, also private device drivers are not supported (such as a VXD). A VXD is usually a .386 file.
Besides direct hardware access, some 16 bit apps will not run under NT because they use a 16 bit API function call that either has no 32 bit equivalent, or the 32 bit equivalent has a completely different function call (different number/types of arguments) and NT can't convert the 16 bit version to the 32 bit version. If either of these things occur, NT will halt execution of the 16 bit app and throw some sort of error similar to the one it throws when direct hardware access occurs. This doesn't happen very often, but it seems that NT 4.0 has more problems with 16 bit code than NT 3.51 due to the 16 bit to 32 bit conversion process.
As a side note, this conversion of 16 bit code to 32 bit code is one of the reasons that NT will run 16 bit code slower than Win95 given all other things held equal. This has nothing to do with the Pentium Pro's problem with 16 bit code, it is an NT problem.
Q. Will NT 3.51 drivers work with NT 4.0?
A. Standard NT drivers will automatically be upgraded from the NT CD. 3rd party drivers may not work and the supplier should be contacted. In particular Video drivers and Printer drivers were moved for NT4.0 from Win32 to the NT executive to improve performance and reduce memory use (basically moved from Ring 3 - user mode to Ring 0 - kernel mode). This does have the effect that a graphics driver could crash NT.
Q. How do I change the letter associated with a drive?
A. From the Start Menu, select Administrative Tools and Disk Administrator. Right Click on the partition and choose "Assign Drive Letter", then just select the drive letter you wish to use. It is a good idea to recreate the Emergency Repair Disk after changing any drive information.
Q. How can I get NT to recognize my second harddisk?
A. Sometimes the Enhanced IDE (EIDE) adapter is misidentified as an ATAPI controller which loads the ATAPI.SYS driver. Disable this driver (Control Panel - Devices - Startup - Disable) and load the correct EIDE driver.
Q. How do I install a HP scanner?
A. There is full information on this at http://pw2.netcom.com/~gmelendz/index.html
Q. How do I install dual screens?
A. NT 5.0 will have support for this, however in the mean time you are limited to certain applications with specialty drivers, such as two Matrox Millenium cards to drive the two screens, with matching special programs.
Q. How much memory can NT support?
A. NT is a 32-bit operating system which means it can support 2^32 amount of memory (4 Gigs). However NT splits memory into 2 parts, 2 gigs for the programs and 2 gigs for the Operating System. There are known to be some problems when having more than 64MB even in NT4.0, please see Q117373
Q. How much memory do I need for NT?
A. For NT Workstation on Intel 12MB is the minimum, however 16MB is the recommended min, 24MB will reduce virtual memory usage and increase performance. For RISC based processors 24MB is recommended, and 32MB to improve performance. Most NT people will say the real acceptable performance numbers are 40MB for NT Workstation and 64MB for NT Server. It really does depend on what you will be running on the server.
For NT Server 16MB is the minimum, however most sites have 32MB.
Q. I cannot see my CD-ROM drive from NT?
A. If it is a IDE CD-ROM Drive ensure you have the ATAPI CD-ROM driver installed (or one supplied with drive).
If it is a SCSI CD-ROM ensure the correct SCSI driver is loaded.
Q. What are the IRQ's used for?
A. An Interrupt allows the piece of hardware to get the CPU's attention. For something like a Network card this is important as the card has limited buffer space so unless the CPU does not move the data out of the buffer it will get lost. Below is a table of the common IRQ uses.
| IRQ Level | Common Use | Comments |
| 0 | Timer | Hard-wired on motherboard |
| 1 | Keyboard | Hard-wired on motherboard |
| 2 | Cascade from IRQ 9 | May be available depending on Motherboard |
| 3 | COM2 or COM4 | |
| 4 | COM1 or COM3 | |
| 5 | LPT2 | This is usually free as not many people have 2 parallel ports. Sound blaster cards usually use this. |
| 6 | Floppy disk controller | |
| 7 | LPT1 | Sound blaster cards can use this |
| 8 | Real-time clock | Hard-wired on motherboard |
| 9 | Cascade to IRQ 2 | Wired directly to 2, sometimes tell software 9 when mean 2 |
| 10 | Unused | This is usually used by Network cards, many of them not allowing it to be changed |
| 11 | Unused | Usually used by SCSI controllers |
| 12 | PS/2, Bus mouse | If you are not using a PS/2 or bus mouse this can usually be used by another device |
| 13 | Math Coprocessor | Used to signal errors |
| 14 | Hard disk controller | If you are not using an IDE hard disk you may use this for another device |
| 15 | Some computers use this for the secondary IDE controller | If you do not use the secondary IDE controller you may use this for another device |
Note about attempting to free IRQ's used by unused motherboard devices: if your BIOS lets you disable the device manually and doesn't get reset by any Plug-and-Play software you have (for instance, Windows 95), you are probably okay. Otherwise, you'll just have to experiment to determine whether you can really use the IRQ occupied by the unused motherboard device.
Q. How Many CPU's does NT support?
A. NT Workstation can support 2 CPU's, NT Server supports 4 CPU's, however the OEM version of NT Server can support up to 32 CPU's.
Q. Is there a list of hardware NT supports?
A. Microsoft has a NT hardware compatibility list at http://www.microsoft.com/hwtest/hcl/
Q. Can I test my hardware to see if it is compatible with NT?
A. It is possible to create an NT Hardware Qualifier Disk. Boot to DOS, and insert the NT CD-ROM and a blank formatted floppy disk. On the CD-ROM goto \SUPPORT\HQTOOL and run makedisk. Then just boot off of the floppy disk.
Q. Can I test my SCSI devices?
A. A tool is provided on the NT installation CD that will test SCSI adapters from Adaptec and BusLogic, to use this tool perform the following:
Q. How do I disable mouse detection on a COM port (for UPS usage)?
A. Follow the steps below after first removing the UPS from the computer
Q. Where can I get a driver for x?
A. If you have a piece of hardware that does not have a driver with NT you should check in two places, the maker of the hardware, i.e. for the Iomega Ditto goto www.iomega.com . If there is nothing there you should try the Microsoft site as they make the drivers for some hardware, for example the HP NT 4.0 drivers are made by Microsoft. If you cannot find the driver in either of these places then e-mail the technical support of the hardware maker, asking them for the driver, in some cases the driver is not on the web site, but they will e-mail it to you (makes a lot of sense :-))
For Iomega drivers can be downloaded from 1-800-998-0037.
Q. My U.S. Robotics 56K modem only connects at 19200.
A. The USR .inf that is supplied with NT defaults to and has a limit of 19200. Download the latest mdmusr.inf from USR which will allow the top speeds.
Q. Can I user the IDE interface on my sound card?
A. It depends if it is ATAPI 1.2 compliant. If it is, there should be no problems, however if it is not, it will not work and you will be unable to use this port.
Q. Does NT support Plug and Play?
A. In a limited sense. There is a driver that can be installed that will detect Plug and Play devices, however it is not supported and you will receive no support. To install the driver
A. Follow the instructions below:
Q. How do I give my tape drive a letter so it is visible from explorer?
A. NT on its own cannot do this, however there is a 3rd party "driver" that gives this functionality. For more information see http://www.tapedisk.com.
Q. How can I force NT to use a mouse on a given port?
A. When NT boots its hardware detection component checks all hardware and updates the registry, sometimes it may not detect the mouse however it is possible to force NT to use a mouse on a given port:
For more information see knowledge base article Q102990 at http://premium.microsoft.com/support/kb/articles/Q102/9/90.asp
Q. How can I view which resources devices are using under NT?
A. The easiest way to view resource usage by devices is to use the built in WINMSD.EXE utility supplied with Windows NT:
You could also use the winmsdp.exe utility that is supplied with the resource kit. The command
winmsdp /i
will output the IRQ usage information to the file msdrpt.txt.
A. The warnings are there for a reason however if you want to stop them perform the following:
A. A batch file is just a text file with a .bat or .cmd extension that adheres to a syntax and a set of valid commands/instructions. To run a batch file just enter the name of the file, you don't need to enter the .cmd or .bat extensions. In line with program the first batch file we write will output "Hello World".
Q. What commands can be used in a batch file?
A. Windows NT 4.0 introduced some extensions to cmd.exe, so to use these make sure HKEY_CURRENT_USER\Software\Microsoft\Command Processor\EnableExtensions is set to 1. The following is a list of the more common commands you will use
| call <batch file> | This is used to call one batch from inside another. The execution of the current batch file is suspended until the called batch file completes |
| exit | Used to stop batch file execution. If a batch file is called from inside another and exit is called both batch files are stopped |
| findstr <string> <filename(s)> | Used to find a string in a file. There are a number of parameters from this and is quite powerful |
| for | Standard for loop for /L %n IN (1,1,10) DO @ECHO %n Would print 1 to 10 |
| goto <label> | Causes the execution of a program to skip
to a given point. The actual label name must be preceded
with a colon (:), e.g. goto label1 ... :label1 ... |
| if <condition> .. | The if statement has a great deal of
functionality. Some of the more common ones are: if /i <string1> <compare> <string2> <command> The /i makes the comparison case insensitive and compare can be one of: EQU equal NEQ not equal LSS less than LEQ less than or equal GTR greater than GEQ greater than or equal if errorlevel if exists <file name> |
| rem <string> | A comment |
| start <window title> <command> | Starts a new command session and runs a given command. Unlike call the execution of the current batch file is not halted and continues |
There are some extra utilities supplied with the NT Resource Kit which can be useful.
Q. How can I perform an action depending on the arrival of a file?
A. This is a common request as users on hosts have files FTP'd from a host and need to action it when it arrives. Below is a simple batch file to do this:
:filecheck
if exist e:\upload\file.txt goto actionfile
sleep 100
goto filecheck
:actionfile
...
This would check for file.txt every 100 seconds. The program sleep.exe is supplied with the resource kit so you would need the resource kit installed.
Q. How can I access files on other machines?
A. You can use the UNC naming conventions, e.g. \\<server name>\<share name>\<dir>\<file>. Alternatively you could map the drive, access the file using a drive letter and then unmap the drive, e.g.
net use g: \\savilltech\filetosee
... g:\dir\file.txt
net use g: /d
Q. How can I send a message from a batch file?
A. Use the NET SEND command, e.g.
net send <machine> "<message>"
Q. The command I enter asks for input, can I automate the response?
A. Most commands have a switch to confirm an action however if a command requires a response when run, for instance a logon may want you to enter a password try the following:
echo <password> | logon savillj
This runs the command "logon savillj" and assuming it then asked for a password, the echo would then echo the password with a return thus entering your password for you.
A. Samba is a suite of programs which work together to allow clients to access to a server's filespace and printers via the SMB (Server Message Block) protocol. Initially written for Unix, Samba now also runs on Netware, OS/2 and VMS. For more information goto http://lake.canberra.edu.au/pub/samba/
Q. Why disk spanning function of PKZIP (command line version) not work under NT?
A. Because NT command processor CMD.EXE uses
'&' character for separating several commands on the same
command line and PKZIP uses the same character for creating
multi-disk archives. Solution is to enclose '&' in quotes
like this:
C:>pkzip "-&" -pr <archive.zip>
<files...>
Q. What virus killers are available for NT4.0?
A. Below is a table of virus killers I know about.
| Cheyenne Software InocuLAN | http://www.cheyenne.com |
| Data Fellows F-PROT Professional | http://www.datafellows.com |
| McAfee Anti-Virus | http://www.mcafee.com |
| Symantec's Norton Anti-Virus for NT | http://www.norton.com |
| Ontrack Computer Systems VirusScan | http://www.ontrack.com |
| Dr. Solomon's Anti-Virus Toolkit | http://www.sands.com/prods/toolkit/ |
| SOPHOS | http://www.sophos.com |
Q. Does NT support the LS120 (adrive)?
A. Yes, see http://www.ortechnology.com/adrive.html for more information.
A. Yes. For more information see Year 2000 Issue - FAQ
A. See the table below
| ACL | Access Control List | A list that controls the access to an object |
| API | Network Applications Interface | A set of commands that allow programmers to build network-aware programs |
| BDC | Backup Domain Controller | An NT Server machine that receives a copy of the master user-database from the PDC and can validate logons |
| COLD | Computer Output to Laser Disk | |
| DHCP | Dynamic Host Configuration Protocol | A service that automatically assigns IP-addresses to clients from a given range (scope) |
| DLC | Data Link Control | International standard
protocol IEEE 802.2 Used with mainframe gateways and to control printers with a JetDirect-card |
| FAT | File Allocation Table | The DOS way of organizing a
harddisk Lots of wasted space on large disks Little file security |
| HPFS | High Performance File System | The OS/2 way of organizing a harddisk |
| IPX/SPX | Internetwork Packet Exchange / Sequenced Packet Exchange | Novell NetWare protocol Based on the Xerox protocol XNS(Xerox Networking Services) |
| MAC-addresses | Media Access Control layer addresses | 48-bit address that is
hardwired into the netcard DHCP, among others, use this to identify a machine requesting a certain IP-address within its lease duration |
| NBT | NetBIOS over TCP/IP | NetBIOS built on top of the TCP/IP suite |
| NDIS | Network Driver Interface Specification | Microsoft binding standard
(interface between netcard driver and protocol) Can load into high memory on DOS systems |
| NetBEUI | NetBIOS Extended User Interface | The actual NetBIOS transport protocol |
| NetBIOS | Network Basic Input/Output System | An API of 18 networking-related commands |
| NIC | Network Information Center | The organization that assigns domain names and IP-addresses to Internet hosts |
| NTFS | New Technology File System | The NT way of organizing a
harddisk Efficient storage High level of security |
| ODI | Open Data-link Interface | Novell binding standard
(interface between netcard driver and protocol) Can not load into high memory on DOS systems |
| PDC | Primary Domain Controller | The NT Server machine that stores the master user-database in a domain |
| RAID | Redundant Array of Inexpensive Drives | A number of disks with data
distributed all over them to allow for faster access Can also provide data-recoverability NT supports RAID level 0,1 and 5 |
| RIP | Routing Internet Protocol | The protocol that takes care of routing on the Internet |
| SID number | Security IDentification number | Every object in an NT domain
have a SID number Reinstalling will not give the same SID number |
| SPS | Standby Power Supply | Device that is installed
between the wall outlet and the computer inlet The power goes directly into the computer with a branch to the batteries When the power fail, the batteries take over, but with a delay The delay should be 4 ms or better for proper operation |
| TCP/IP | Transmission Control Protocol / Internet Protocol | The protocol used for Inter- and Intranet communications |
| UDP | User Datagram Protocol | Part of the TCP/IP suite It is used for communicating with DHCP-servers before IP-addresses are assigned |
| UPS | Uninterruptible Power Supply | Device that is installed
between the wall outlet and the computer inlet The power is directed through the batteries, thus stabilizing the variance of the power from the outlet Because of this, the switch delay is 0 ms |
| WINS | Windows Internet Naming Service | A dynamic IP-to-name database |
Q. What are the shortcuts available with the "Win" key?
A. See the table below
| WIN + R | Display the Run dialog |
| WIN + M | Minimize all windows |
| WIN + Shift + M | Undo minimize all windows |
| WIN + F1 | Help |
| WIN + E | Explorer |
| WIN + F | Find Files |
| Ctrl +WIN + F | Find Computer |
| WIN + TAB | Cycle through minimized taskbar icons |
| WIN + BREAK | Systems Properties |
Q. How can I open a file with an application, other than the one it is associated with?
A. Usually you can right click on the file, and select open. If you hold down shift and right click on the file you will have "open with."
Q. How do I change the icon associated with a short cut?
A. Follow the steps below:
Q. Is it possible to map a drive letter to a directory?
A. You can use the SUBST
command to map a pseudo drive letter to drive/directory
subst r: d:\winnt\system32
would map the letter r to the directory winnt\system32
on the d: drive.
Q. What keyboard shortcuts are available?
A. See the table below
| F1 | Help |
| F2 | Rename |
| F3 | Find |
| F4 | Display combo box in Explorer |
| F5 | Refresh |
| F6 | Switch panes in Explorer |
| F10 | Menu Mode |
| ALT + ENTER | Properties |
| CTRL + Drag a file | Copy |
| CTRL + G | Goto |
| CTRL + U | Undo |
| CTRL + A | Select All |
| CTRL + ESC | Start Menu |
| CTRL + SHIFT + ESC | Task Manager |
Q. How do I schedule commands?
A. Windows NT has a built in scheduler service which enables applications to be started at specified times. To schedule events the schedule service must be started:
The scheduler service only needs to be started on the target
machine, not the issuing machine. If the scheduler service is not
started on the target machine the error
The service has not been started
will be displayed.
To schedule a command you use the AT utility. AT is used with the following syntax:
at [<computername>] <time> [/interactive]
[/every:date/day..] [/next:date/day..] <command>
e.g. at \\savmain 22:00 /interactive /every:M,T,W,Th,F
sol.exe
The example would start the solitaire game on the SAVMAIN machine at 10:00 p.m. every weekday. The /interactive means the application can interact with the desktop, i.e. the currently logged on user. If /interactive is omitted and the application requires user interaction it will just start and finish instantly.
When a command is submitted it will be given an ID. To delete a scheduled command use:
at [<computername>] <id> /delete /yes
e.g. at \\savmain 3 /delete /yes - The /yes
skips confirmation of the delete
The above may seem quite a lot to take in if all you want to do is a backup (see Q. How do I schedule a backup? for an example of using AT with a backup), so a utility called WINAT is shipped with the NT Resource Kit that puts a graphical interface to the AT command which you may find easier, however the functionality is the same. The advantage with WINAT is that it automatically starts the Schedule service on the target machine.
Q. What are the long path names in the boot.ini file?
A. The pathnames in the boot.ini file are the ARC (Advanced RISC Computing) pathnames, and are used to locate the NT system partition. There are two main types of ARC names depending on if the disks are IDE or SCSI. For IDE they will follow the convention below:
multi(x)disk(x)rdisk(x)partition(x)\%systemroot%
Both the multi and disk are not really used for IDE and should always be 0. The rdisk is the physical drive and will be 0 or 1 on the first IDE controller, or 2 and 3 on the second IDE controller. Partition() is the partition number on the disk and starts from 1.
The scheme is slightly different for SCSI:
scsi(x)disk(x)rdisk(x)partition(x)\%systemroot%
Scsi() is the controller number of the SCSI identified in the Ntbootdd.sys. Disk() is the SCSI ID of the physical disk. RDISK() is the SCSI logical unit number (LUN), which will nearly always be 0. Partition is the same is with IDE and is the partition number starting with 1.
Q. How can I execute a batch file using WINAT with Administrator Permissions?
A. From the Services Control Panel Applet (Start - Settings - Control Panel) double click Scheduler. Change the account/password to that of a user in the Administrative group. It may be wise to create a new account just for this use which would require the following attributes:
After changing the Scheduler information you will need to stop and start the service.
Q. I have 95 and NT installed, how can I configure the applications to run on both?
A. While it is possible to add the windows95 system directory to the NT path (which would mean you would find any .dll's etc. associated with applications), many applications write a large amount of information to the registry which would be missing. The best approach, and one I have tested, is to just install the application twice to the same directory, once when you are booted into NT, and once when you are booted into 95. This has the effect of only having one set of exe's, but duplicates both .dll's and registry settings to both machines. Obviously the applications cannot be on an NTFS or FAT32 partition.
Q. How can I stop and start services from the command line?
A. This can be accomplished using the
net stop <service name>
net start <service name>
A full list of the exact services is found in the registry (run
regedit.exe) under the
HKEY_LOCAL_MACHINE\SYSTEM\CurrentControlSet\Services key.
Alternatively, you can perform the stop and start using the
name that is showed in the Services Control Panel applet by
putting the name in quotes, i.e.
net stop "<service>"
net start "<service>"
A. To delete a service that has not been automatically removed by a software uninstall you need to edit the registry:
There is also a utility that is supplied with the NT resource kit called INSTSRV.EXE that can be used to install and remove services
instsrv <service name> remove
Alternatively, also with the resource kit is a utility SRVINSTW.EXE that again installs and removes services, but with a GUI wizard format allowing you to select the service either locally or remotely.
A. USER.DMP is created by Dr. Watson when a program crashes, and is there to help you fix the problem. It can be examined using \support\debug\i386\dumpexam.exe or using windbg -z user.dmp. You can delete this file without any worries. The syntax for dumpexam.exe is
dumpexam -y <symbol file location> <dumpfile
name and location>, e.g.
dumpexan -y d:\winnt\symbols d:\winnt\memory.dmp
The output from dumpexam will be placed at %SystemRoot%\MEMORY.TXT.
To stop this file from being created start the System Control Panel Applet and select the startup/shutdown tab and uncheck the "write debugging information to" checkbox.
Q. How do I configure a Print Separator Page?
A. A printer separator page is configured by creating a text file using a number of special control codes. The basic format of the separator page is as follows
$ ---- this can be any character, and
must be the first character on the first line. Choose a character
not normally used to be the control character, in this case $
$LUser Name $N ---- $L is used to
display normal test until another code is found, $N displayed the
username
$L, Job Number $I ---- $I displays the
job number
$E ---- $E means end of page
Other characters you can use are
$B$S ---- Turn on block character
printing
$D ---- Data job printer
$F<filename> ---- A file to print
$H ---- Printer specific control code
$x ---- Where x is a number of blank lines
to print
$T ---- Time job was printed
$U ---- Turns off block character printing
$Wxx ---- Width of the separator page
To configure the printer to use the separator file:
Q. How do I cut/paste information in a command box?
A. To copy the entire contents of a command window, you can maximize the window (Alt - Enter) and press the Print Scrn button. Alternatively:
Q. How in Notepad can I save a file without the .txt extension?
A. When you save the file, just put the file name in double quotes, e.g. "johns.bat" will save the file as johns.bat with no .txt extension.
Q. How can I move shares and their contents from one machine to another?
A. Moving the actual files and directories is simple, however share information is not contained in the directories, but rather is contained in the registry (under LanmanServer), it is therefore necessary to copy this registry information from the machine currently containing the shares, to the machine that will host the shares:
Q. How do I enable Tab to complete file names?
A. NT has this functionality built in, however by default it is disabled. To enable perform the following
Q. How do I create a shortcut on the desktop to a directory/disk?
A. The procedure below works for and file/directory/disk (even the a: drive).
Q. How do I create a shortcut from the command prompt?
A. There is a utility supplied with the Windows NT Server Resource Kit Version 4.0 Supplement One (phew) called shortcut.exe which can be used to create .lnk files. The application is quite powerful, and allows you to specify not only the resource to link to, but also an icon etc. An example is shown below
shortcut -t "d:\program files\johnsapp\test.exe" -n "Johns App.lnk" -i "d:\program files\johnicon\icon1.ico" -x 0 -d "e:\johns\data"
What does it mean?
-t this is the location of the resource
to be linked to
-n the name of the link file to be created
-i the icon file
-x the icon index to use in the icon
file
-d the starting directory for the
application once started
You can copy shortcut.exe off of the CD with the resource kit, and it is located in <processor>\desktop (e.g. i386\desktop). There are no other files needed, just shortcut.exe.
Q. How can I create a spare set of Windows95 disks?
A. Microsoft distributed Windows 95 using a new method, storing 1.68 MB of data on a normal disk, this makes copying impossible using normal methods, however there is a piece of software called CopyQM which can be downloaded from http://www.sydex.com which performs an image copy and using the command below can duplicate a windows 95 installation disk
copyqm a: bios blind silent tracks=80 sides=2 convert=1.68m
You will be prompted to insert the master disk and it will then read in the information and ask you to insert the target disk.
Q. What FAX software is available for Windows NT?
A. There is an excellent site at http://www.stonecarver.com/ntfax-faq.html which has a full list of FAX servers for Windows NT.
Q. How can I delete files that are over x days old?
A. There is a utility called DELOLD which is used in the form of
delold <location>\*.* n
where n is the number of days old the files need to be for them to be deleted. This utility can be downloaded from ACI Software (http://www.michna.com/software.htm)
Q. How can I redirect the output from a command to a file?
A. The most basic use is as follows:
<command> ><file name>
e.g., dir/s >list.txt
However with this errors still get output to the screen, to rectify this use the 2> for the errors, e.g.
<command> ><file name> 2><error file>
e.g. dir/s >list.txt 2>error.txt
If you want the errors and output to goto the same file use the following
<command> ><file name> 2>&1
Q. How can I speed up the performance of my OS/2 applications?
A. Many applications written for OS/2 will run faster under a Virtual DOS Machine (VDM), this is because NT allocates more resources to a VDM than to the OS/2 subsystem. You should therefore disable the OS/2 subsystem as follows: