Graphics: editing and obtaining clip-arts
This tutorial concentrates on editing existing images, and how to obtain clip-art on the Web. The use of graphical packages to create images is beyond the scope of this work.
Editing graphical files
Editing means: converting between formats, cropping, resizing, adding text to an image, creating interlaced and/or transparent background gif files, etc. It is the massaging of graphical files before including them in your page.
I will focus this tutorial on the Windows platform, and on a specic Windows tool capable of doing most of the functions needed in editing graphical files:  .
.
Introduction to Lview
The Lview software can be found at the Lview page. You can download a copy for you from there of the 21-day evaluation version, unfortunately it is no longer free for students (it is installed in the UB labs). You can download for free XnView, but it will not do transparent gifs (see explanation later in this tutorial), unfortunately.
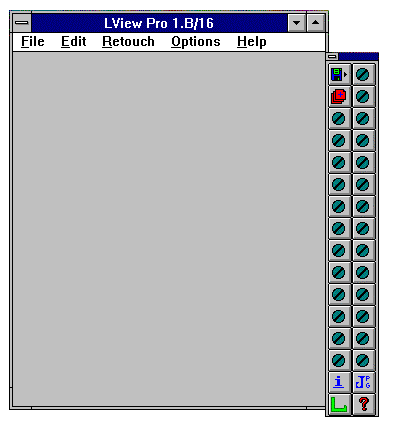
- When you start Lview you see the following screen:

- Most of the right side button bar icons are not yet actived, for you have not loaded a graphical file. See here for Lview with the Lview open screen image inside.
- The File pull-down menu let you load, and later convert (save as) from/to the following file formats: JPEG JFIF, GIF 87a/89a, TIFF, Truevision Targa, Windows and OS/2 BMP, ZSoft's PCX, and PBMPLUS' PBM,
PGM and PPM. The only significant omission is WMF (Windows Meta File), in which many of the clip-arts available on CD-ROMs is saved.
- The Edit pull-down pull-down menu allows you to crop (remove unwanted parts of), resize, etc, your graphical image. Resizing will depend on the resolution of your image. In most cases you can only increase or decrease the size by a small percentage before the image is blurred,jagged, or the like. The best way to resize is in the original graphical package the image was created, not always available.
- The retouch pull-down menu is used to manipulate colar, enhance contrast and a variety of other effects.
- The options menu let you interlace and make transparent background gifs, tailor printed output, etc. We will see more about "transparent gifs" below.
Interlaced and transparent gifs
Some images look better if their background color matches the browser window, making the image appear to float in the window. You can't do this by setting the background color of the image, since you can't control how people will configure their browsers.
You can control this by using GIF89a images, which have the ability to mark a single color in the colormap as transparent, forcing the browser to use its background color for those pixels in the image. LView and Windows and Linux free software like the GIMP and ImageMagick can do the job. Only gif files can be transparent, jpegs will not work.
Creating animations using the gif89A format
Take a look at my old Index page and you will see a spining triangle, if you are using a modern browser. How was that accomplished? Java? Java Script? No, that is only a gif89A format image comprised of four gif images of the triangle in different positions running in a loop.
The easiest way to accomplish this effect is to use the GIF Construction Set. The reference below cover the process of creating animations using gif89A.
An interesting example of what you can do is seen below.

Converting your business graphics to gif
An easy way to create your own graphics is to use a familiar business graphics package, such as Corel Presentations, PowerPoint, Freelance, etc. I will exemplify this procedure with Freelance, but it also applies to the other presentation packages available in the labs, University of Baltimore.
- create your business graphic presentation, or image, as usual in one of these packages. Of course you can use a clip-art available in your package.
- export your slide (chart) as gif, as show here in Freelance.
- open Lview and load the chart you just exported as a gif. Please notice that you have saved not only the clip-art but also the background (a huge area in white).
- crop the image to get rid of the unwanted white, empty area. To do so, click on an imaginary corner of a much smaller rectangle or square closer to the clip-art, as shown in this example.
- select edit and crop, to get rid of the white area as shown in this image. Please note that Lview, resized itself for the new size of the image. You can repeat this procedure, untill you get rid of as much white background, as you care to do.
- this is the point where you can make the background transparent and save the image. To make it transparent select Retouch, background color and select the color to make transparent. Finally, save as GIF 89a to complete the conversion. Please note that I made the image background transparent, and reduced its size.

Finding clip-arts on the Web
These are references to sites with multiple sources of clip-arts:
This page is maintained by Al Bento
who can be reached at abento@ubmail.ubalt.edu. This page was last updated on March 5, 2003. Although we will attempt to keep this information accurate, we can not guarantee the accuracy of the information provided.


 .
.

